C-Desk. A complete free helpdesk solution for any organization. It works like an intranet solution for a company, and it is free. It is customizable on demand. The features include service request management . You can call it as Free Helpdesk Software , complaint management Software, query management, ticketing software. etc. Asset management (Covers complete lifecycle of any asset), Events and photo gallery, birthday calendar, integration with webmail like Outlook Web Access and Round Cube. Integration with Openfire and Jappix for chat, Notice board, Employees personal profiles, Knowledge base to share policies and procedures (SOP) etc., Projects and task management, E-Logs is a log book feature, Customer care is a feature for Customer Support Management.
So C-Desk is a web based application loaded with many features to work like intranet for your organization. And it will continuously remain in development as customers keep demanding features they need. The current development roadmap includes Approval management, Surveys and Polls, Maintenance schedule in Asset management etc. Hope you enjoy the product and use the features. We would be very highly interested to help you develop your requirements in C-Desk
Prerequisites
|
CPU
|
1 GHz
|
|
Hard Drive Space
|
200 Mb Minimum,
|
|
Memory
|
1 GB
|
|
Operating System
|
Windows 2003 Server and above (English Only)
|
|
.NET framework
|
4.0 and 4.5
|
|
Database
|
SQL Server 2008 Express edition and above
|
|
IIS
|
6.0 and above
|
|
|
|
1.LDAP Server
(optional) For Active Directory authentication
2.FTP Server
(Optional)
3.SMTP Server
(optional)
4.Domain List (For
Email ID’s)
5.Microsoft Report
viewer redistributable 2008 or above
6.Webmail URL (OWA/
Roundcube) (optional)
7.Ensure that all
ASP and ASP.NET Related Features are installed from roles and features
8.Ensure WCF http
Activation is enabled from roles and features under .Net framework.
9.Ensure that your
installation folder has full permission for everyone and is not read only.
10.For Video Gallery
to Work you need to add mime types in IIS (.MP4) Extention Type video/mp4
Hosting C-Desk Service & Application on
IIS
Step 1:
1.Go to www.cdesk.in and login with your username
and password.. or register your organization and get a username and password..
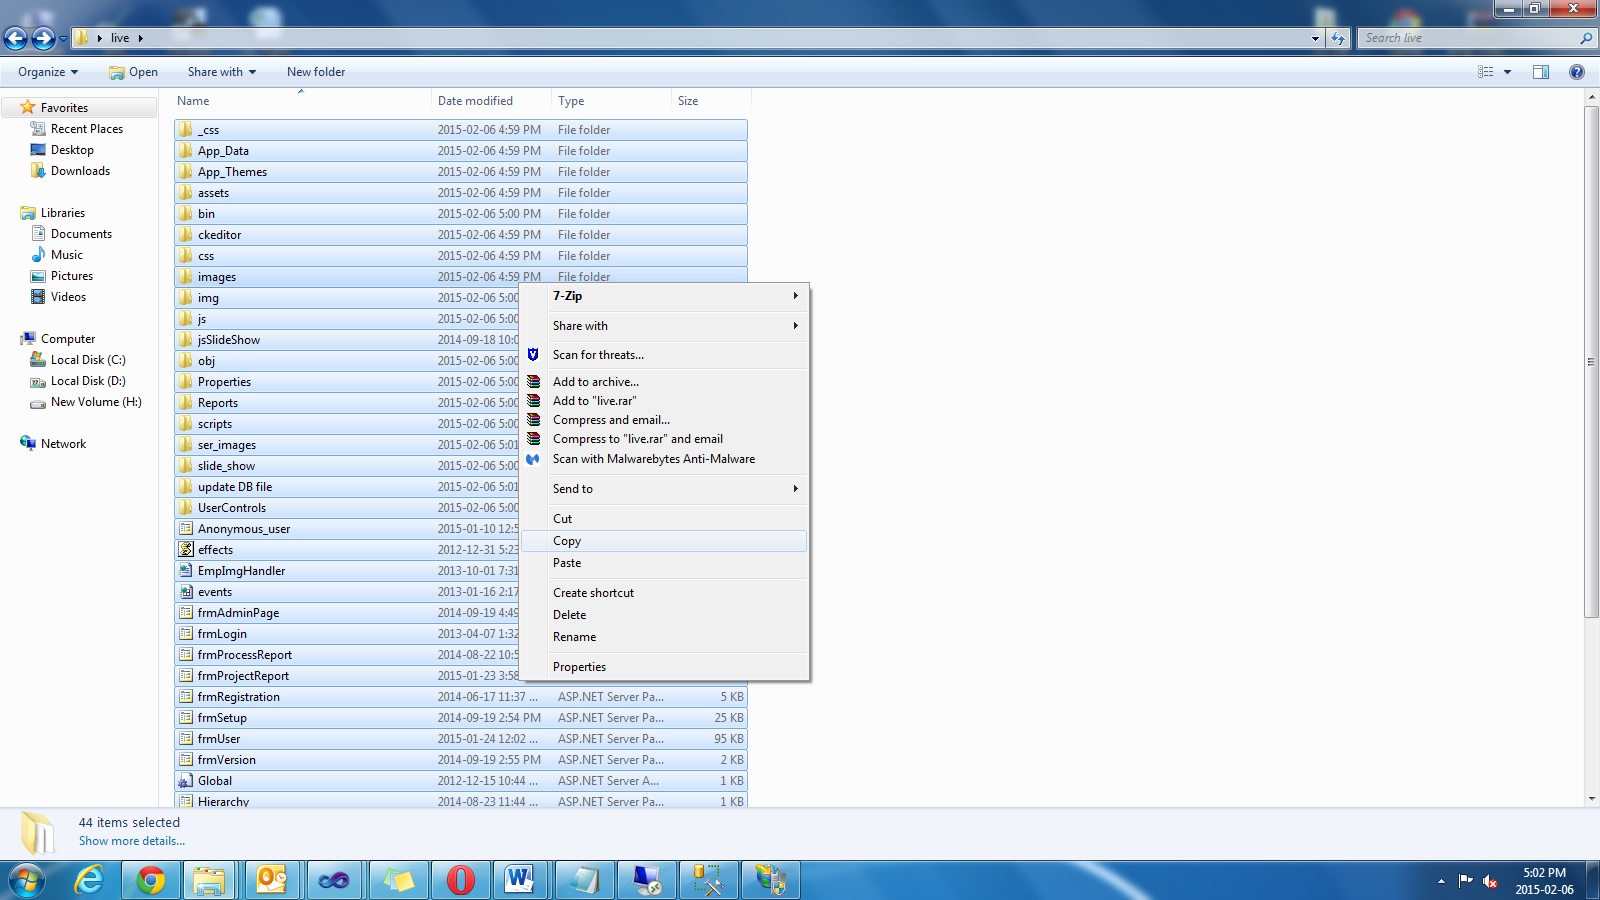
Go to download section and download the ZIP..
2.Unzip the folder to the
drive.. Ensure that drive has enough space as if you use photogallary you may
need space..You will find 1 Folder Cdesk
3.Note down your “License Key”
after the registration.
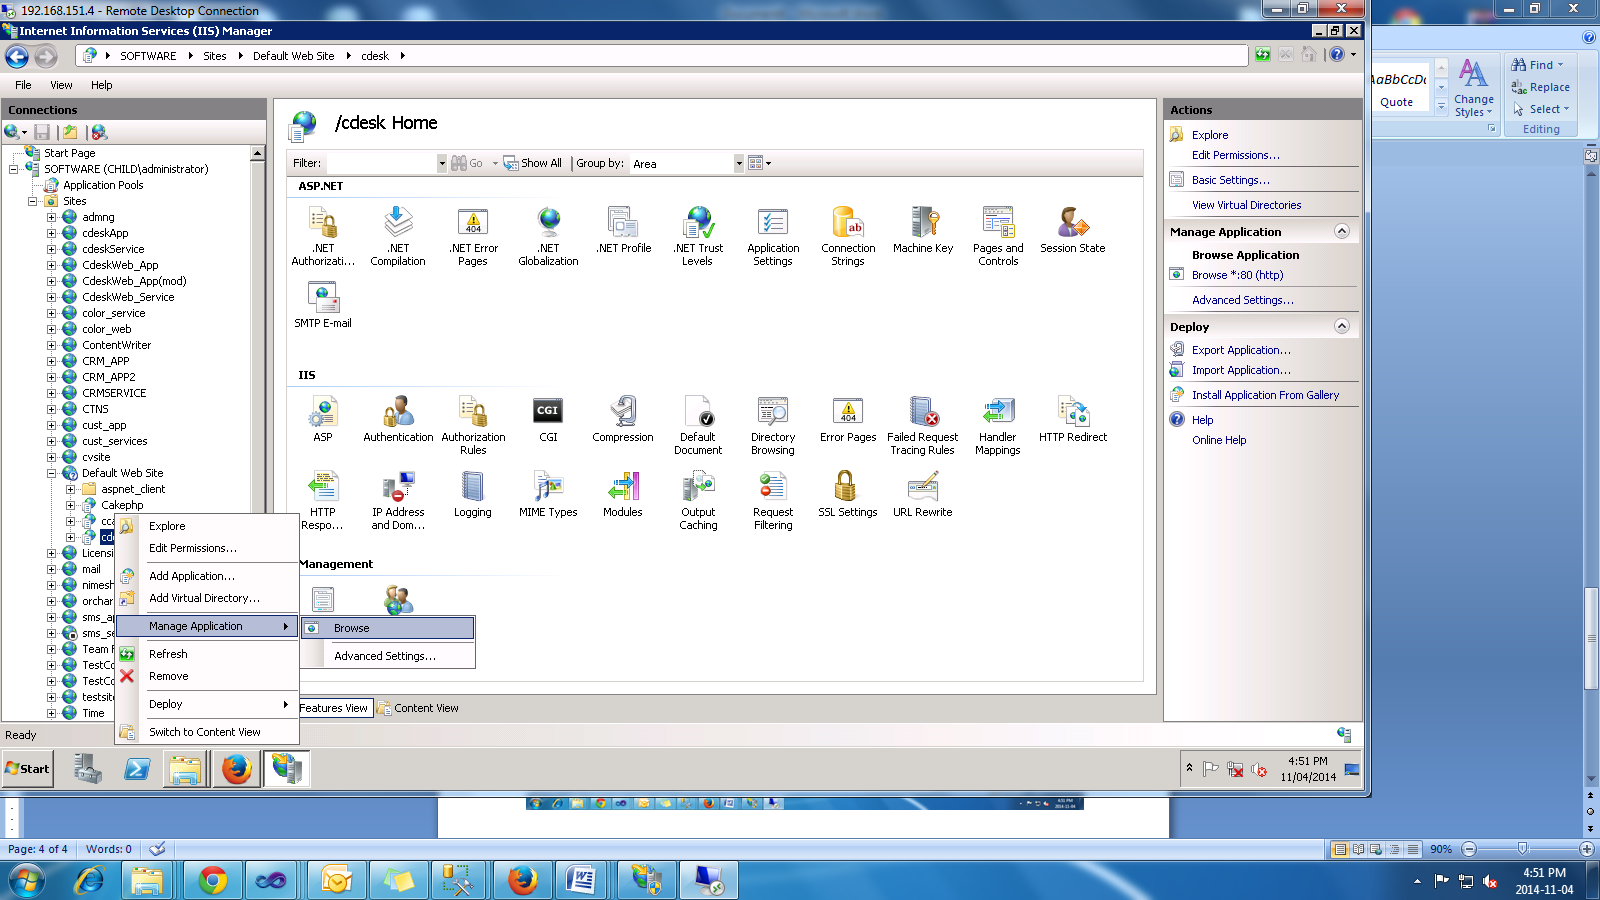
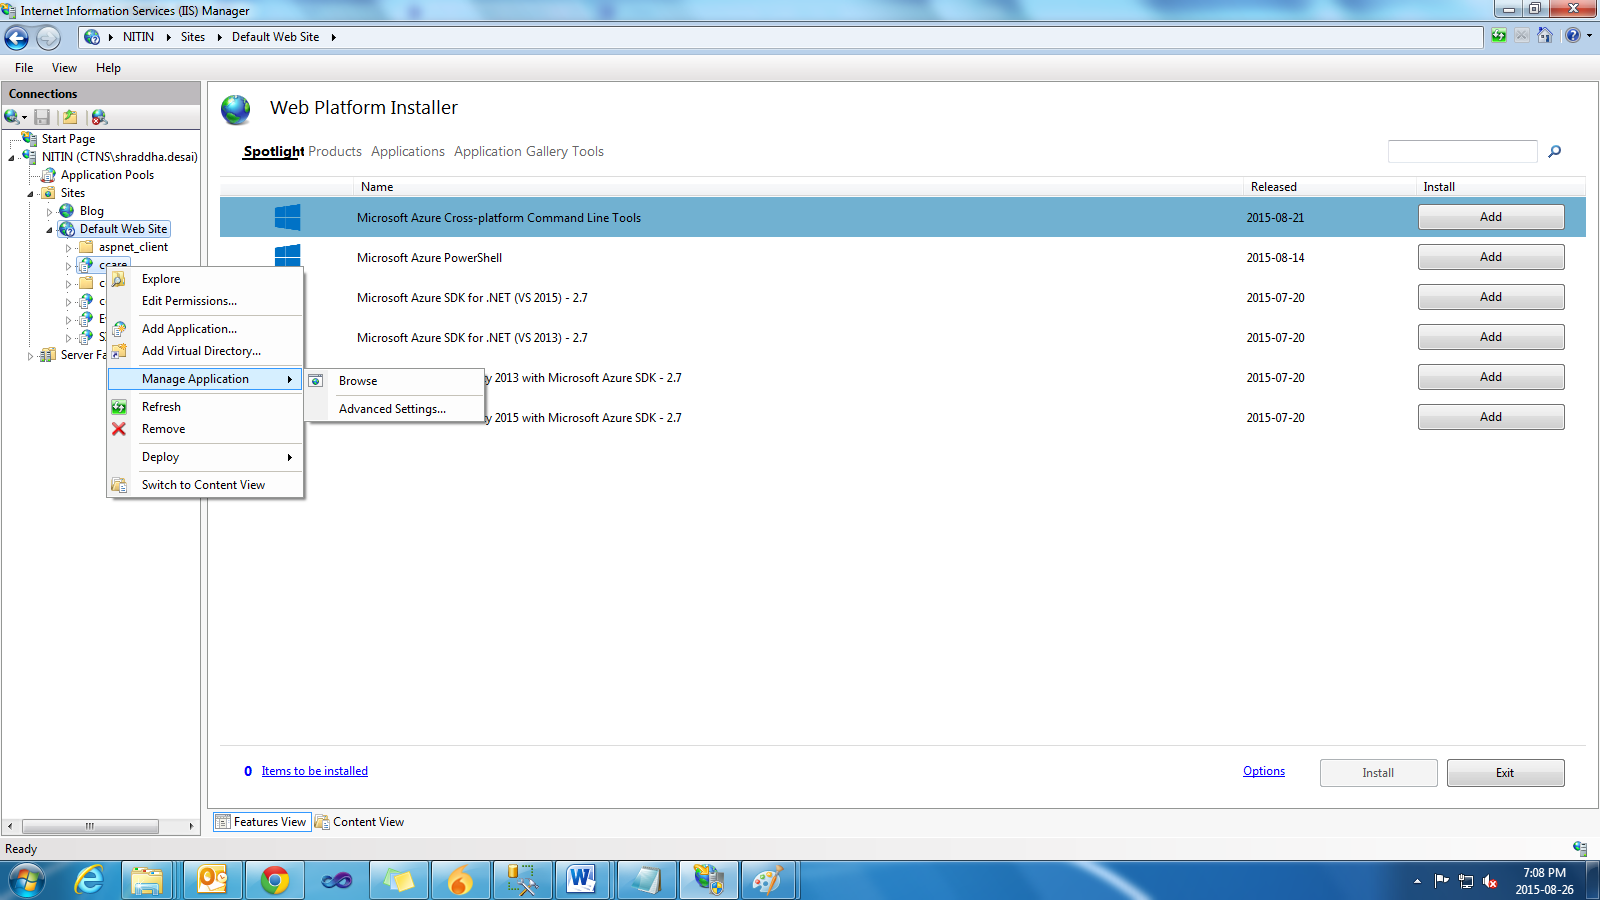
1.Go to your IIS manager.
2.Select yourwebsite to deploy
application.
3.Select “Deploy” à “Import application”.
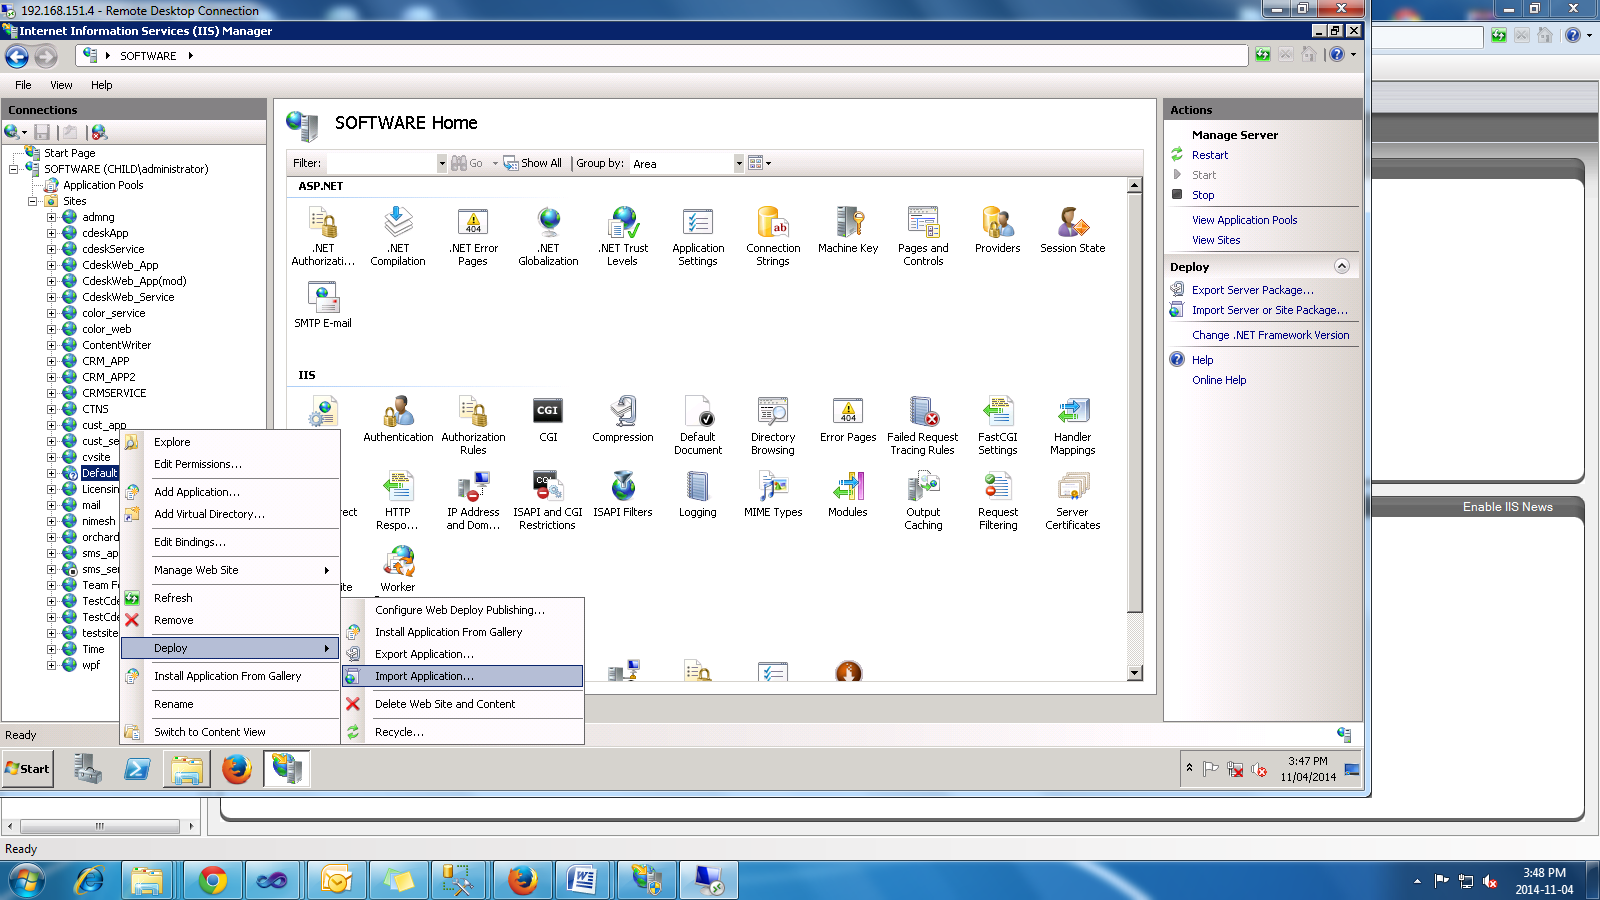
4.The “Import Application
Package” wizard opens and shows the “Select the Package” dialog box.
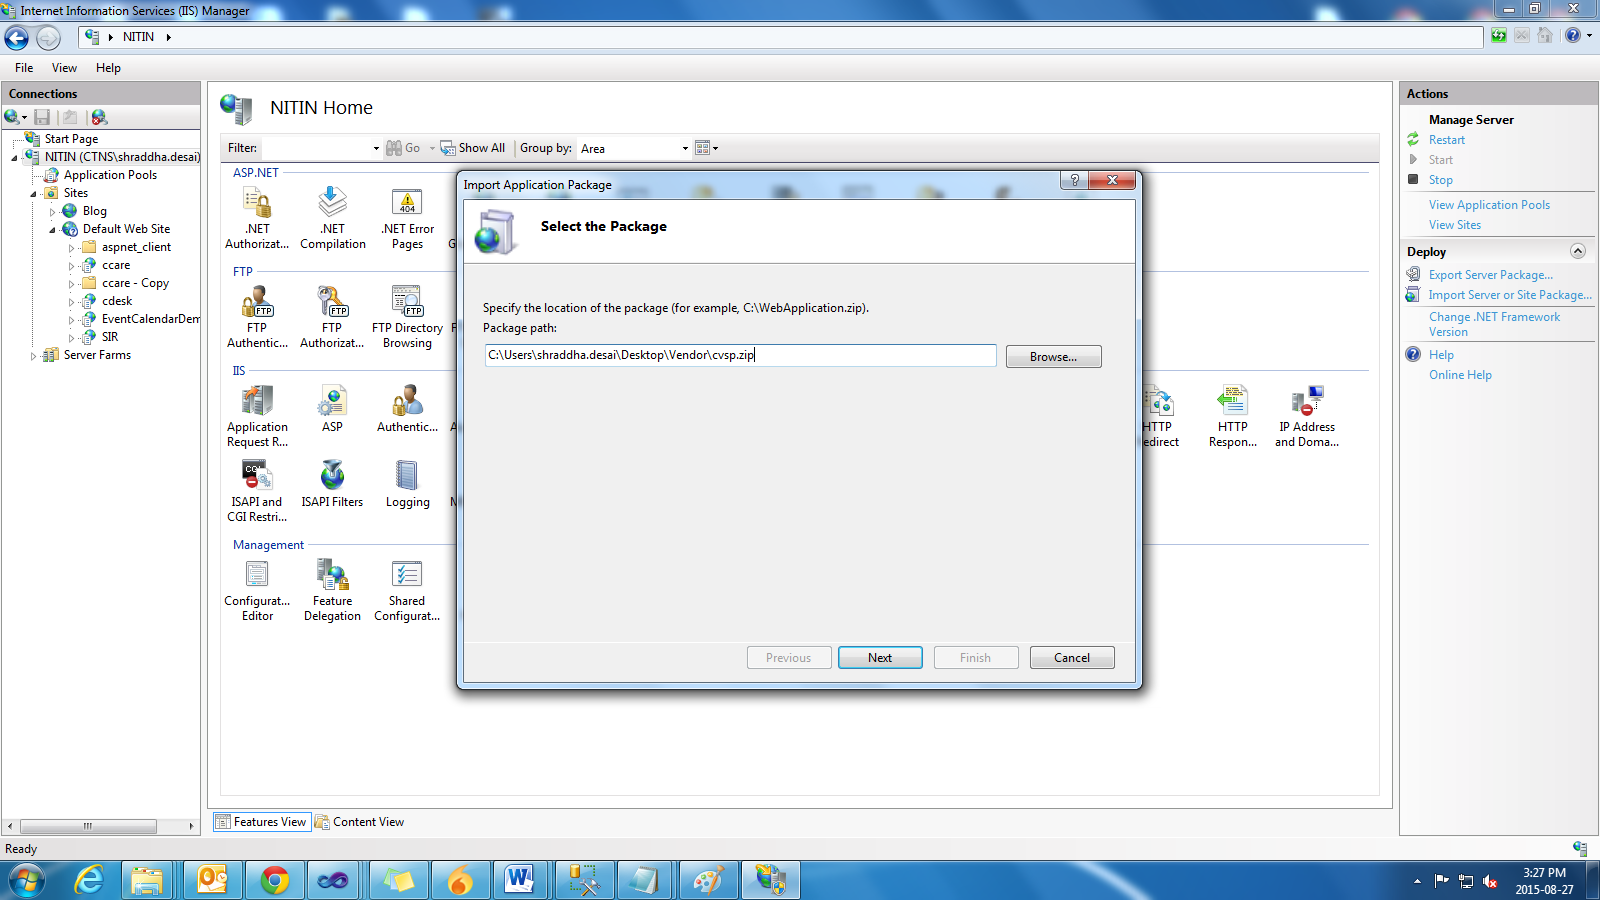
5.In the ”Package path” box, Browse
and select your.zip file from the location where you downloaded
6.The “Select the Package”
dialog box resembles the following illustration:
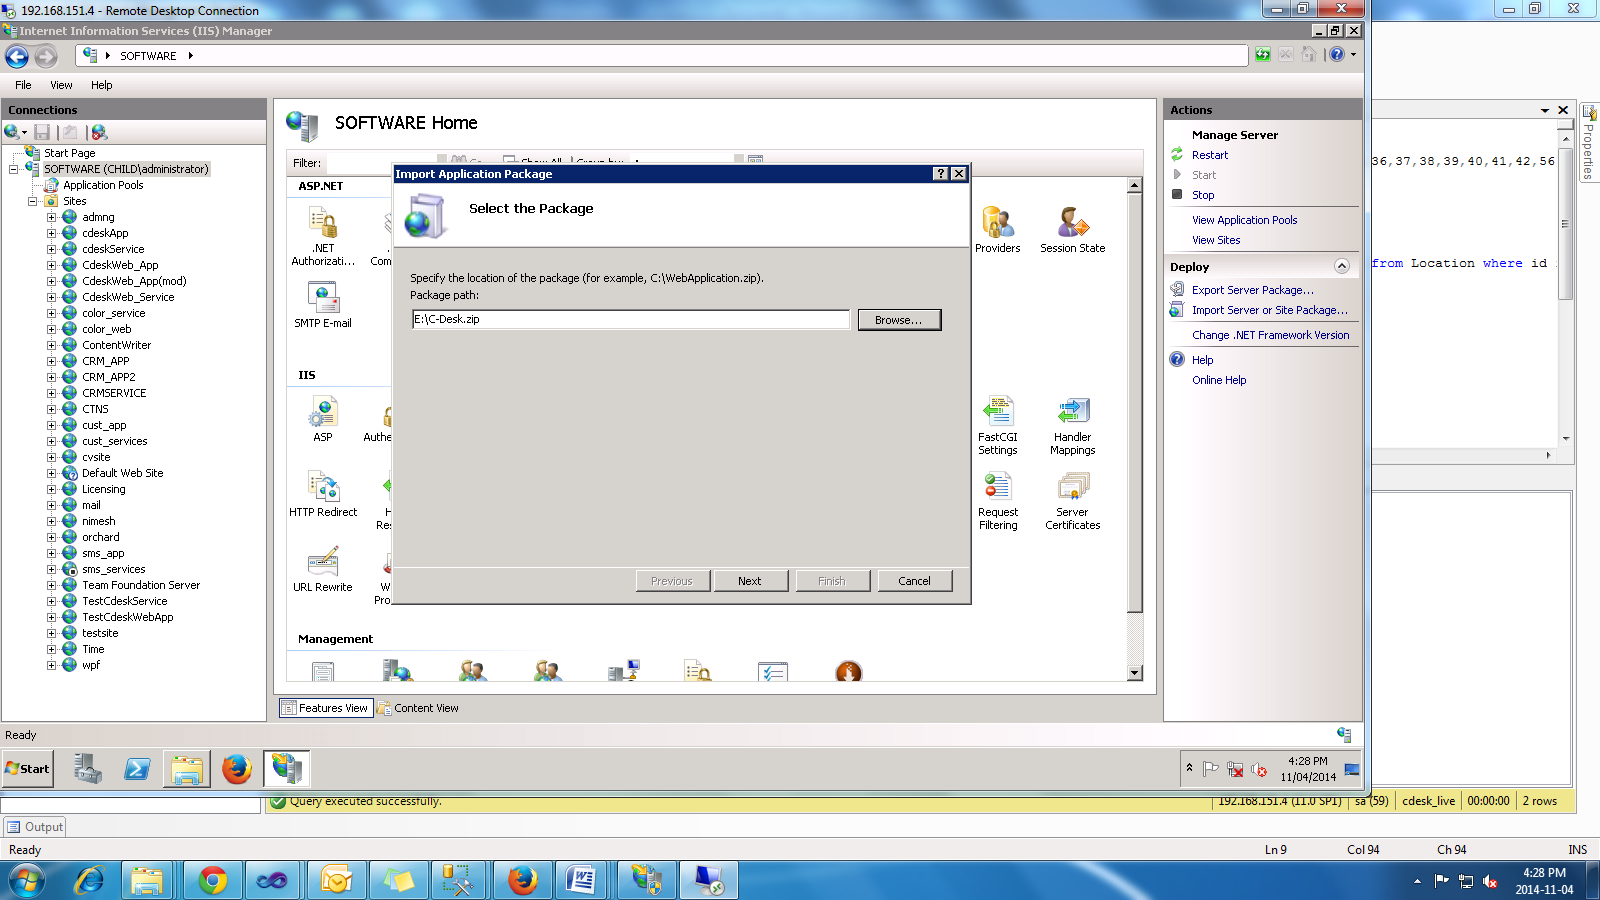
7.Click “Next”.
8.The “Select the Contents of
the Package” dialog box is displayed as shown in the following illustration:
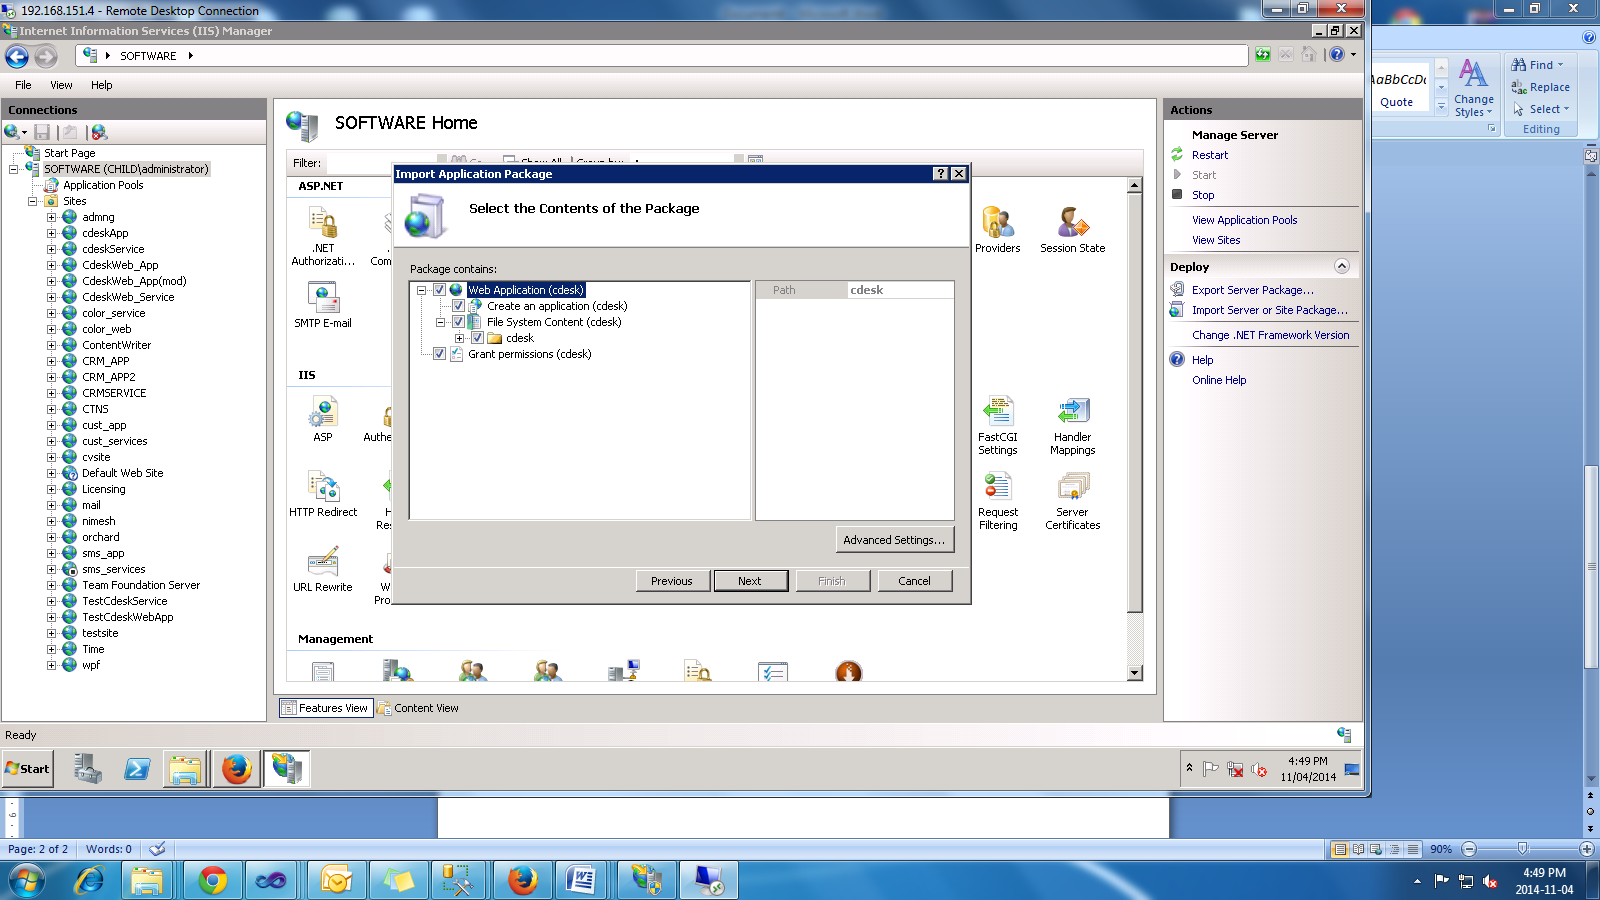
9.Click “Next”.
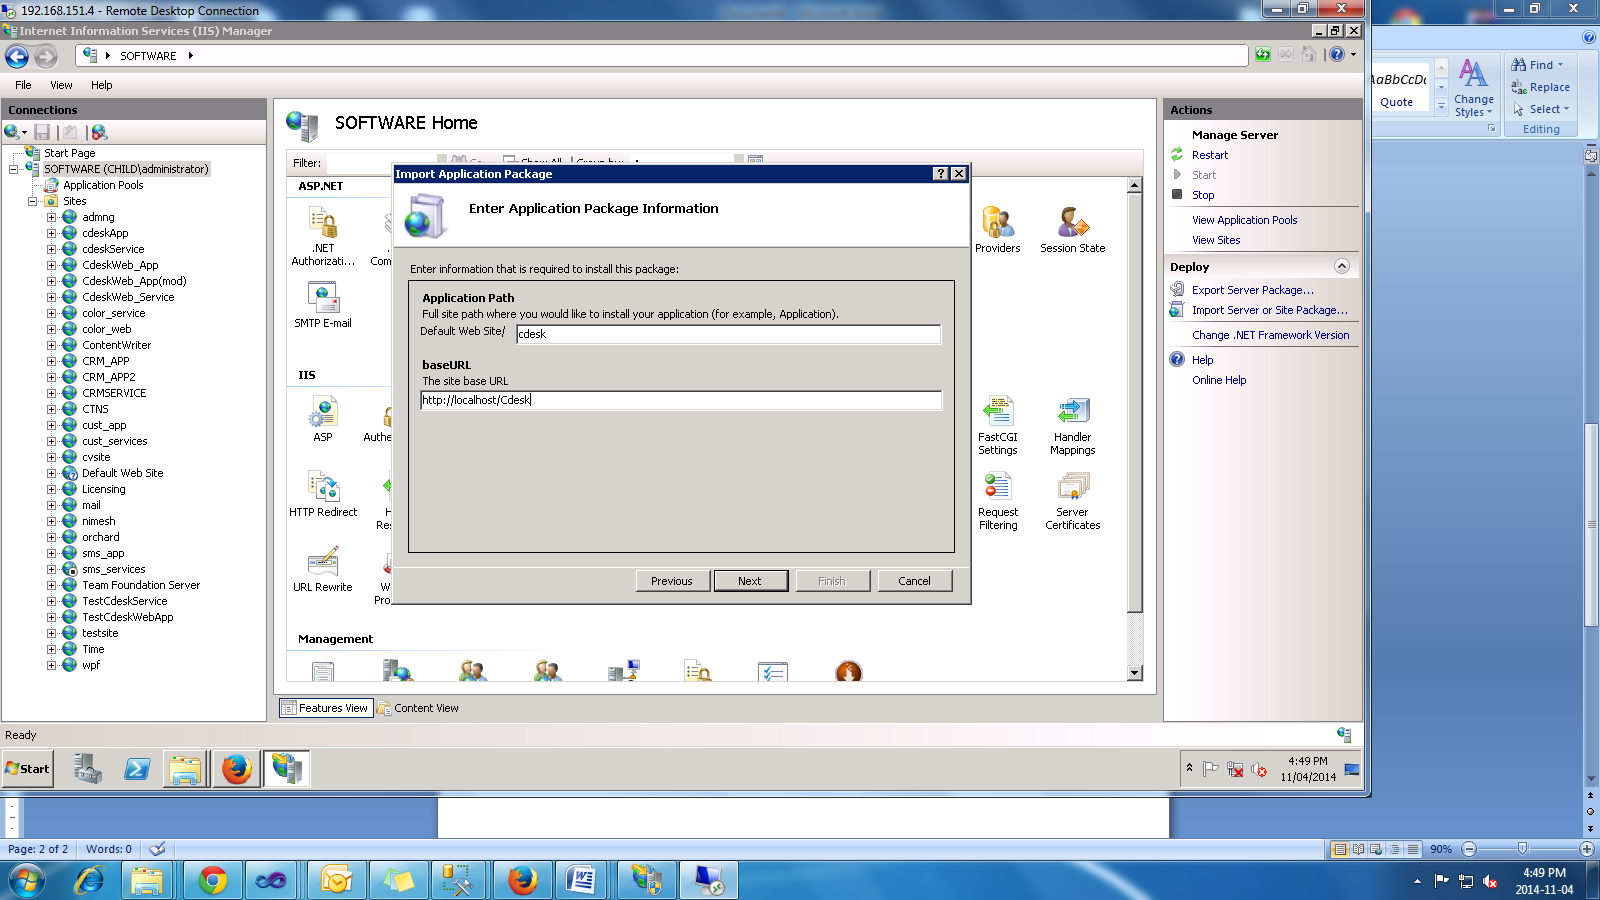
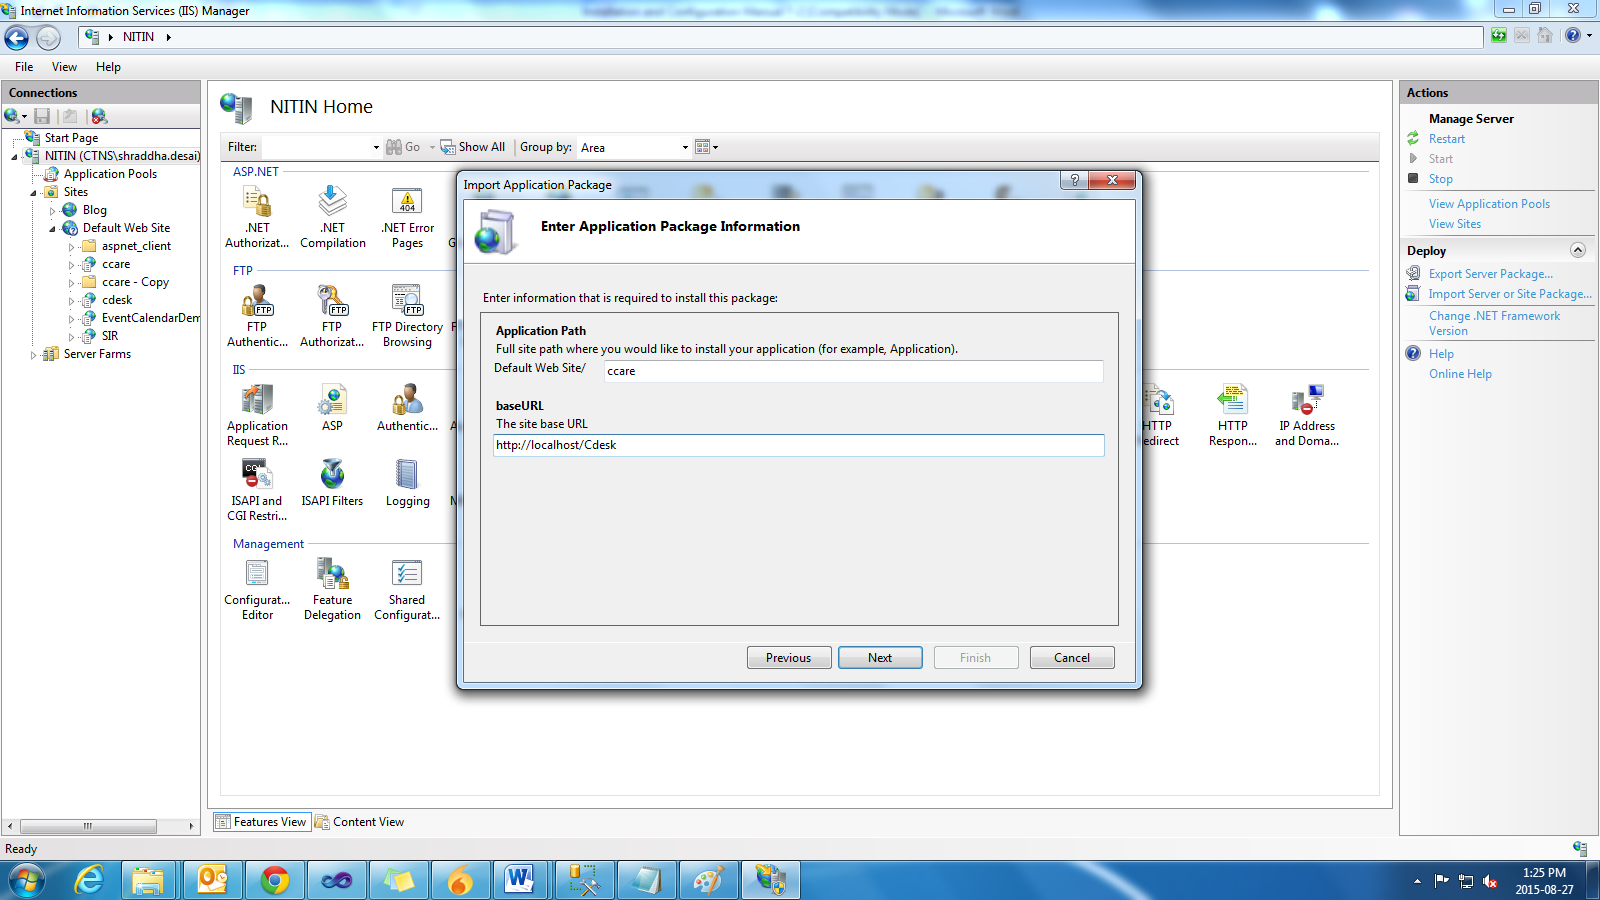
10.The “Enter Application
Package Information” dialog box is displayed as shown in the following
illustration:
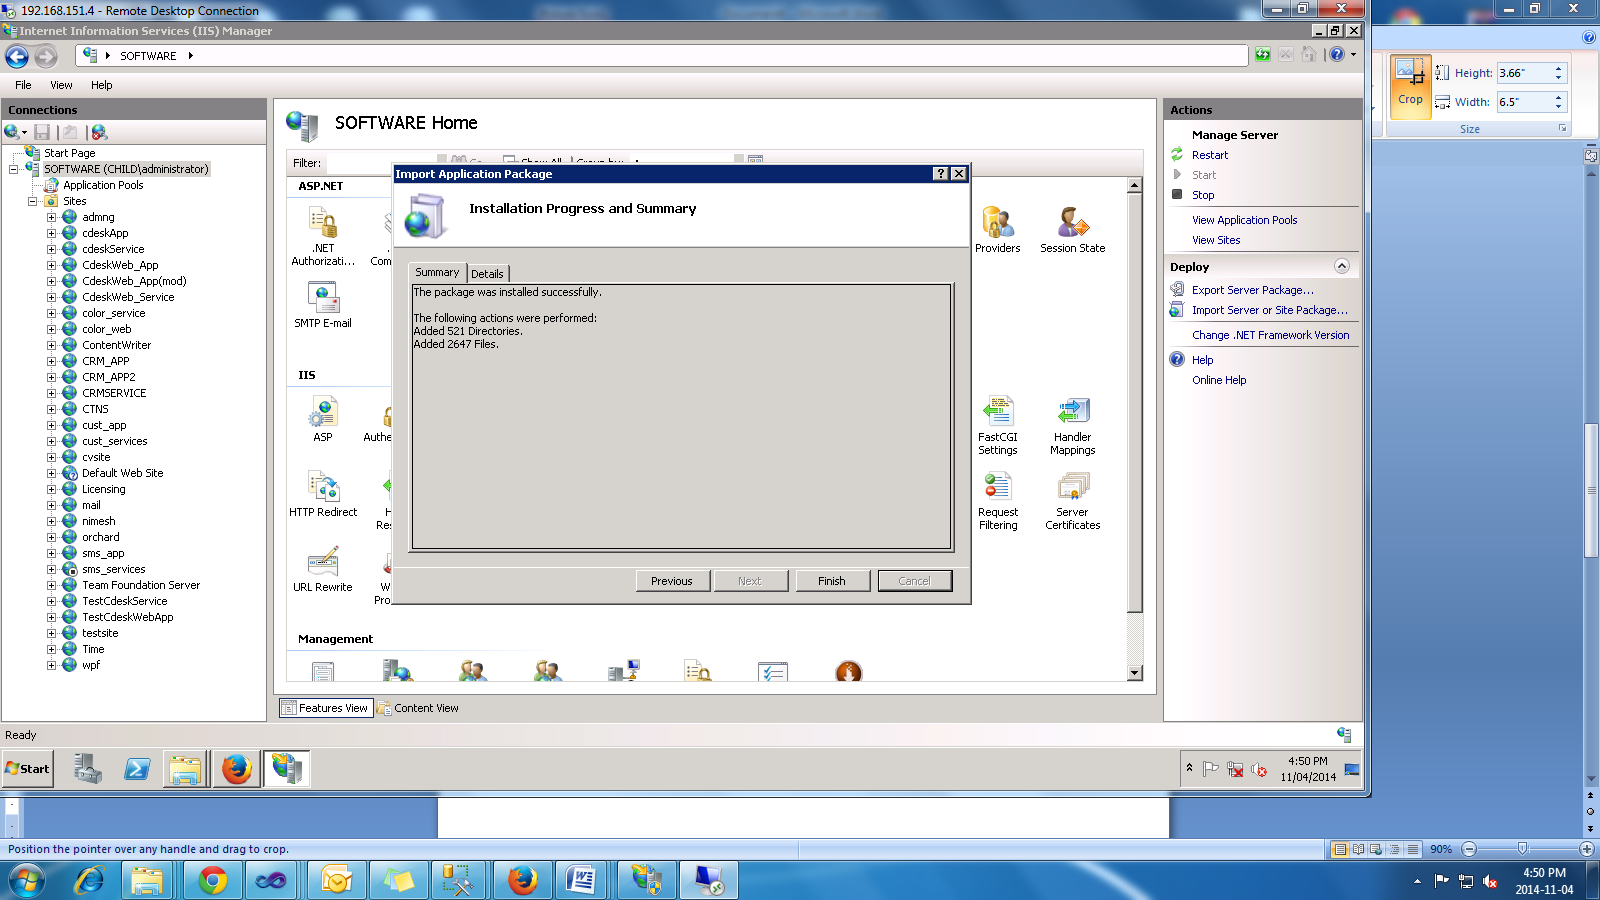
11.While “Web Deploy” installs
the package, the “Installation Progress and Summary” dialog box is displayed.
The dialog box shows a progress bar during the installation process. When the
process is complete, the dialog box shows a log of what was done, as shown in
the following illustration:
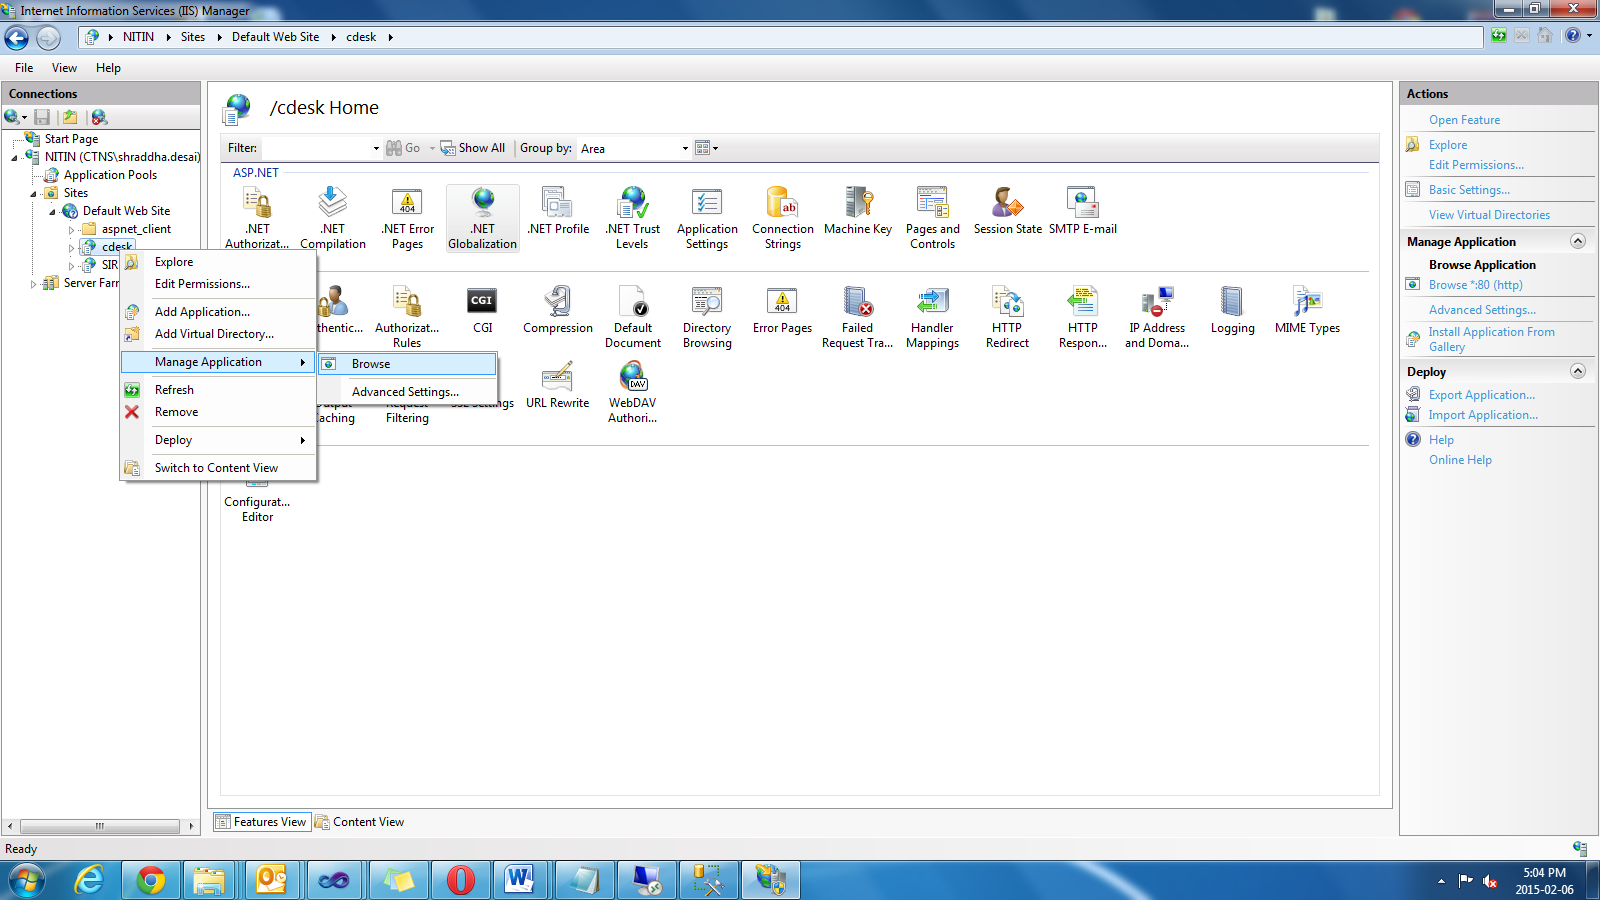
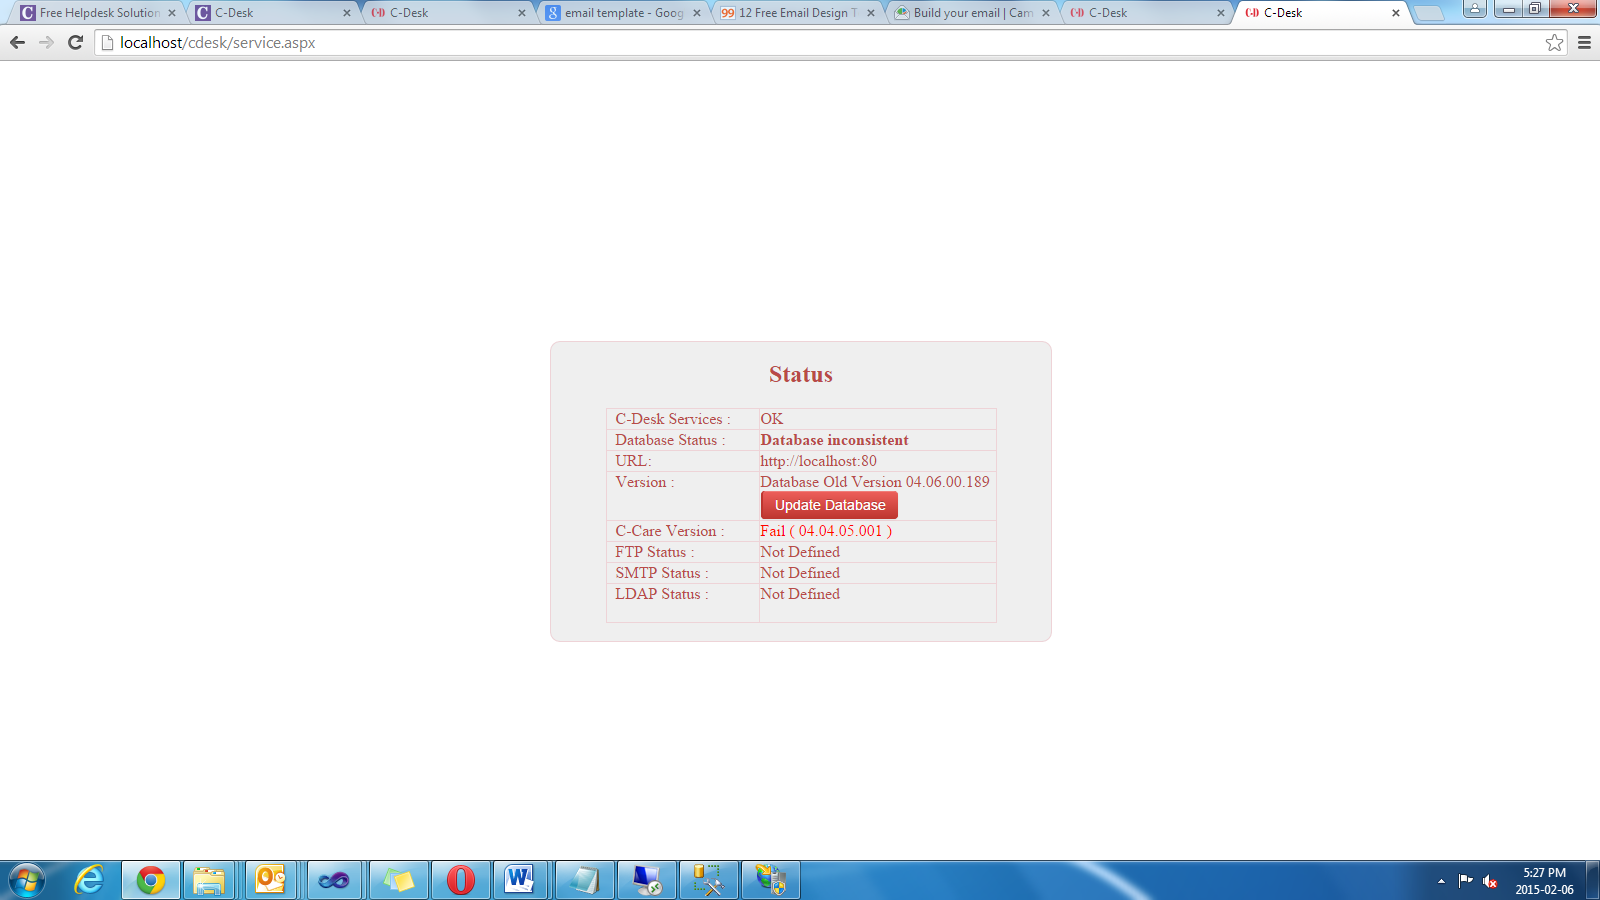
12.Right click C-Desk site and browse
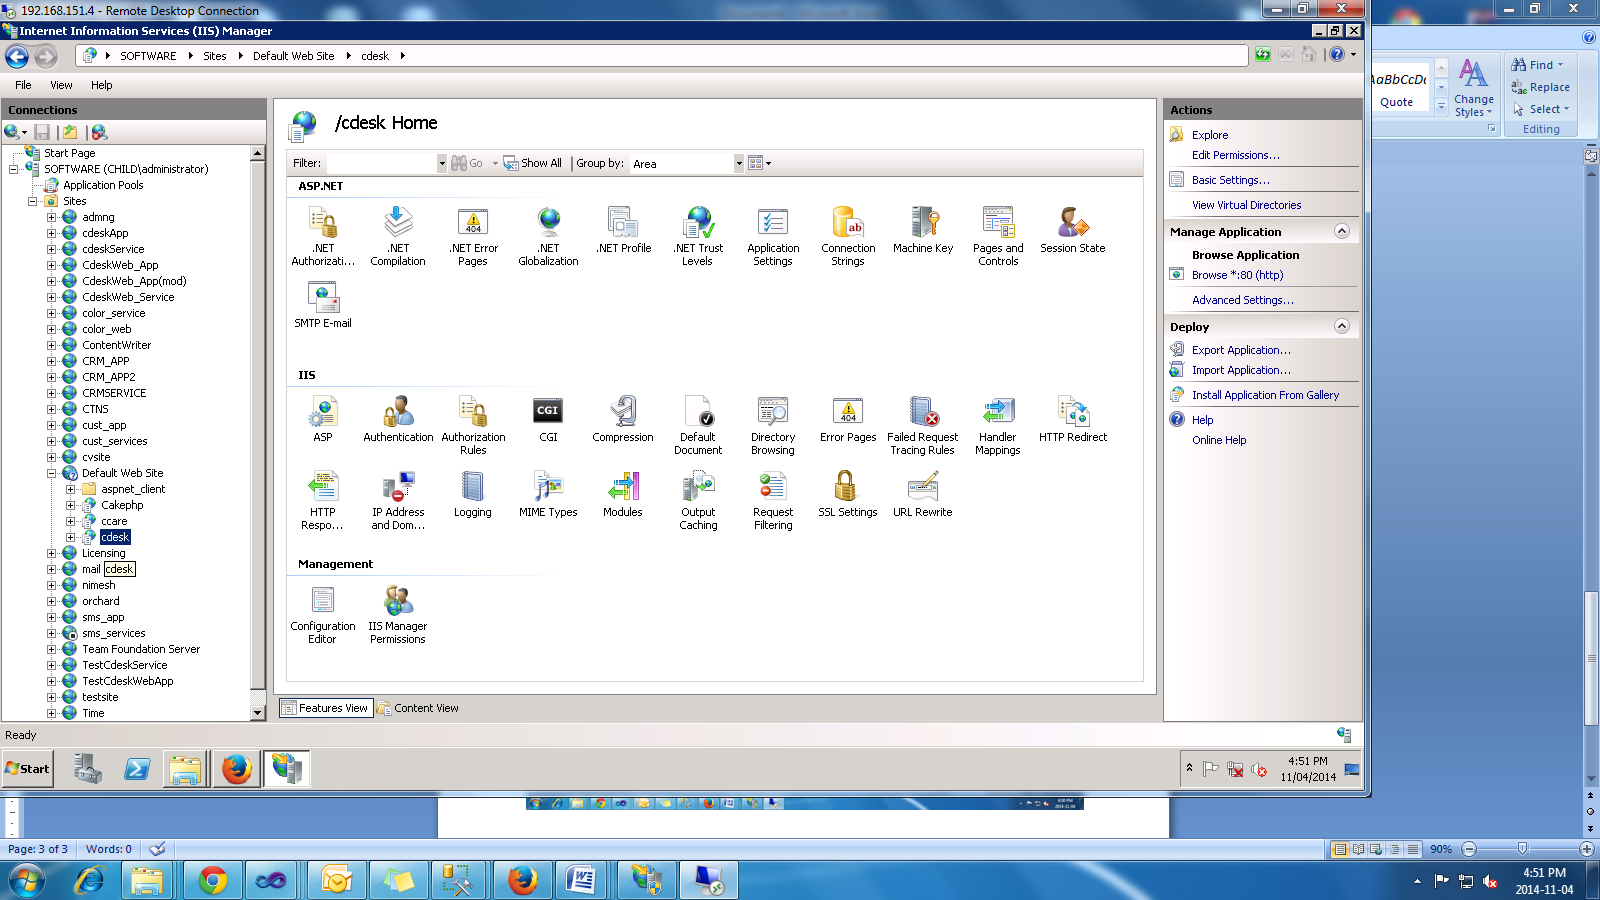
You should get the page saying
database not available since no database is yet configured. So go to
service.aspx page manually from the URL. Refer "Creating and Configuring the database"section to proceed with deployment.
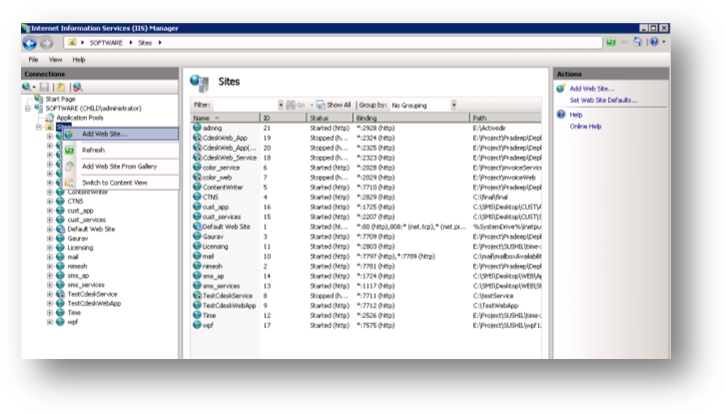
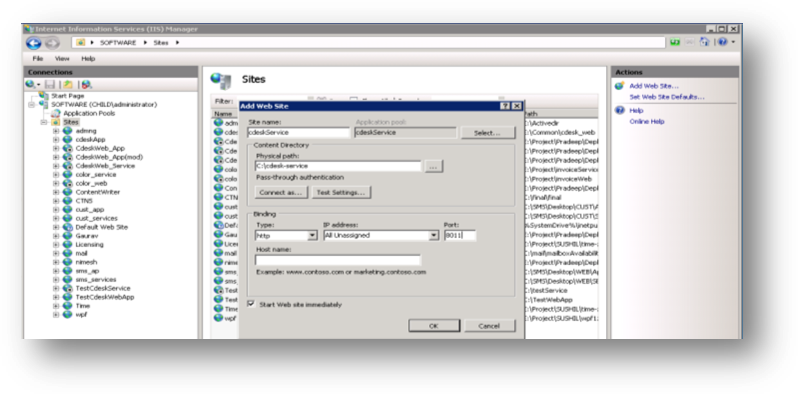
1.Go to your “IIS manager” and
add a site
2.Go to “IIS” and add website..
Or if you have web deploy installed you can directly import the application
Point the physical path to the C-Desk folder
and define the Port. Or the host header value for your cdesk app
Similarly add new site for
Cdeskapp and point the physical path to Cdeskapp folder. Use port 80 and
provide the host name so that we can access the host from outside. Remember to open port 80 on your firewall
and point it to the server. Also remember to add required DNS entries for the
host name in your DNS setting at hosting panel.
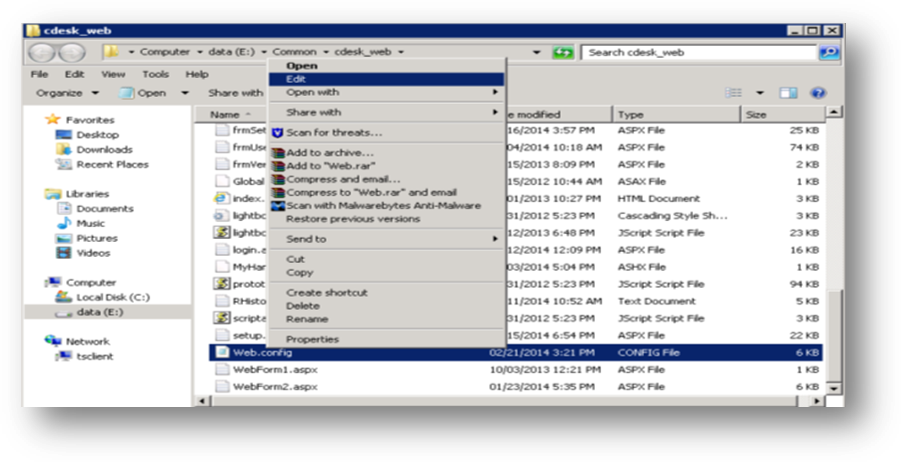
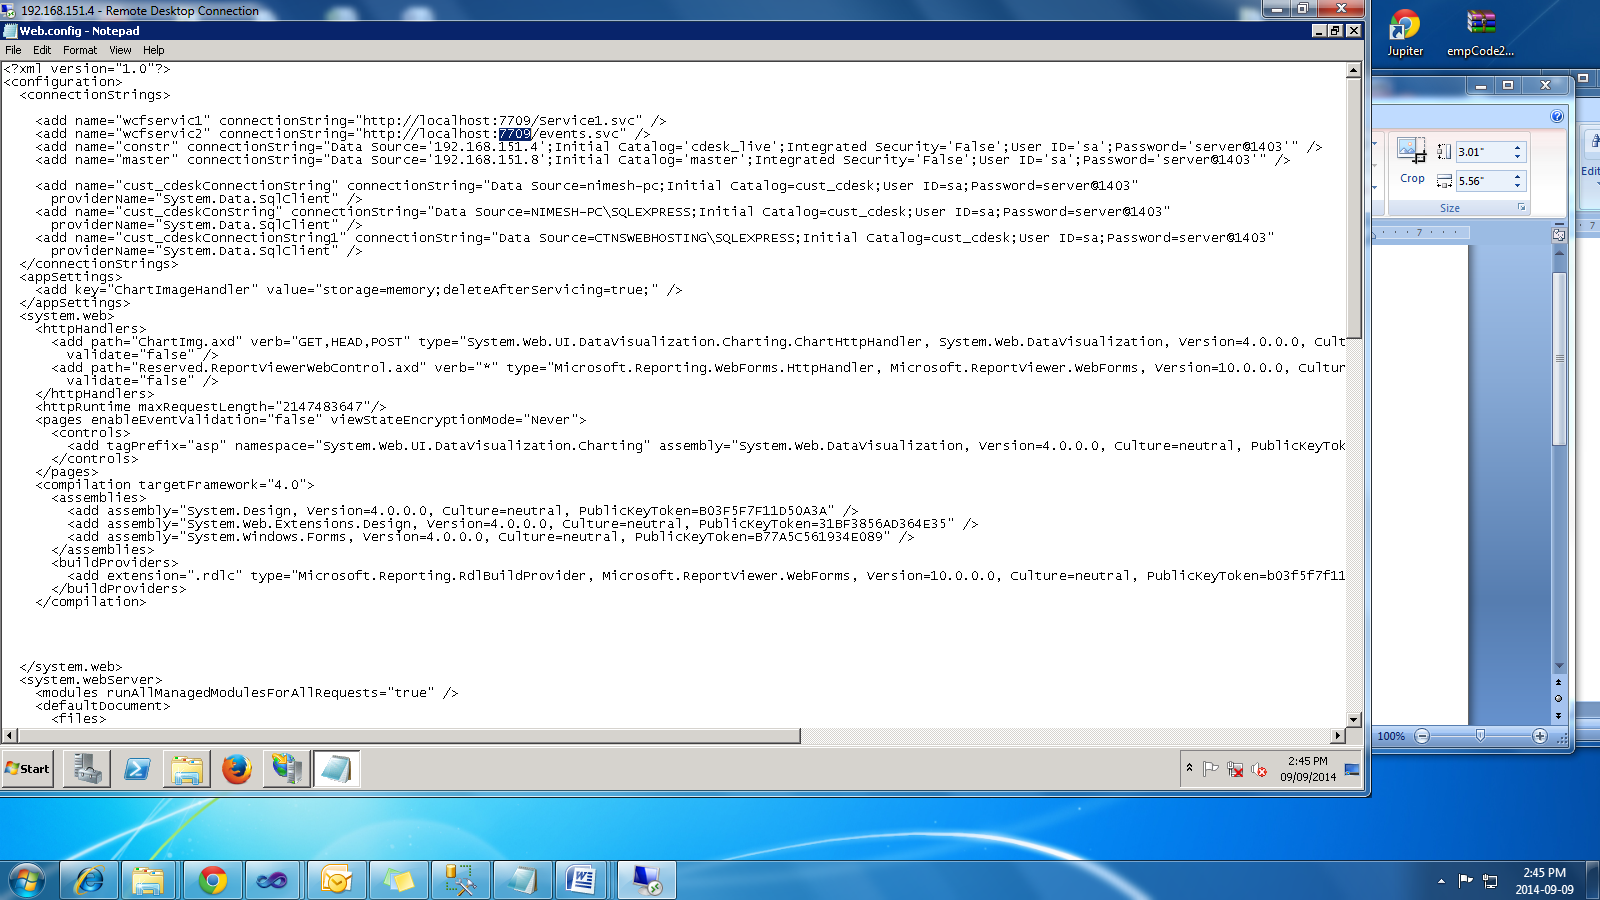
Editing Web.config
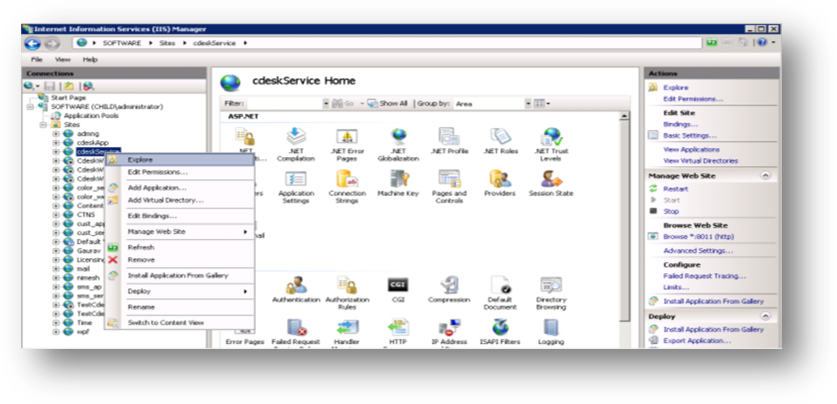
Right Click the cdesk
site created and explore
Edit Web.config
Edit the connection strings named
wcfservic1 and wcfservic2 and modify the port and the IP address of your
server.
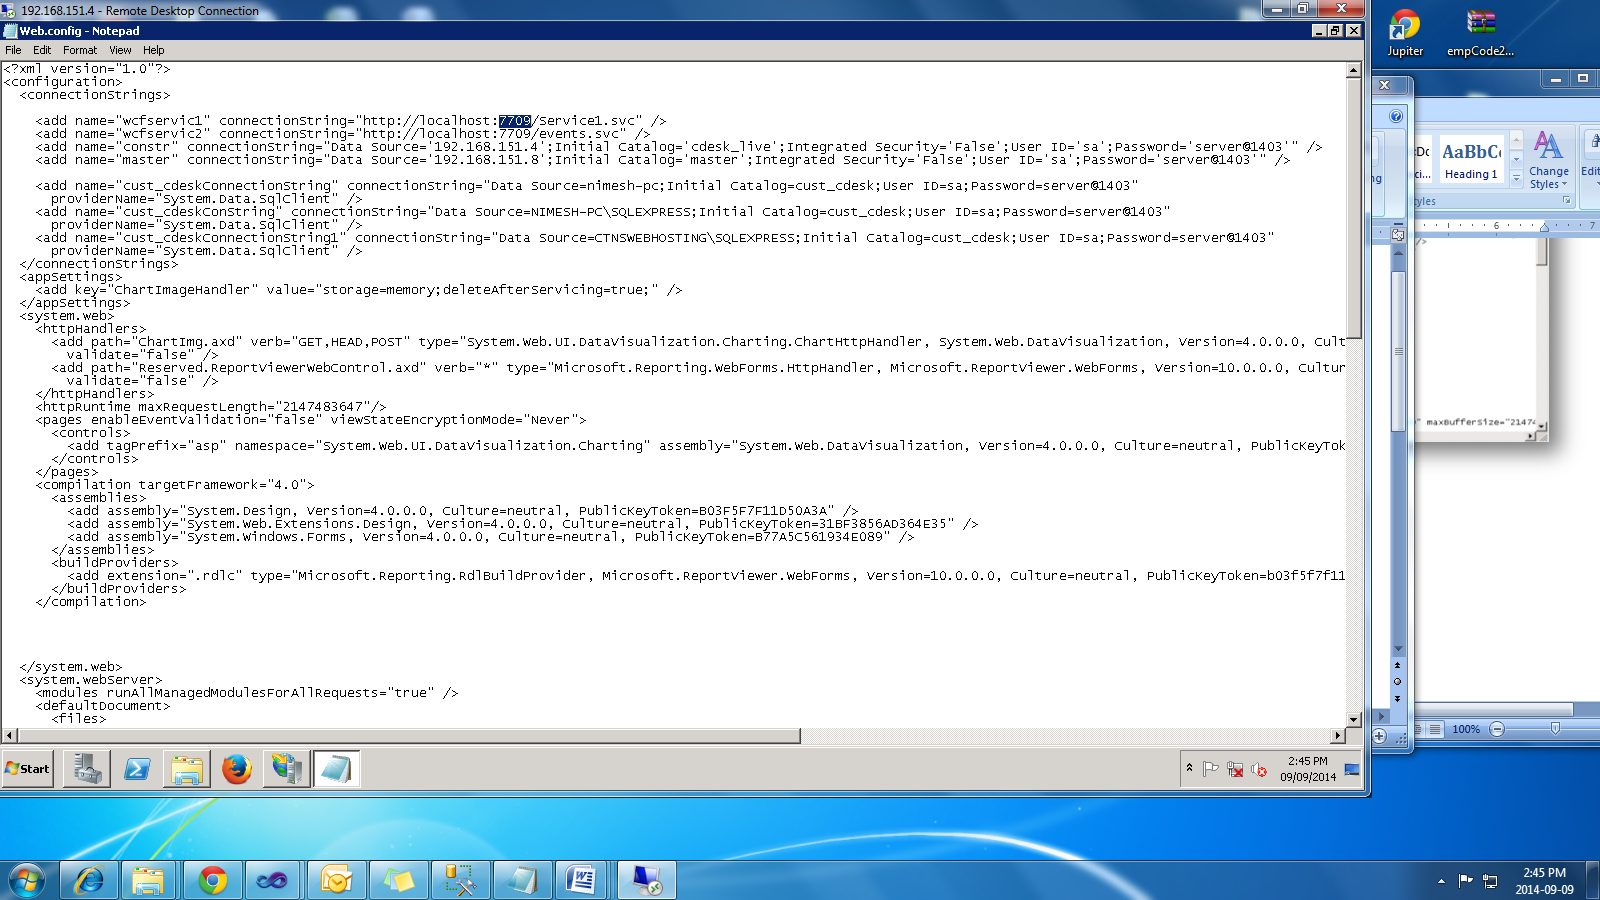
Edit for both connection strings of
wcfservice1 and wcfservice2
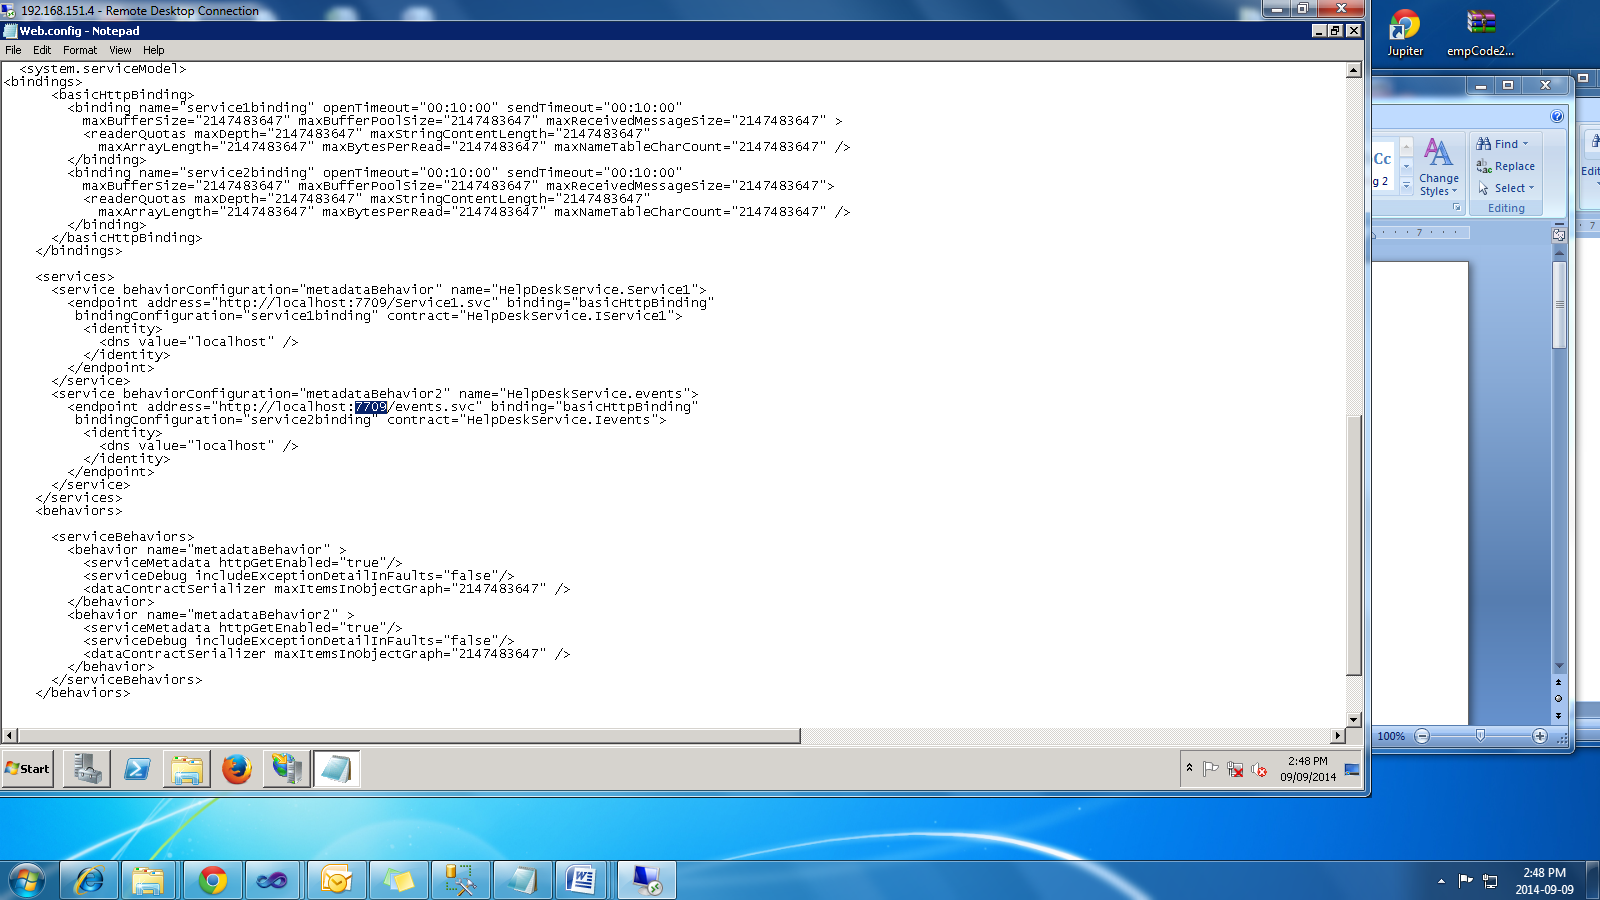
Go to the below section of service
endpoints and also do the same modifications there

Do it for all endpoints
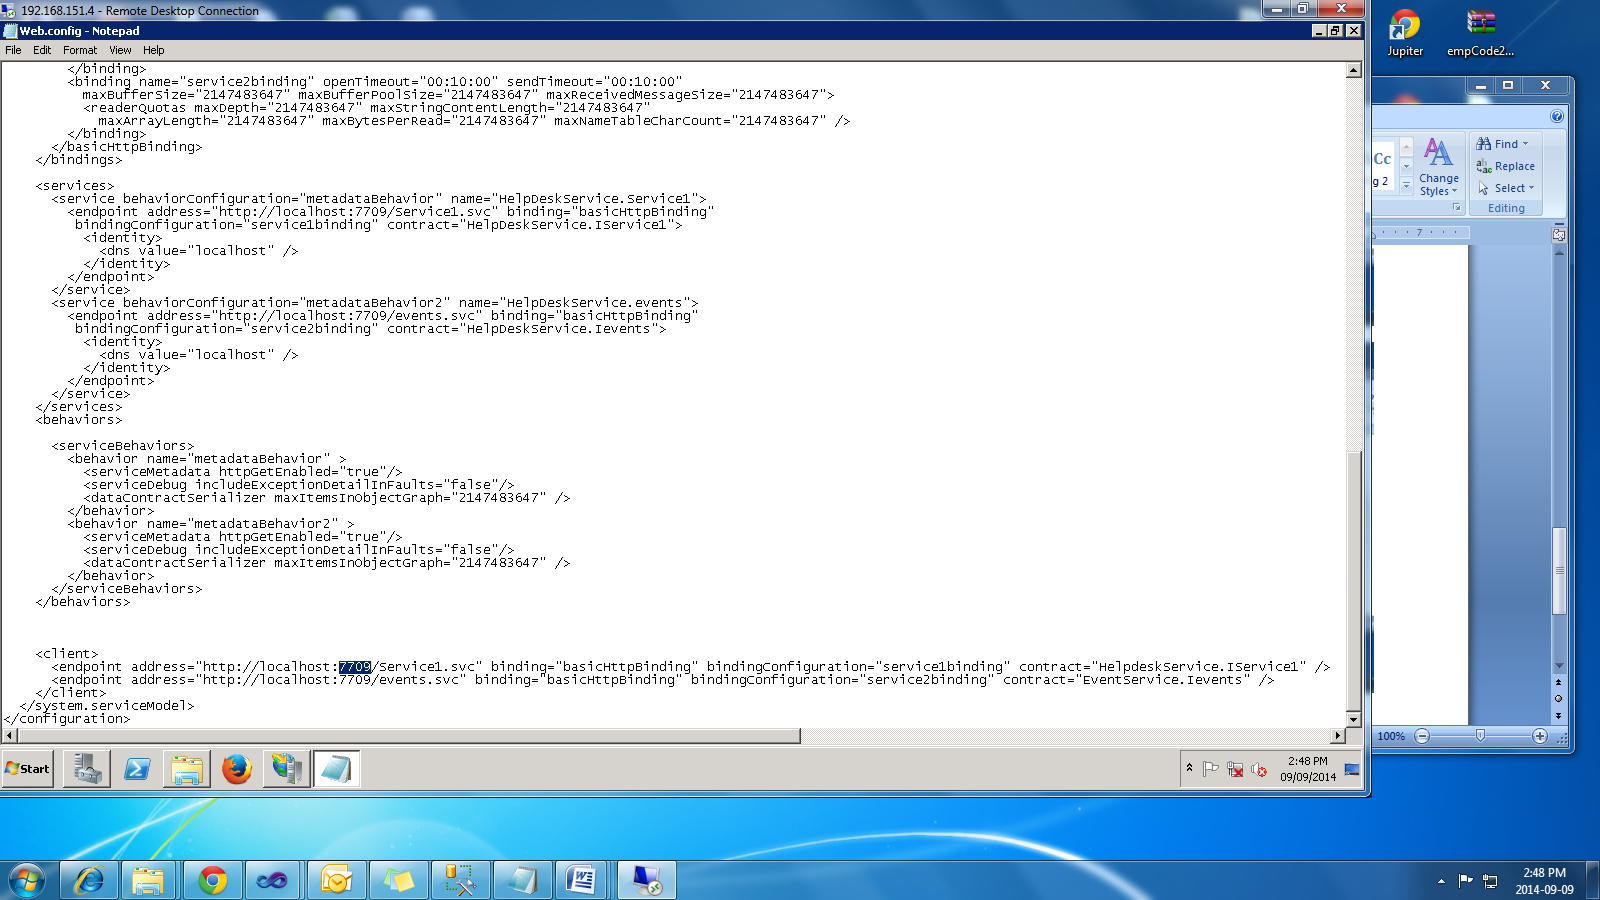
Modify all the client endpoints

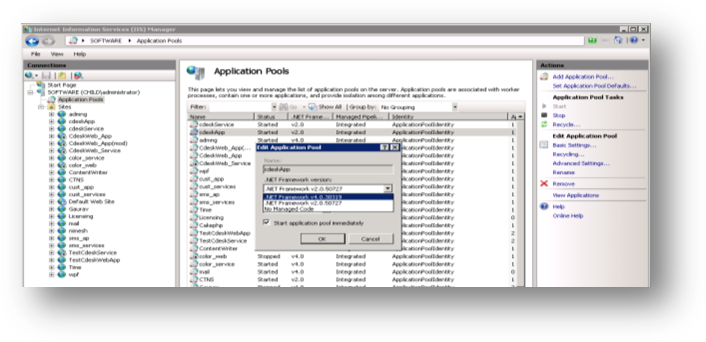
Application pool settings
Ensure the Application pools used by
cdesk is running on .net framework 4.0
Creating and Configuring the database
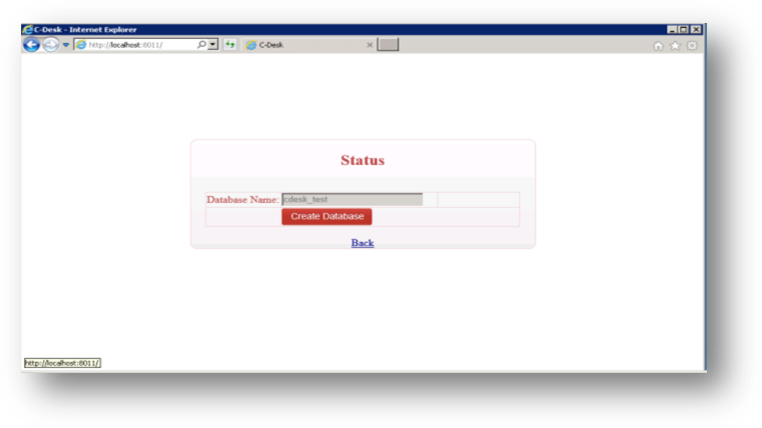
Right click C-Desk site and browse..
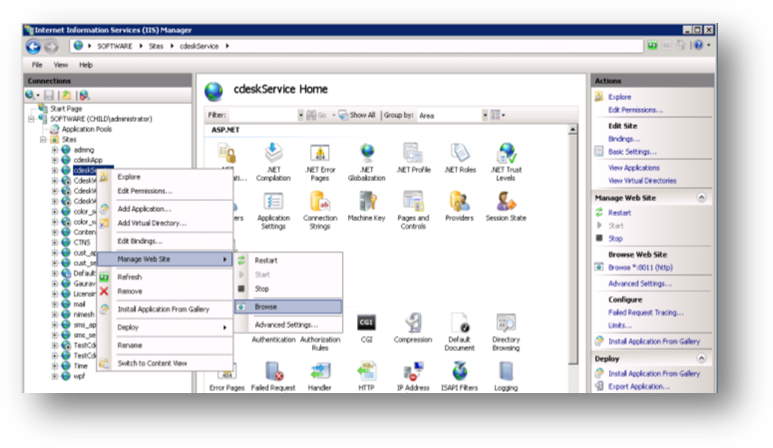
You should get the page saying
database not available since no database is yet configured. So go to
service.aspx page manually from the URL..
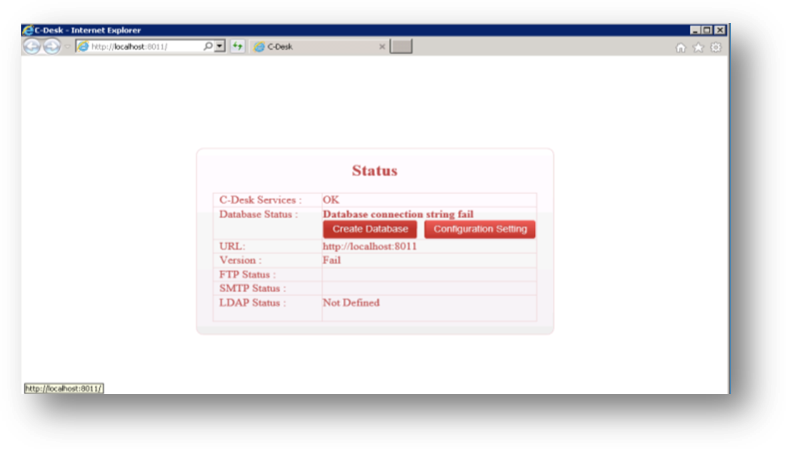
Click Create Database
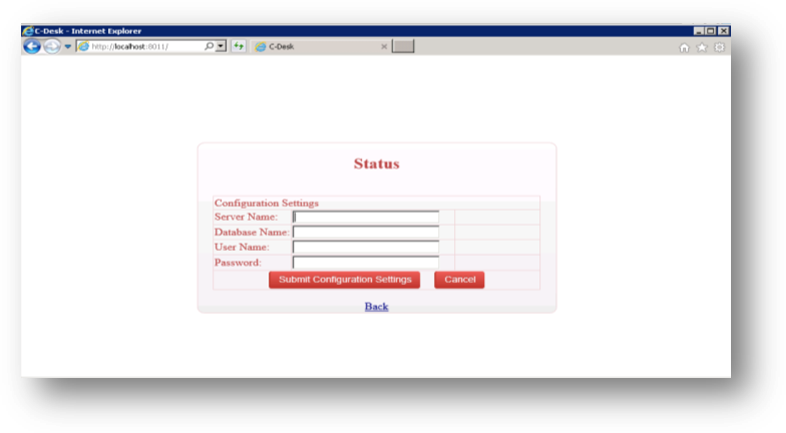
Provide details of the SQL server and provide
the preferred name of the database. And submit configuration settings
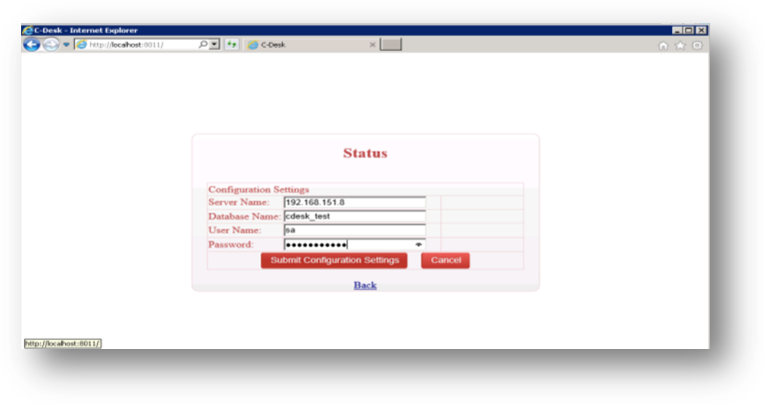
Click Create Database
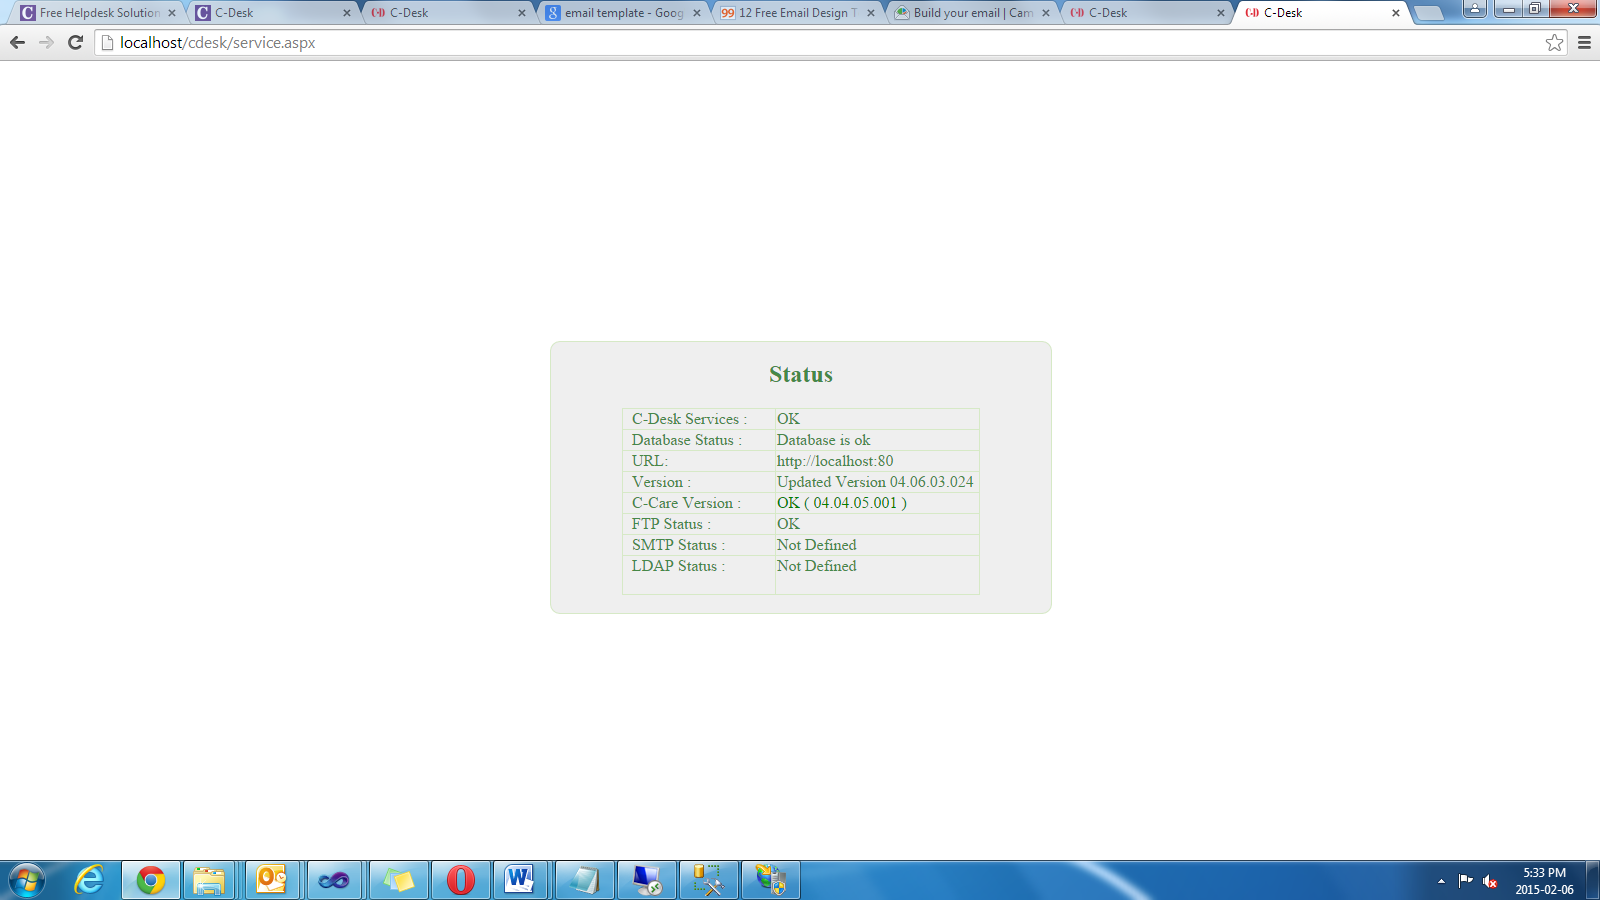
After successful creation of database
you should get service status page..
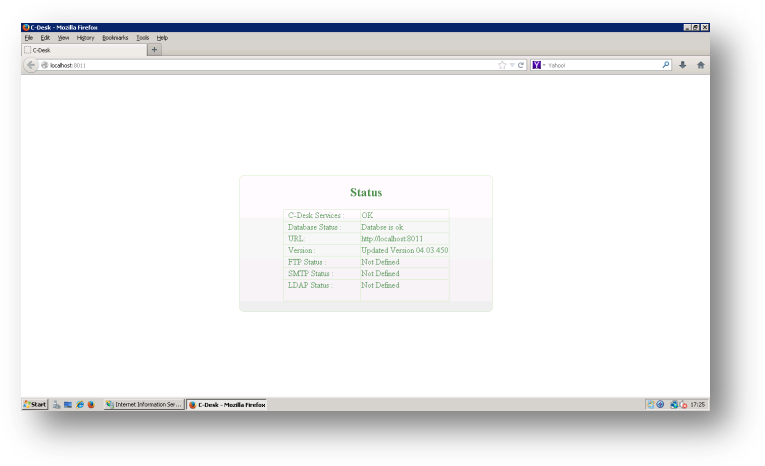
Do not worry as FTP, SMTP and LDAP
settings are not yet provided it would show as undefined.
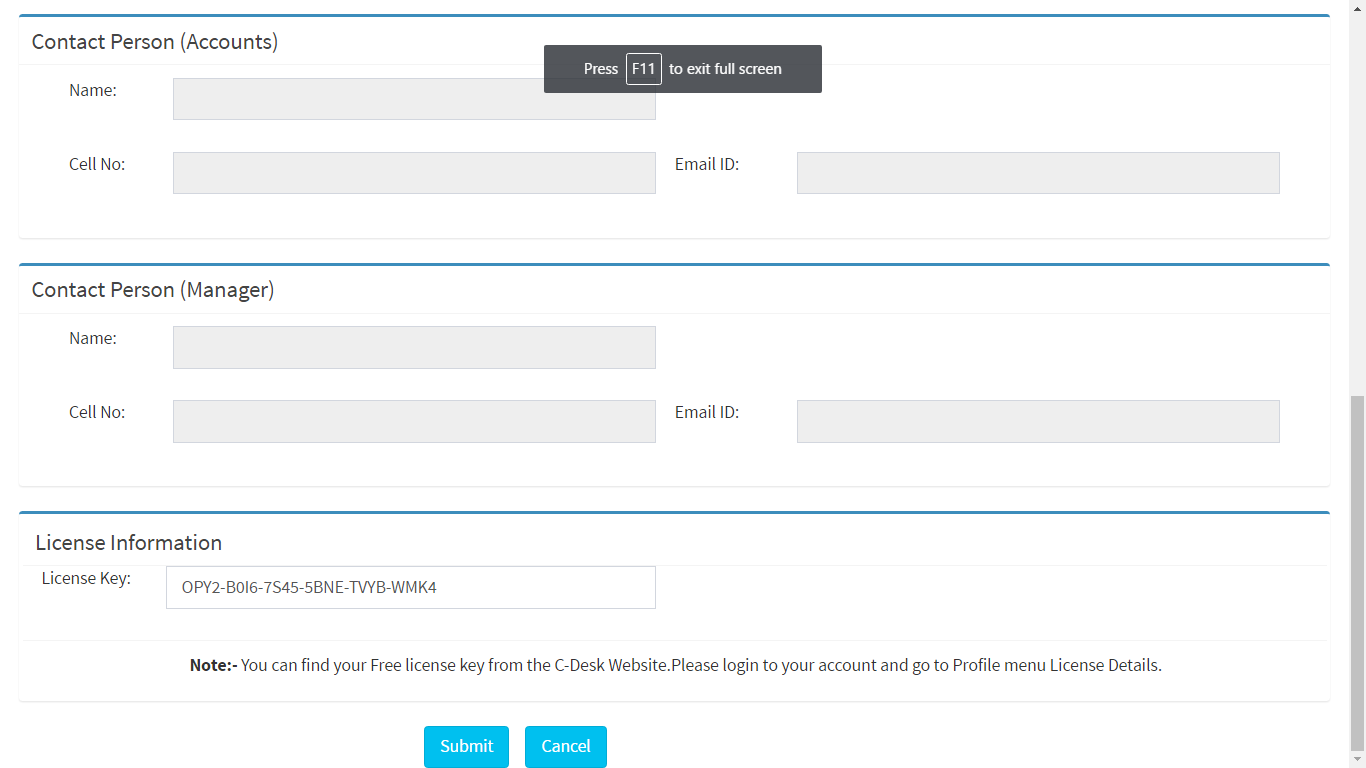
You need your registration key here.
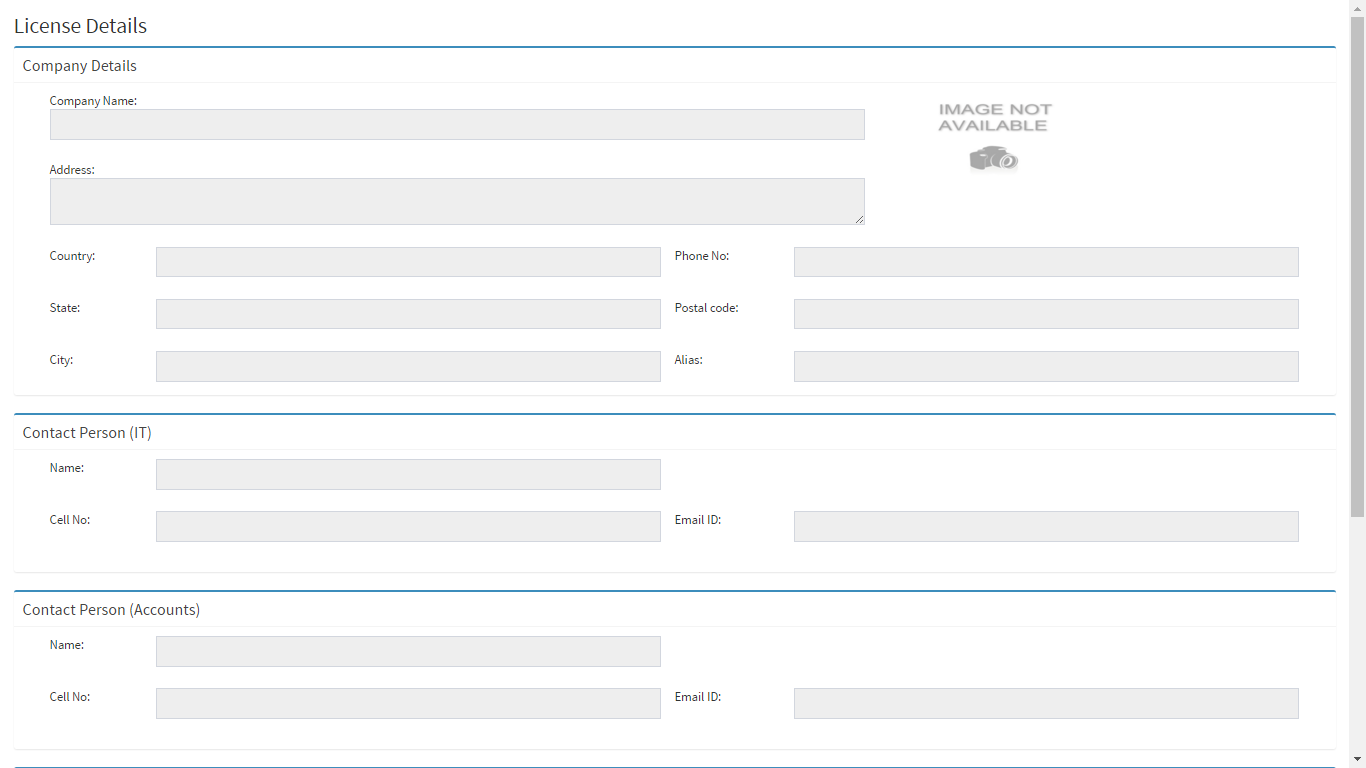
At the bottom of the page go to change
key and insert your key and click on submit. All the data inserted during the
registration on www.cdesk.in will now we automatically filled up. If you
inserted your logo then you should find your logo here.
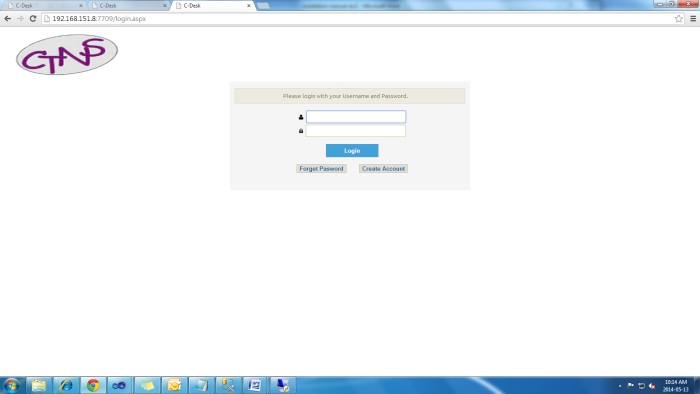
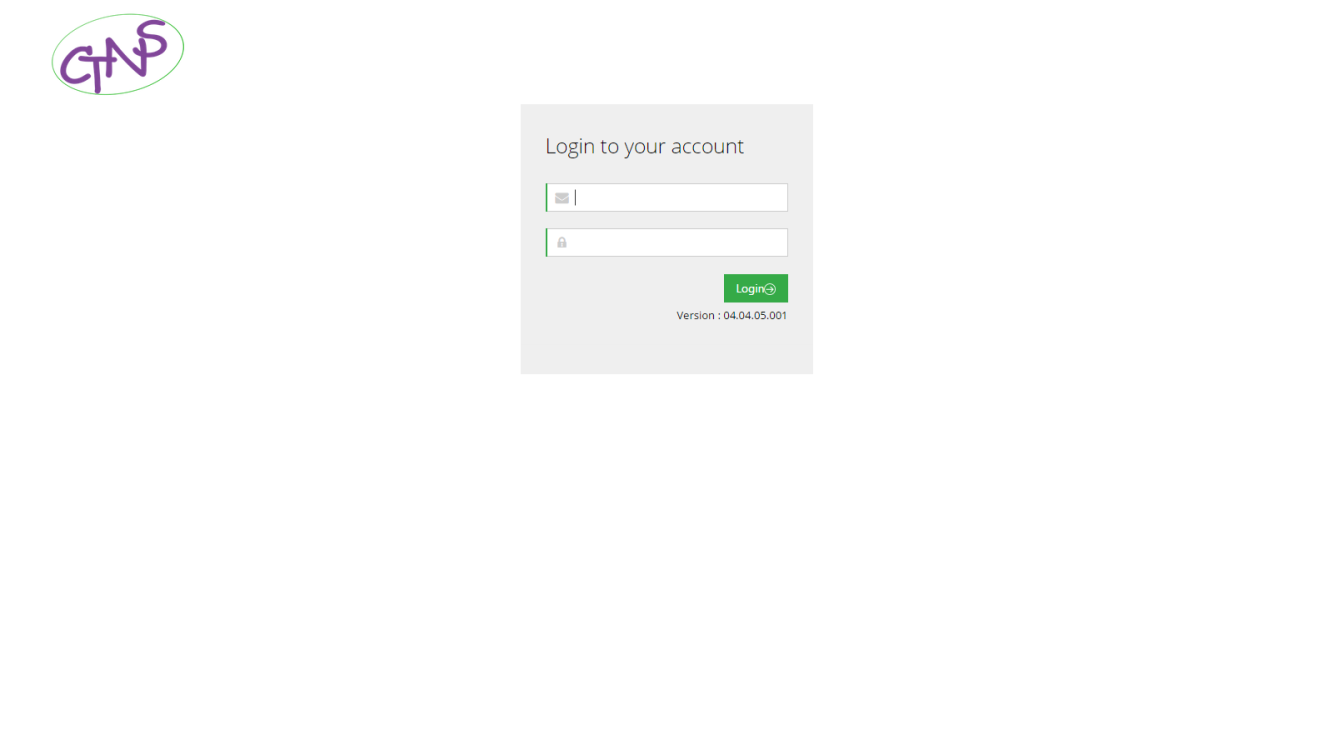
Now at the login screen you should be
able to see your logo.
Application Setup Process
Right click the C-Desk App folder and
click on browse
Put default username ‘cd_admin’ and
password ‘admin’.
Since this is the first time you
logged on you shall get the setup wizard.
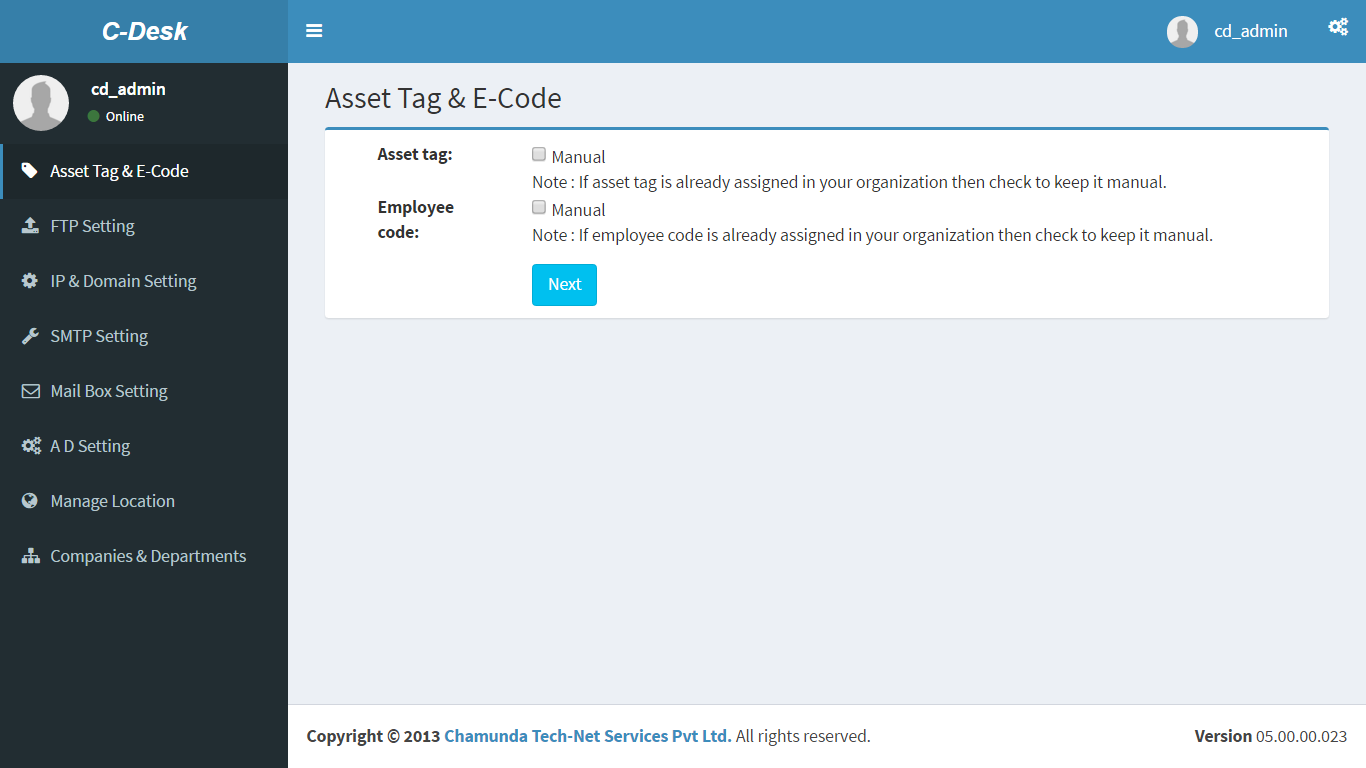
If your organization
already has a asset tag assigned to the assets check on manual. else leave it
unchecked for auto generatation. Similarly if your organization already has the
employee code assigned to employees then check on manual or leave it unchecked
for auto generation. Note This settings
are not reversible
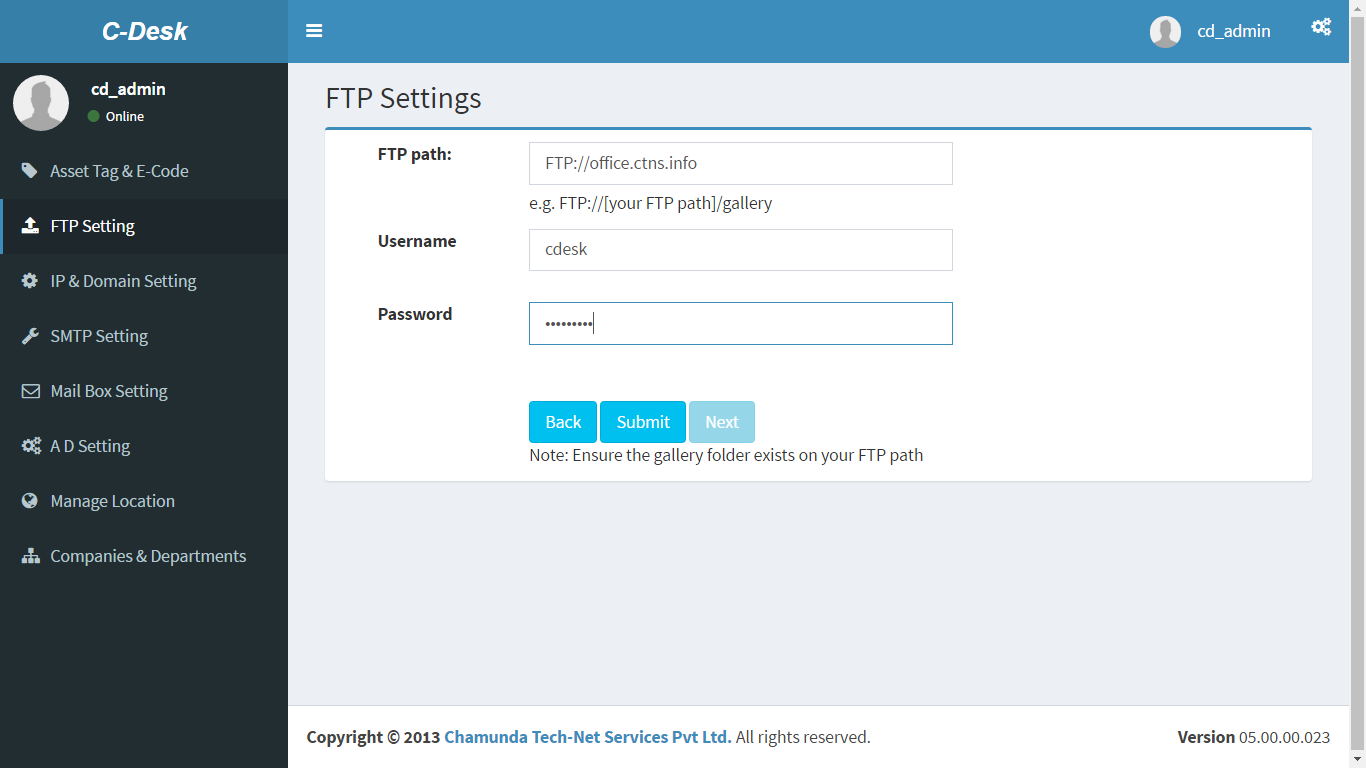
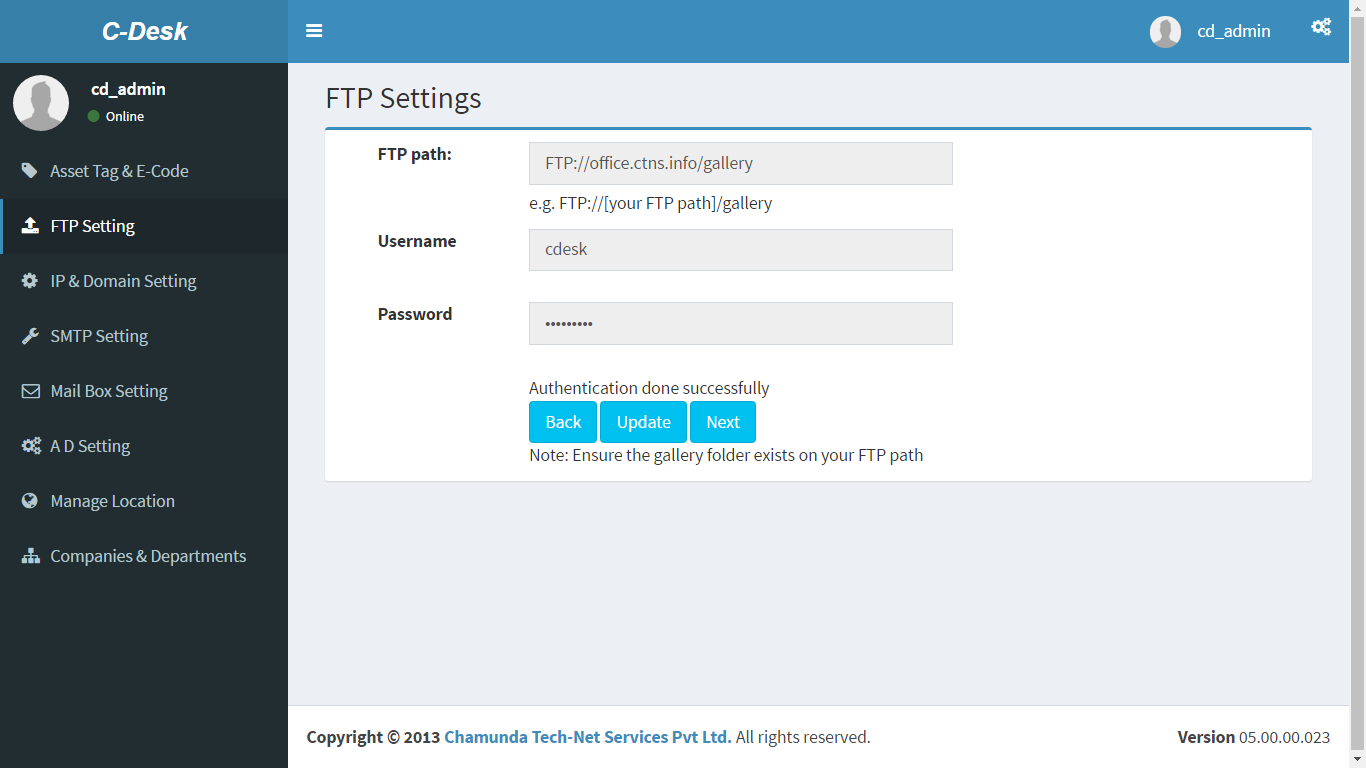
FTP Settings
Provide FTP server details. This is
used for photo gallery and is compulsory.. If you do not have an ftp server
configured then you can configure the same on IIS. You need this if you are
going to have multiple application layers installed at different location, then
ensure that FTP server is accessible from all locations. Else if it is a single
application layer you can have a local FTP server..
IF authentication has succeeded with
the FTP server and data is submitted then you shall get authentication done successfully.
IP Address and Domain Settings
IP address and domain settings. Please
provide the IP ranges for the users who are going to access knowledge base.
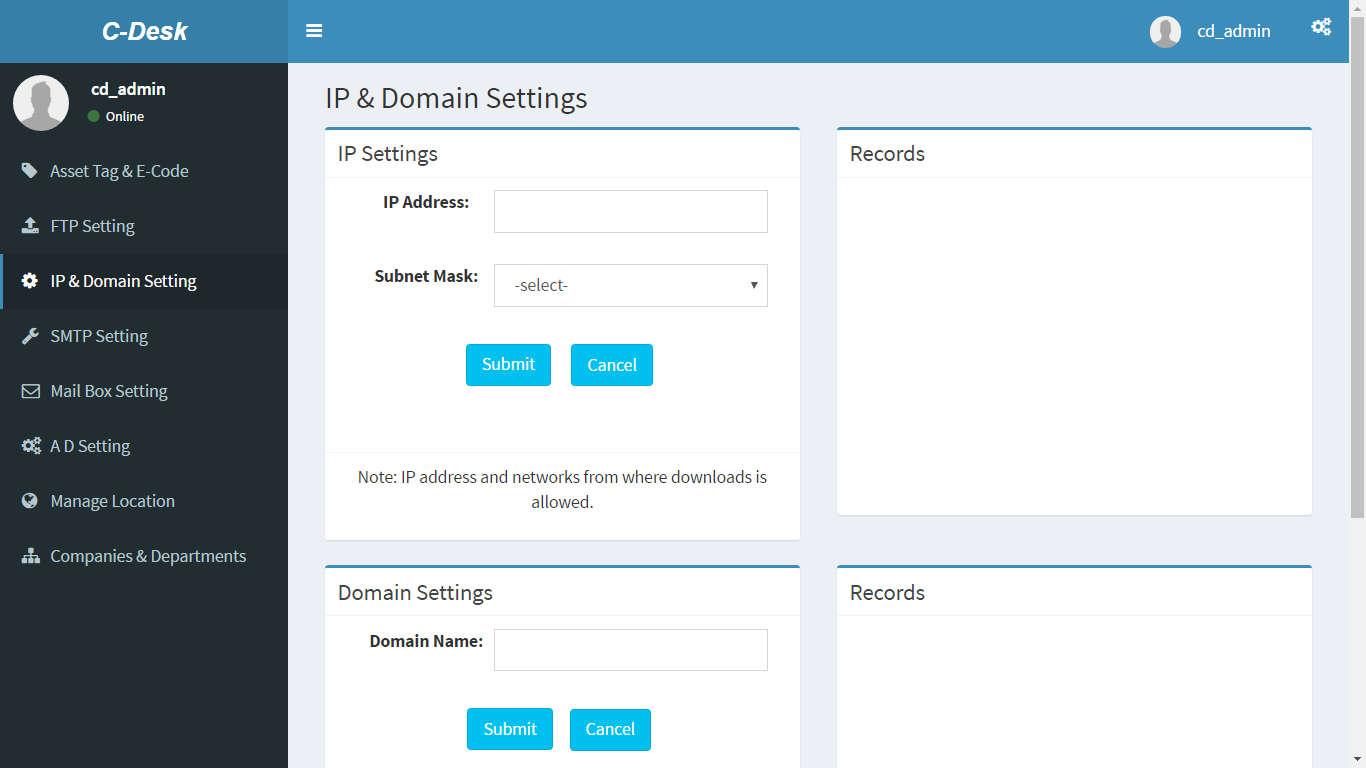
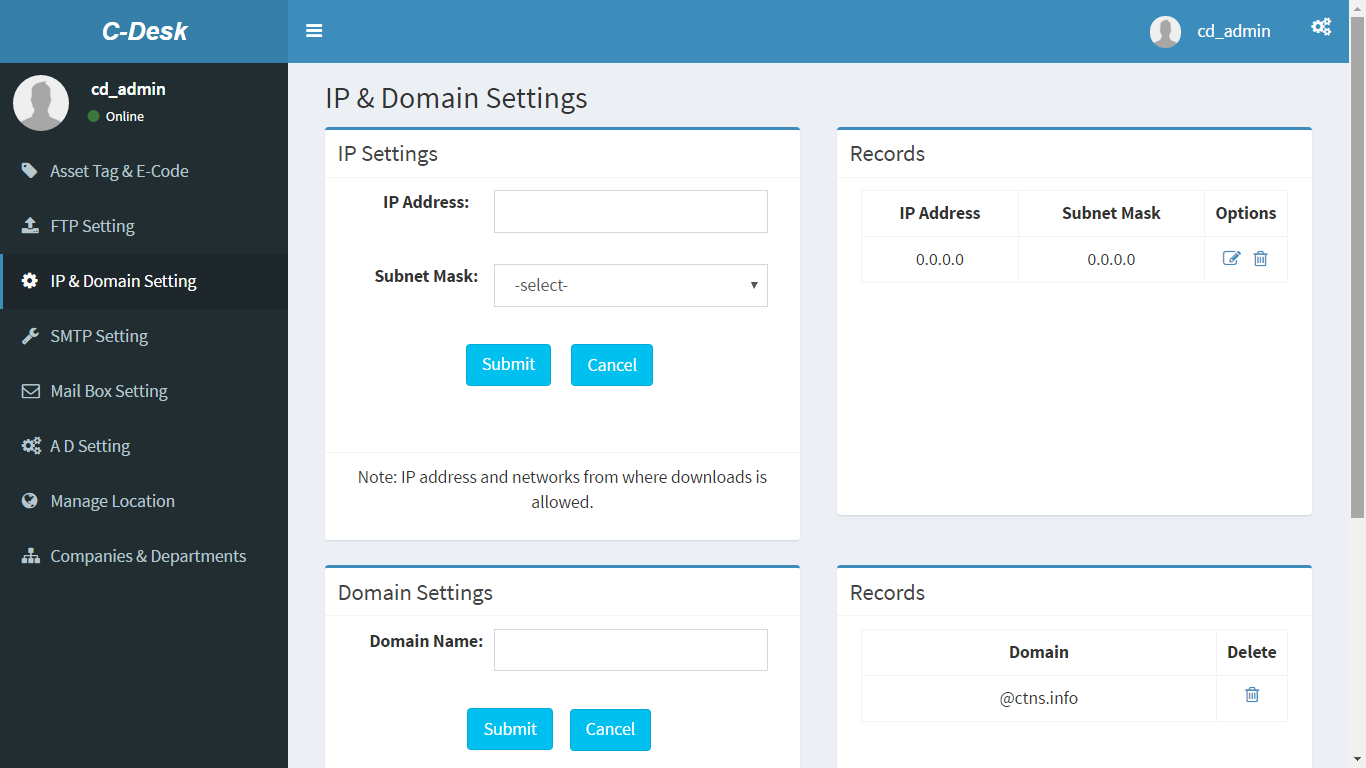
If you want users to access the
knowledge base from external resource then provide IP as 0.0.0.0 and subnet as
0.0.0.0 and submit
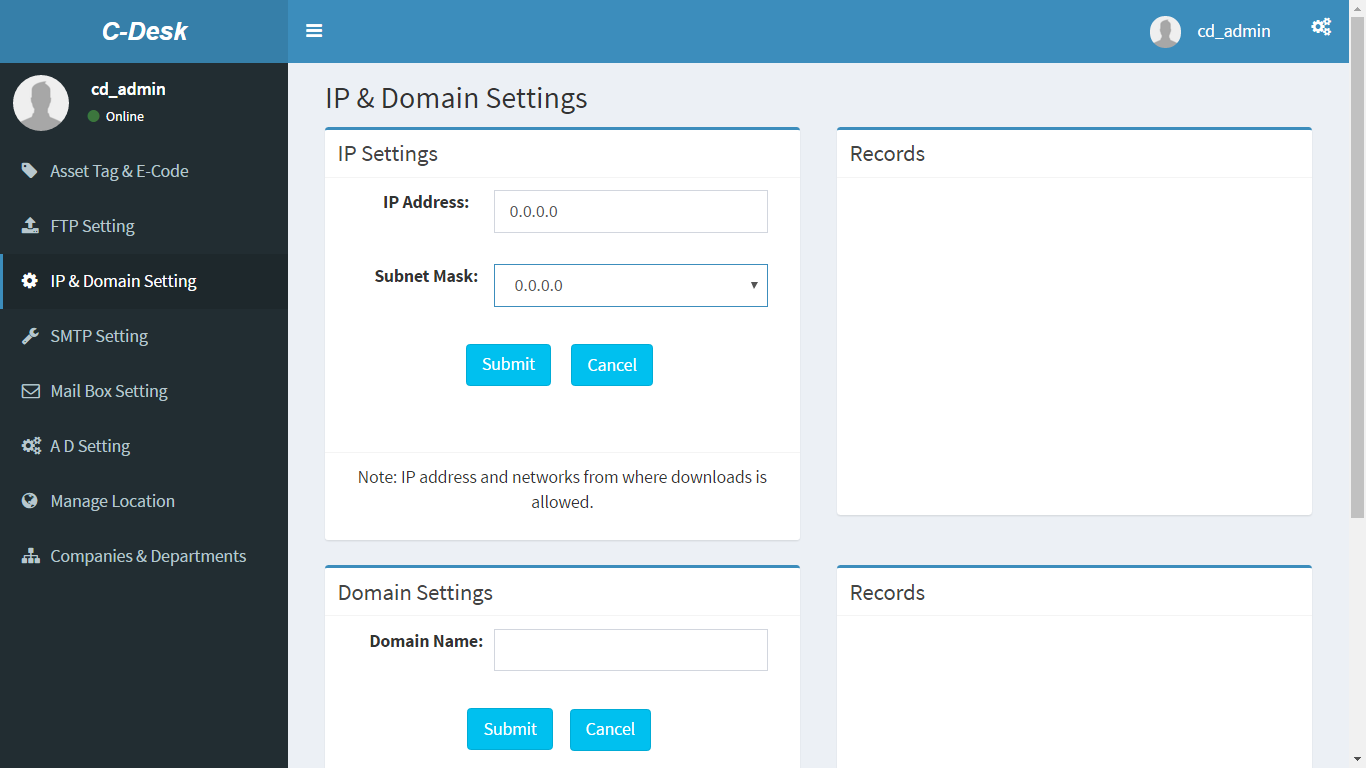
Provide the domain name of the email
id’s that are allowed to register. This function is kept so that employees do
not register with their personal email ID’s. For users not having Email access
from the organization can use @domainname.local
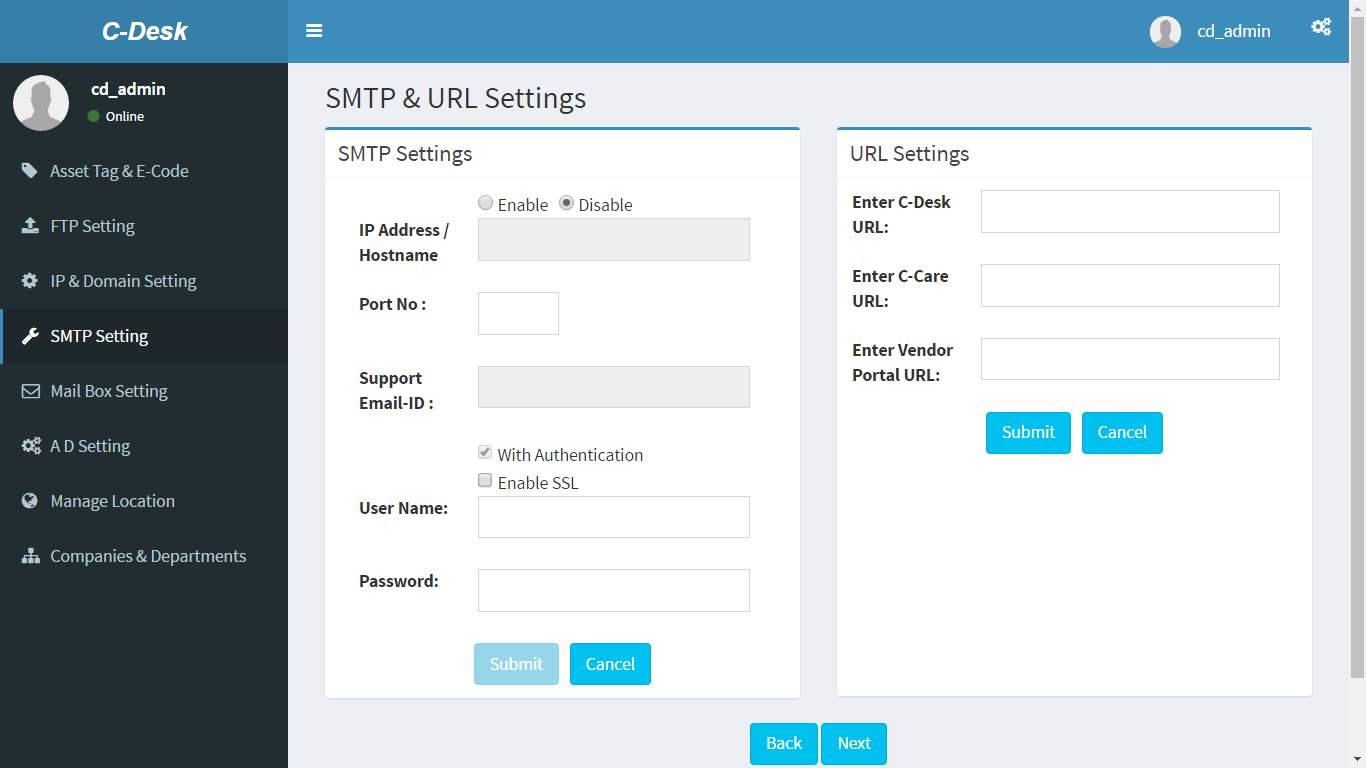
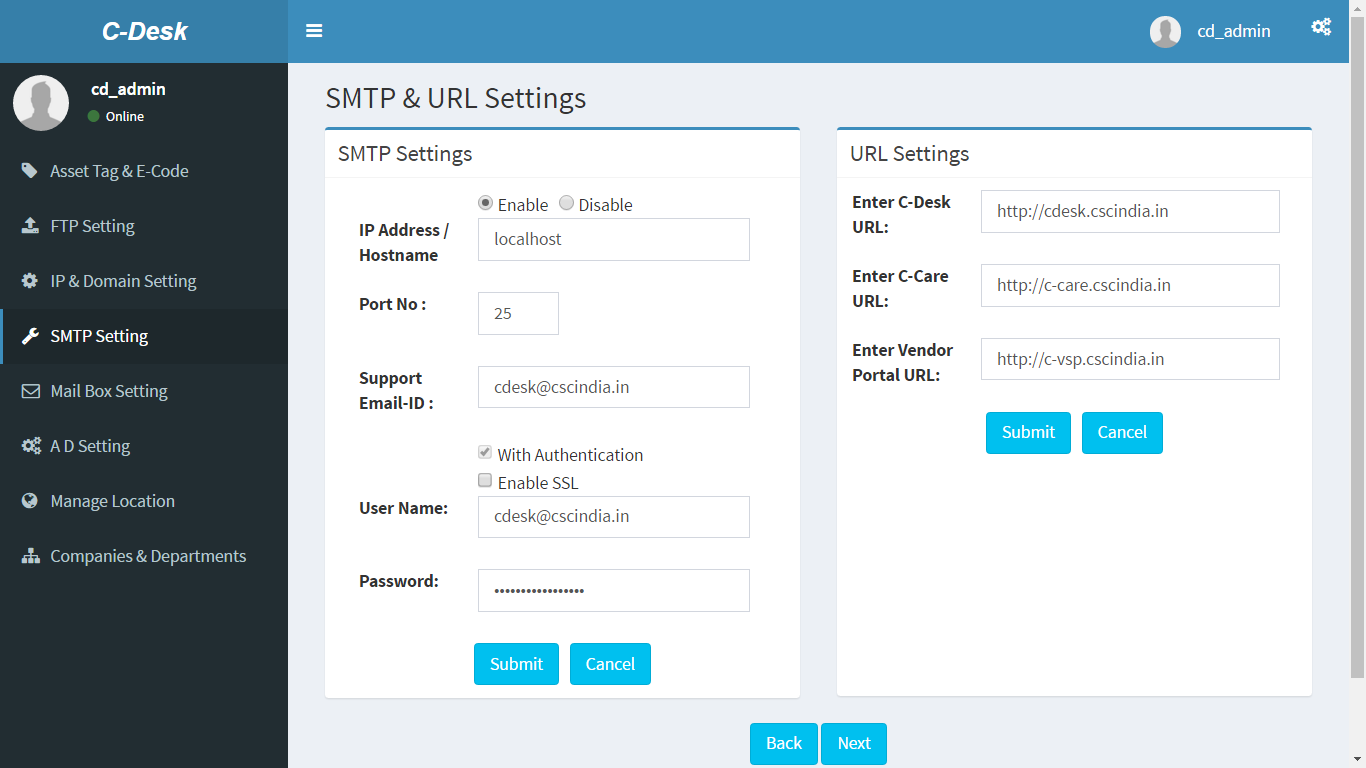
SMTP and URL settings
Please provide the
SMTP server settings SMTP authentication settings here. Also provide the URL
settings to access the C-desk application. this is used as a hyperlink in the
mails sent by C-Desk. Leave it disabled if you do not want the Application to
send mails to the users.
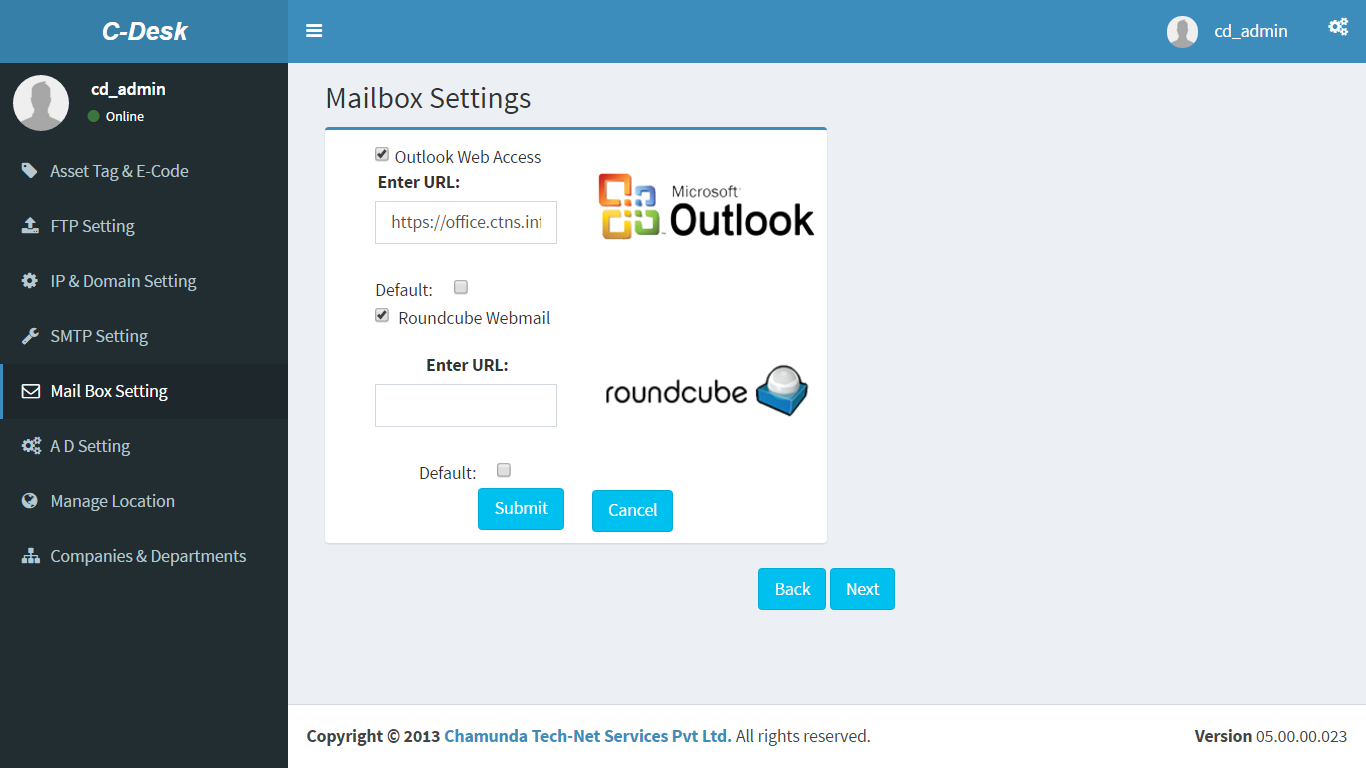
Webmail Settings
Provide access to your webmail server.
If you are using exchange you can select Outlook web access. Or if you are
using roundcube then you can use that. You can also use both if you have both
installed in your organization and set one as default. Through a user is
allowed to give his mailbox username and password manually once he logs on and
can select which one of the two he is using. This allows auto logon to the
webmail from the C-Desk Application.
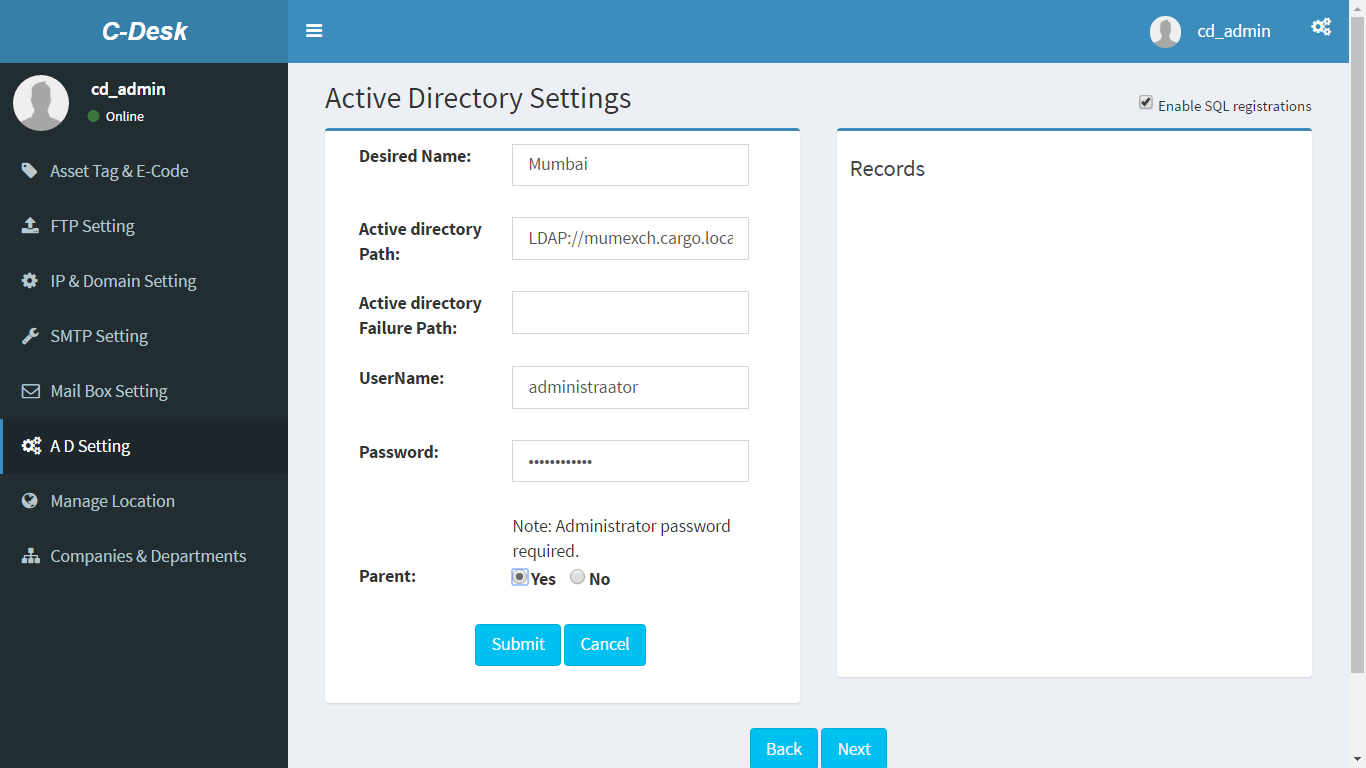
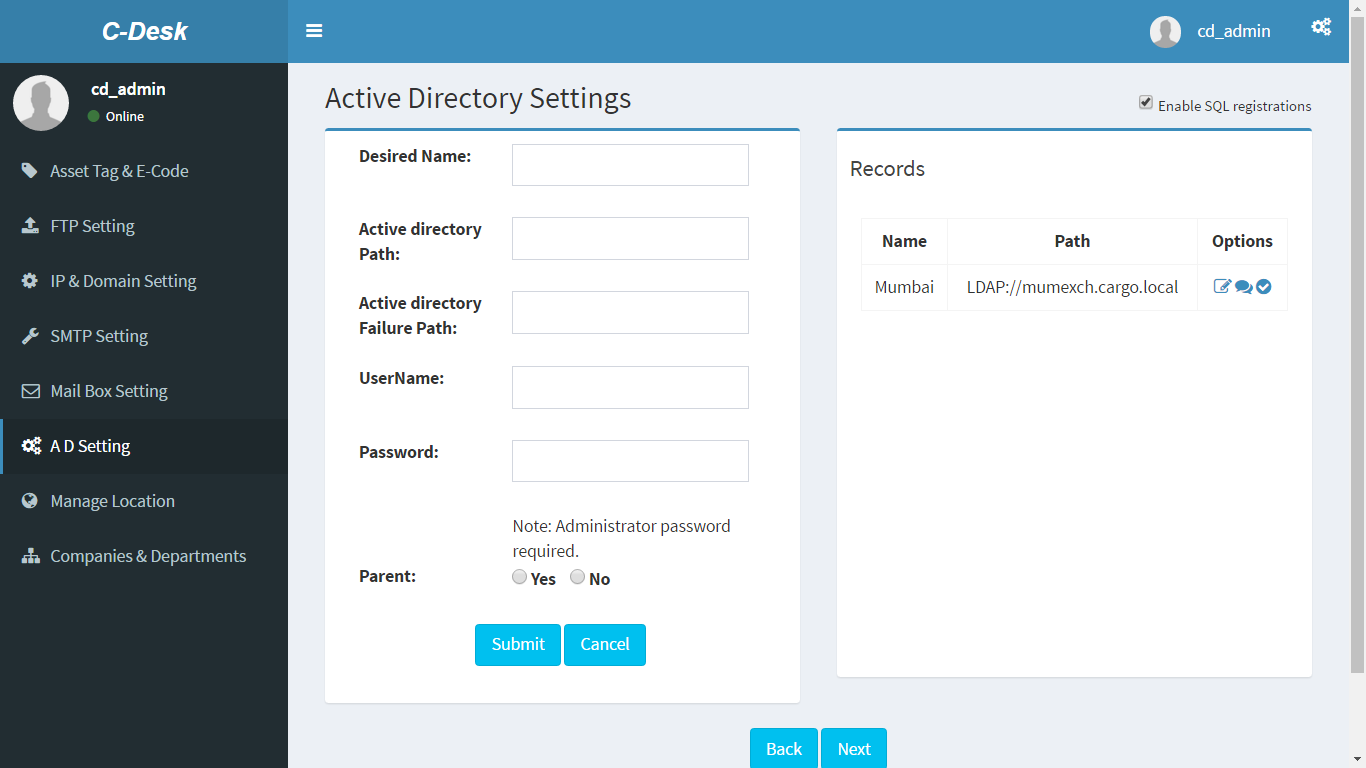
Active Directory Settings
This is very important since employee
can use same username and password to access this application. You are also
allowed to put multiple entries if you have a forest with more than one domain
controller or child domains. Ensure that you have access to the LDAP paths
defined here. The IIS server needs the access to all LDAP servers in your
organization. This also helps user to use the registration process.

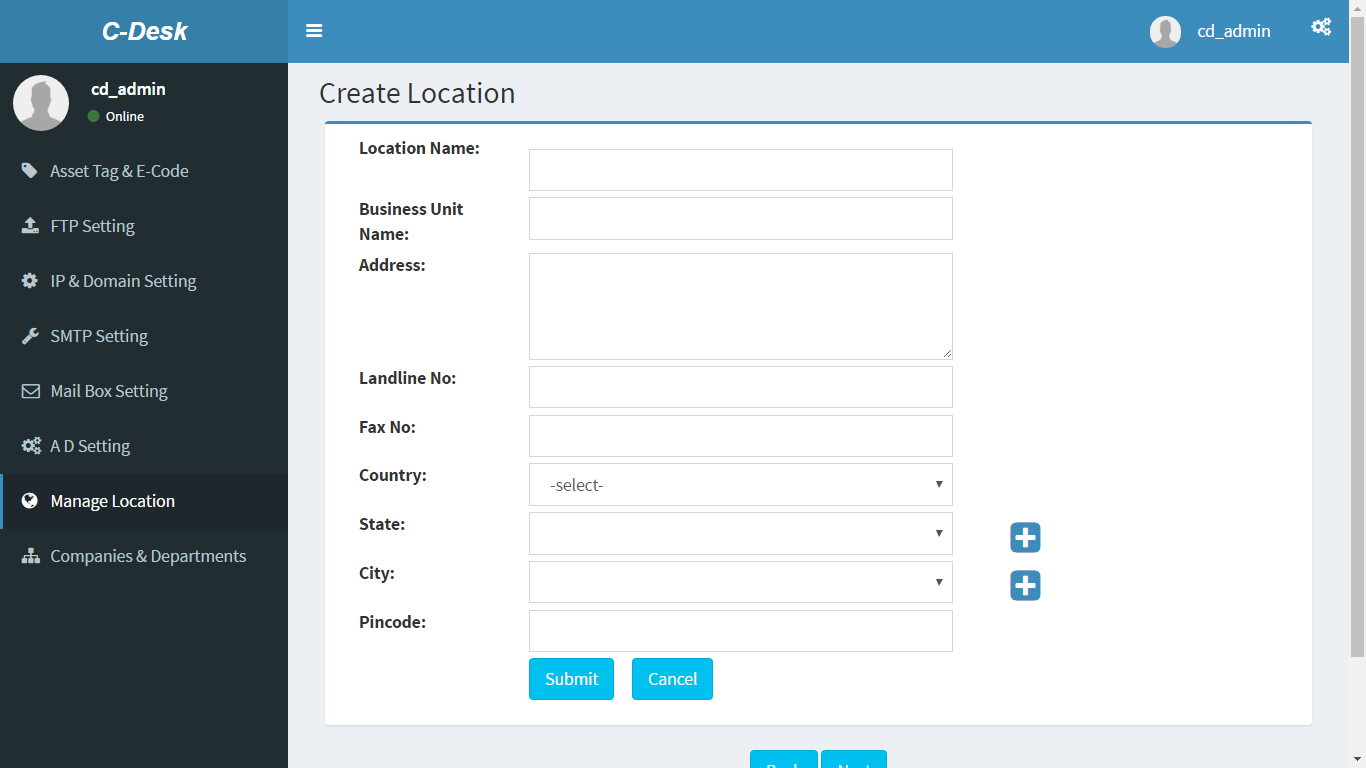
Create Location and Office
Create the First location and the
Office/Business Unit in that location. You can have multiple locations and
multiple offices/Business Units in each location. This is made since the
service request routes as per user location. So if the user requests for a
particular service. Then the request is routed to the person assigned for that
service category for that location.
Manage Companies and Departments
Here you
can create one or more companies. You should have at least one company to start
user registration process
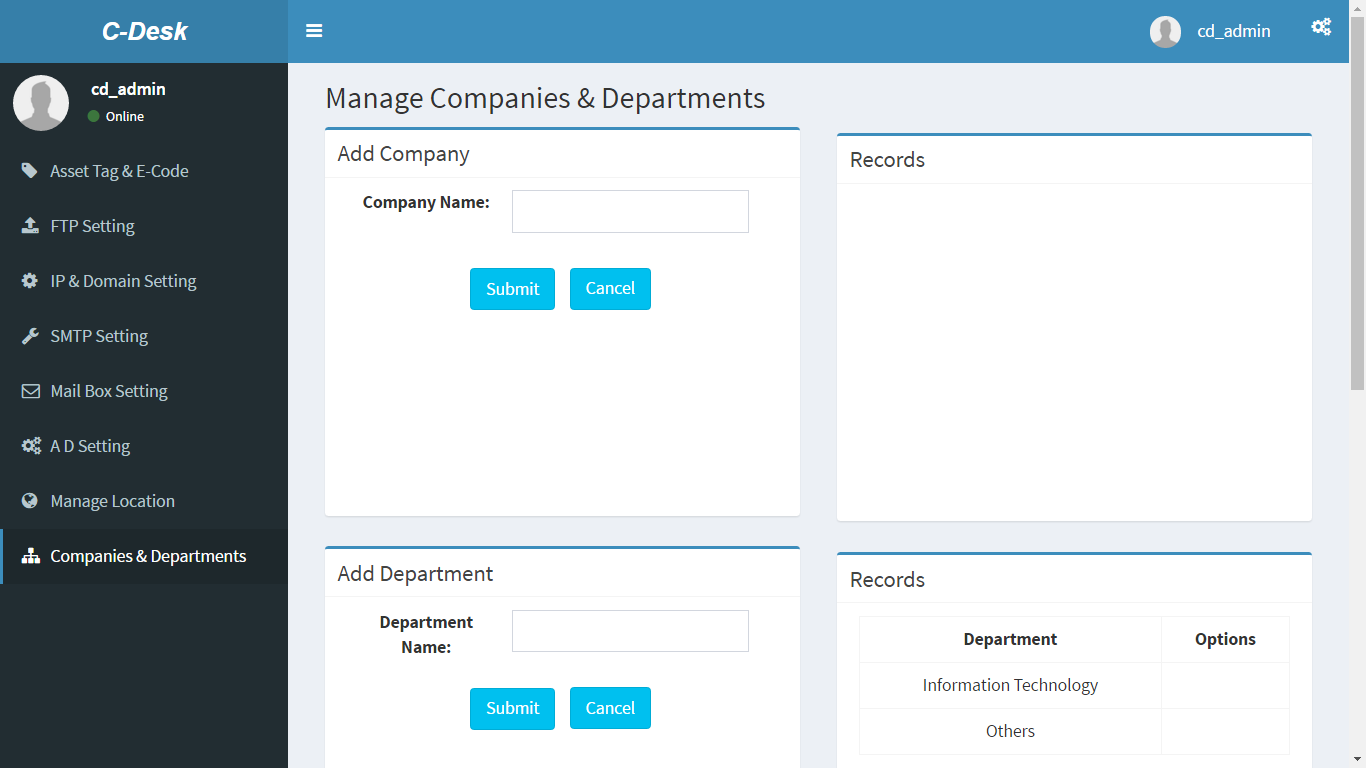
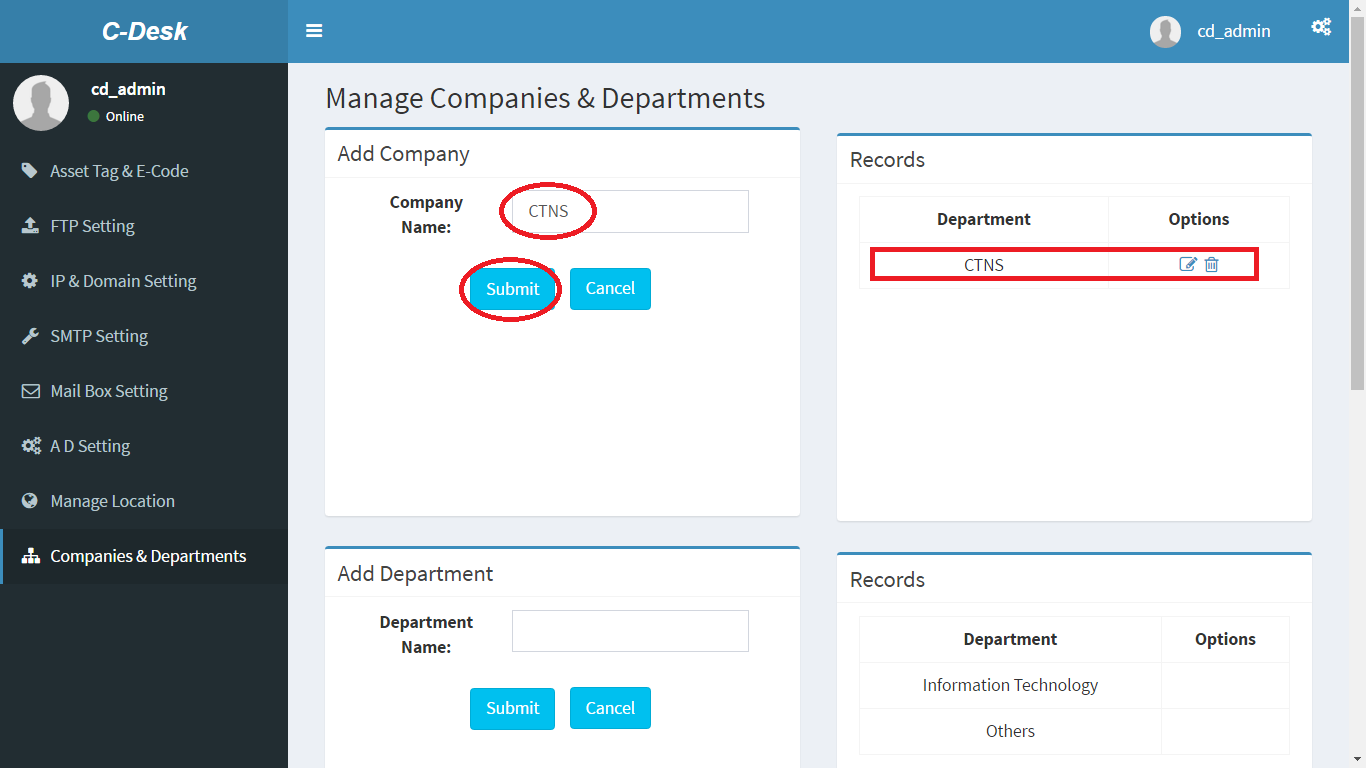
Enter company name
and click on submit to create company as illustarted in below figure.
Enter department name
and click on submit to create department as illustarted in below figure.
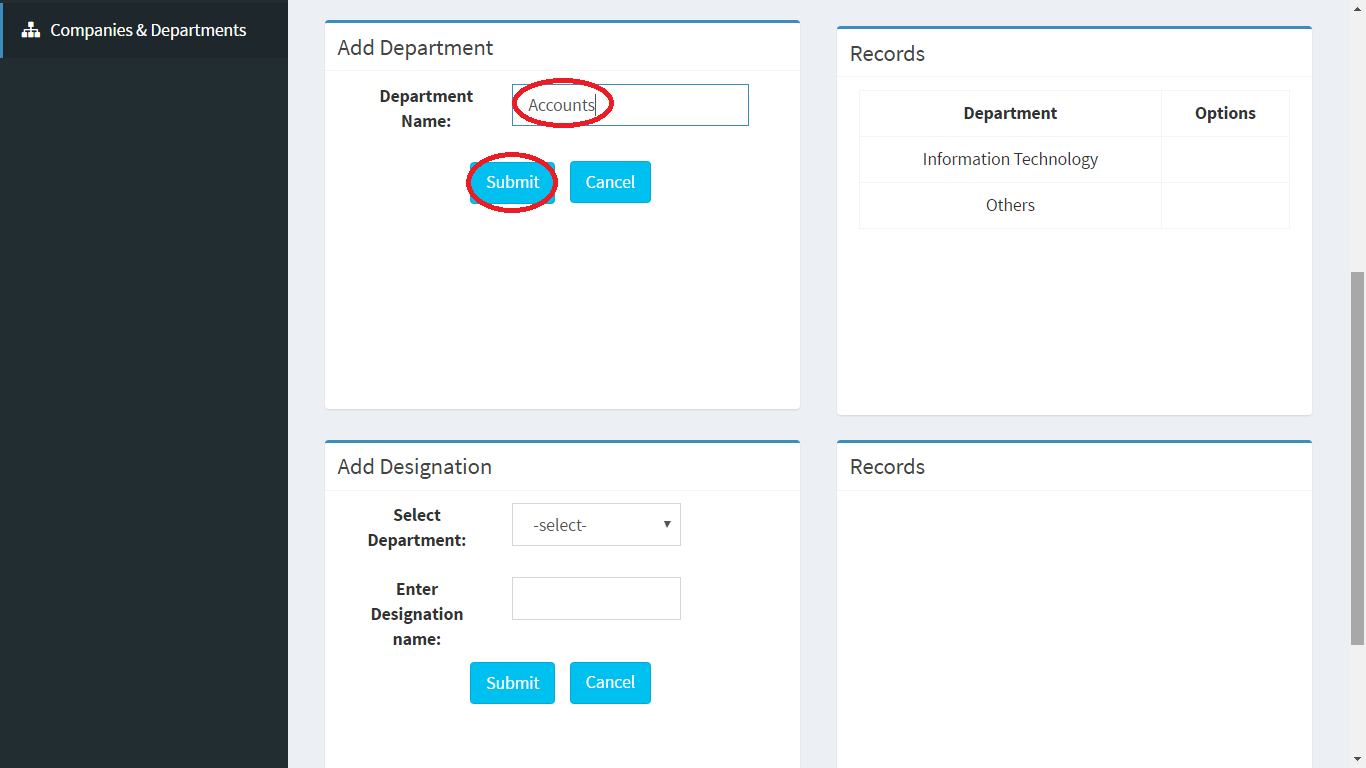
When you create department 2 default
designations will get added. Then you can add more designations as required.
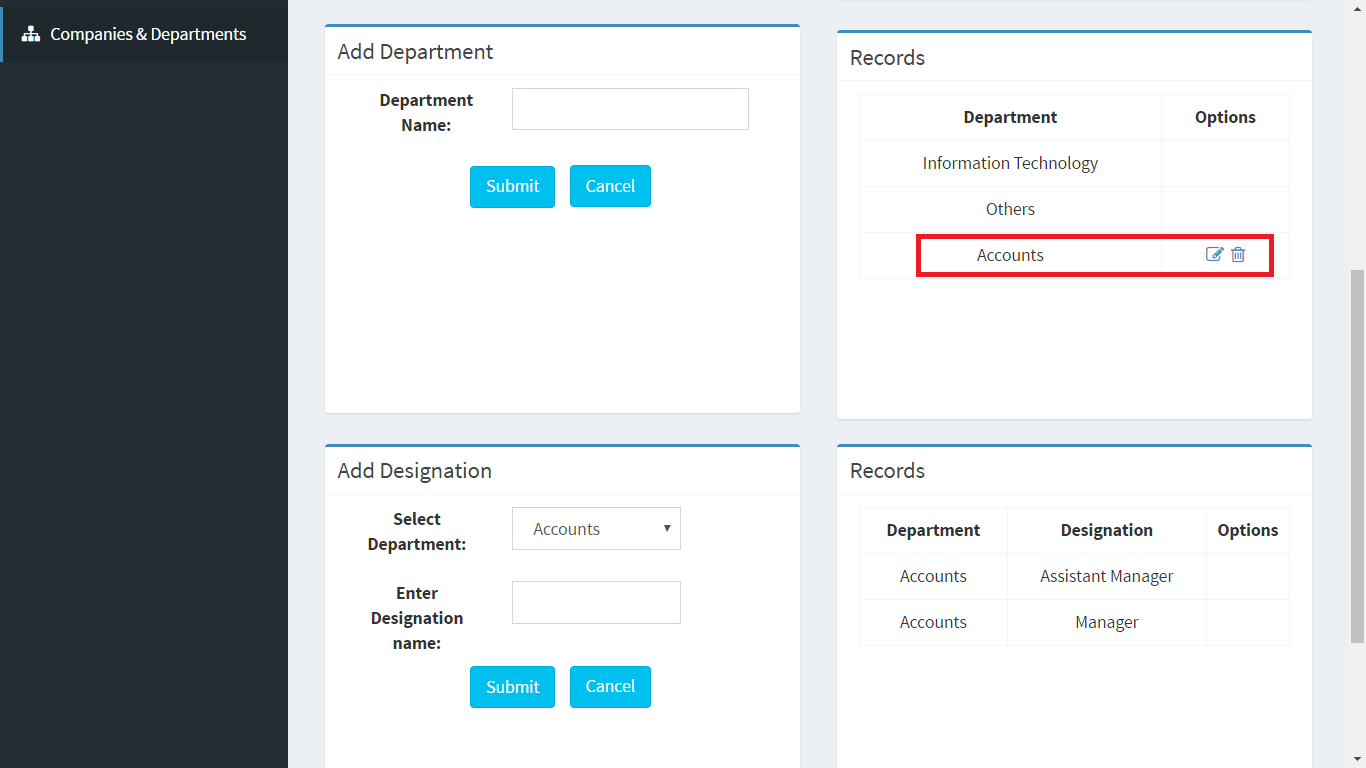
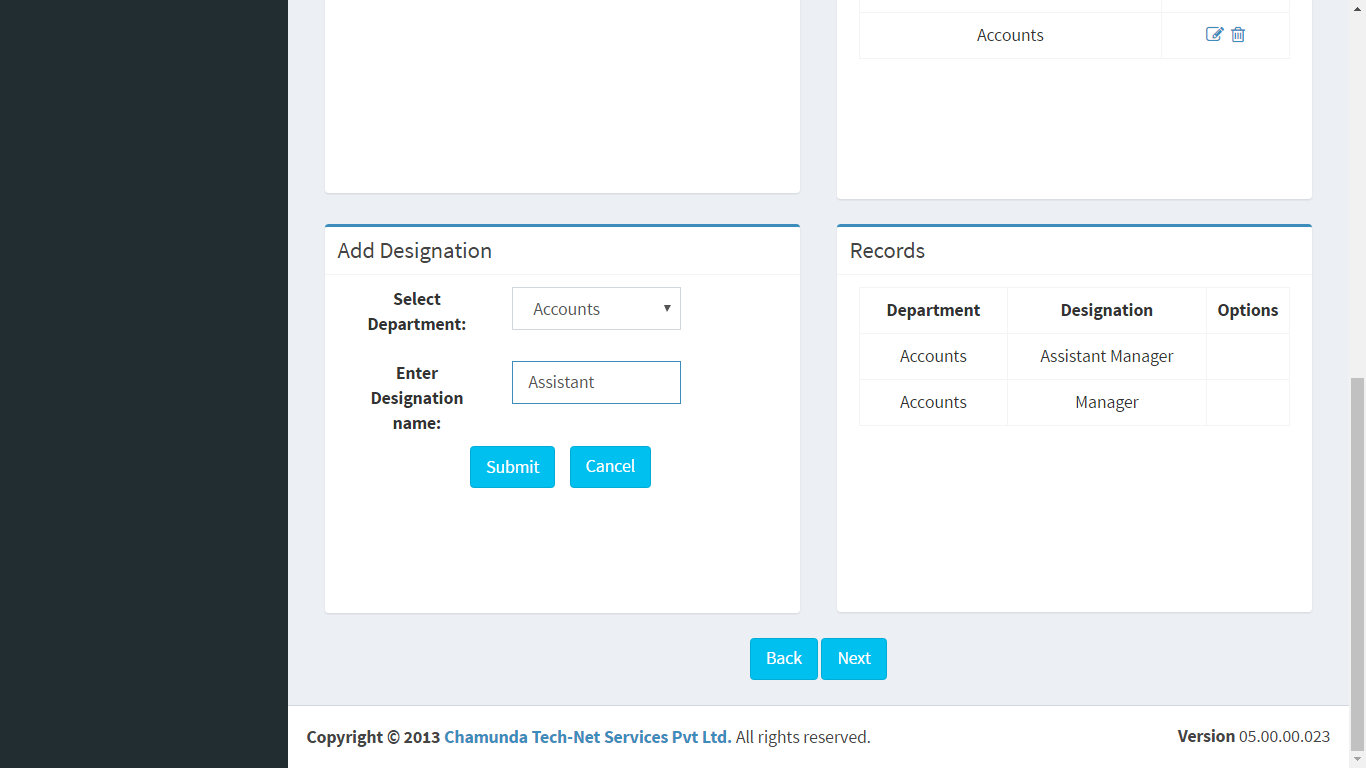
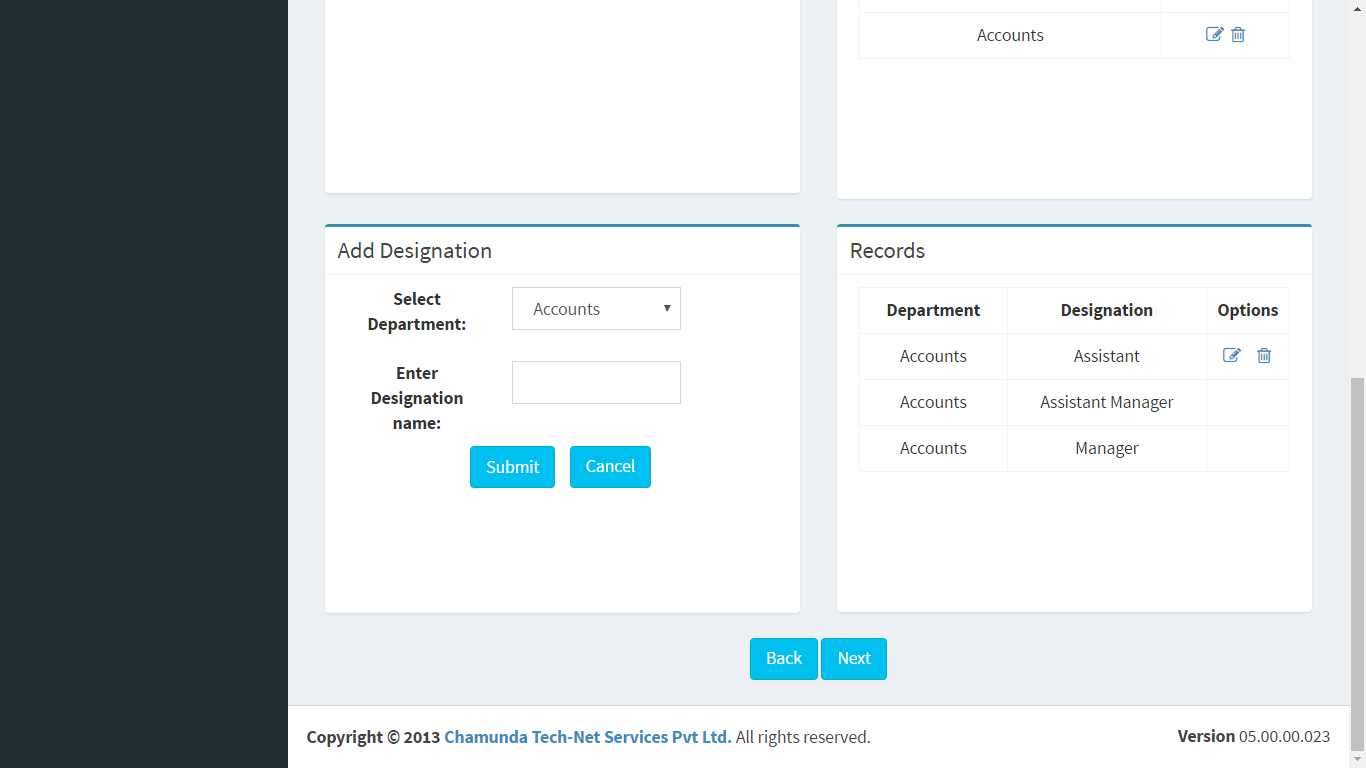
Select the Department and add
designations
Registration Process
We are now ready for the registration
process
Ensure you have all locations and
offices defined in the application (Go to manage locations) so that user can
select right location, office and right department, designation while
registering himself. Also ensure that the LDAP settings are provided for the
domains where users are authenticating, so that he can use his username and
password for the registration process.. For users who are not authenticating to
any domain controller IT manager or administrator can create accounts from
manage user and provide the user with the username and password..
For Successful usage of the
application we would suggest first to get the users registered who provide
services to other employees and whom we need to assign categories. Also
register the IT Manager for all location and IT managers of Specific locations.
Similarly register engineers for all locations and specific locations. Now
before registering all other users create service categories department wise
any service types. Also assign these categories to right people of right
location. Now when user first registers and comes to the application he will
have some data to register his service requests. Also we would suggest to have
some KB data to be feed and some photo gallery album to be created with some
pictures. This would bring interest to users to surf through the application.
So create some general notice, some upcoming events if you have then feed that
data..
Now for users who have account with
the domain controller and the LDAP settings for those domains if you have done,
then you can directly give them your application URL. They can put their
username and password and application will verify the password from the right
AD and pull the data from the domain controller and bring up the registration
form. They will not have the key so not to worry; they shall get the key once
they register will the application. Go through the snap Shots below..
Enter AD username and password
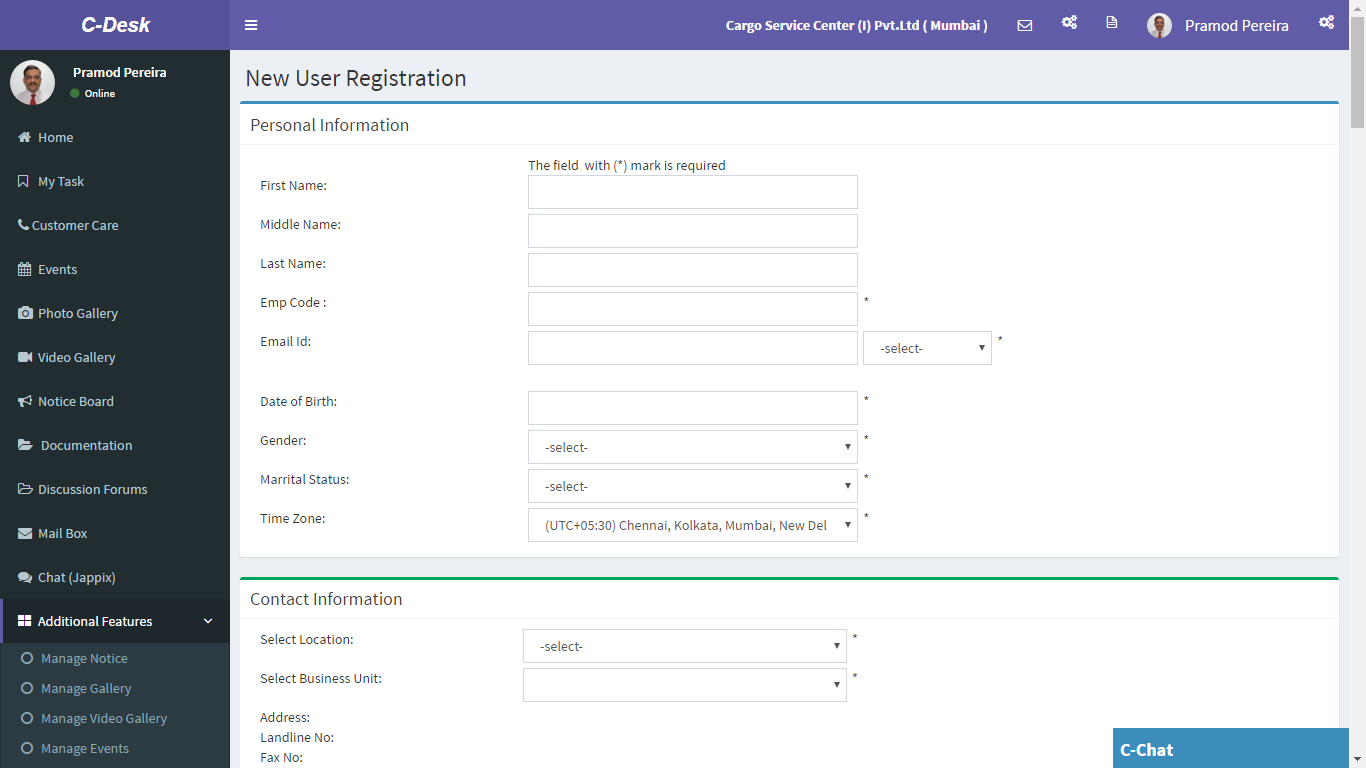
You will get redirected to
registration page if you are not registered yet.
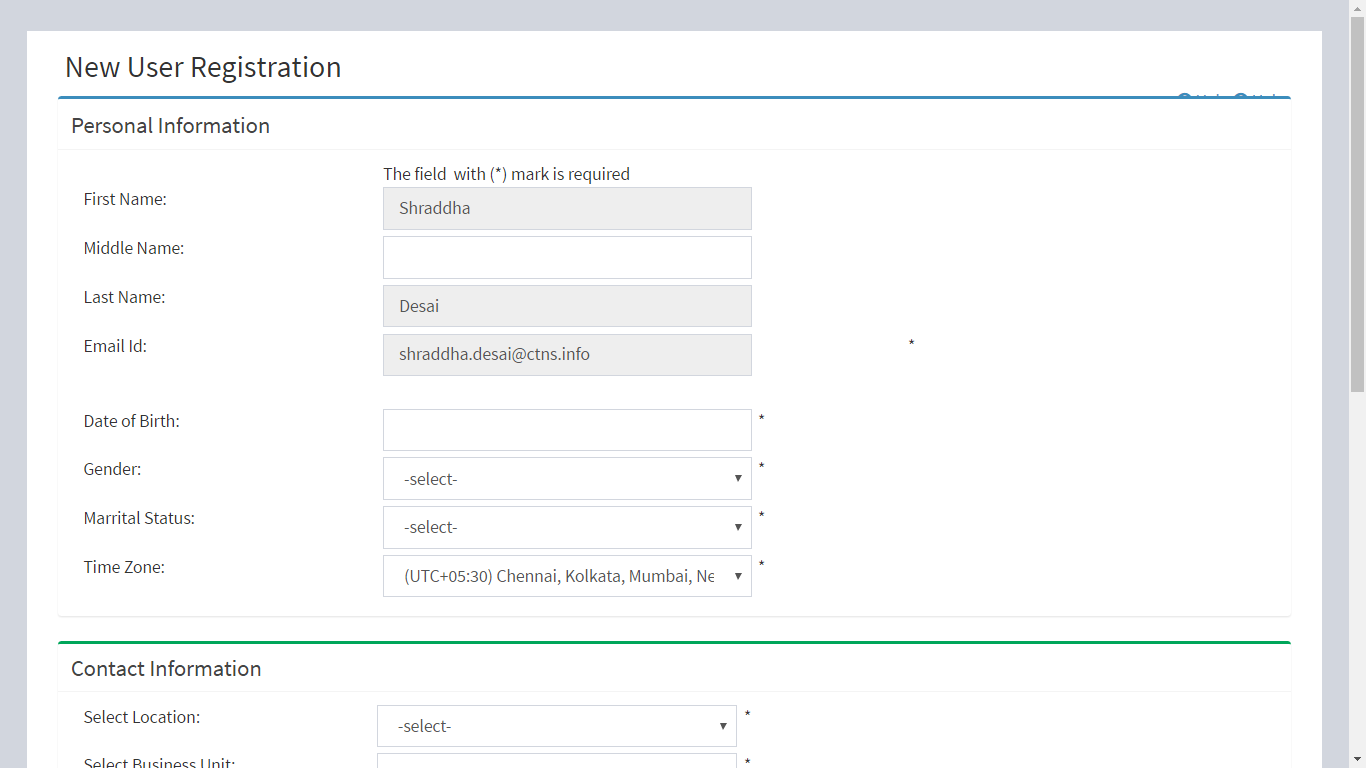
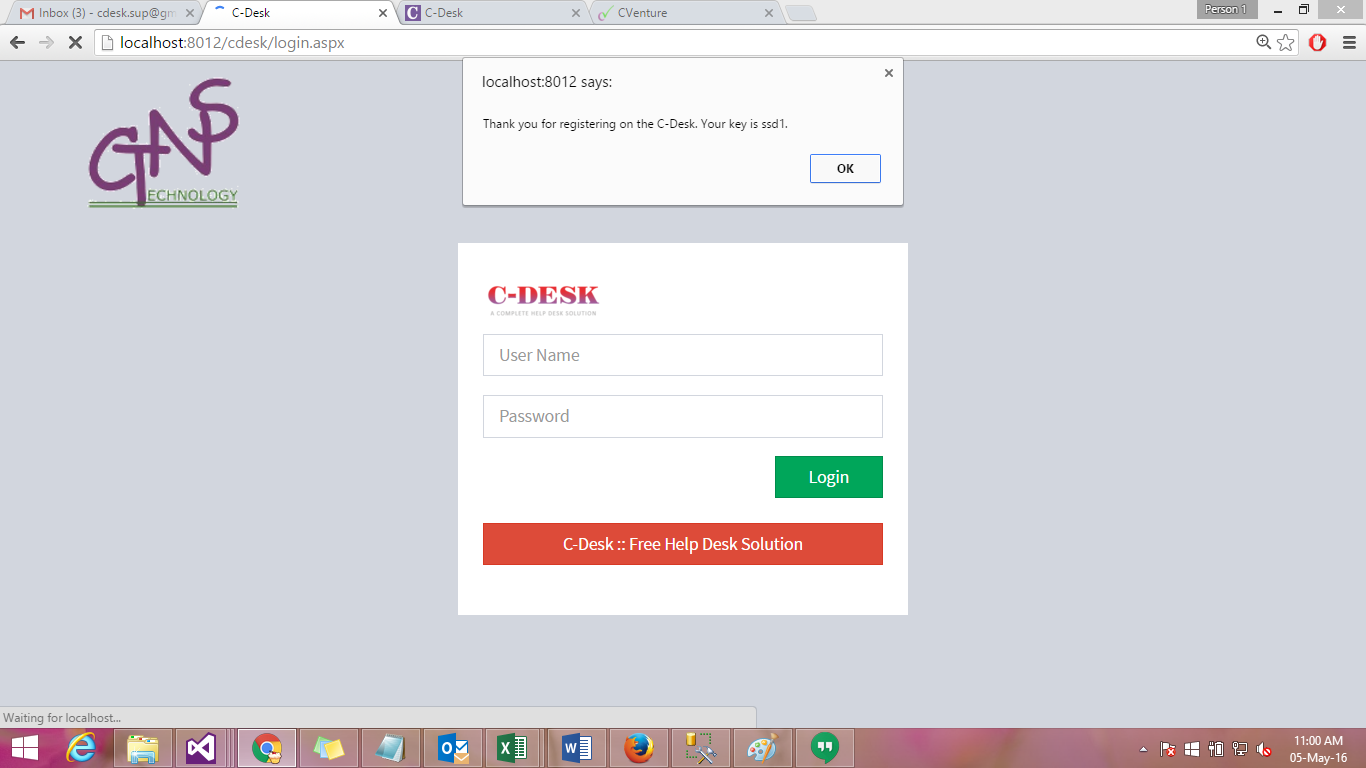
On successful registration user shall
get his key..
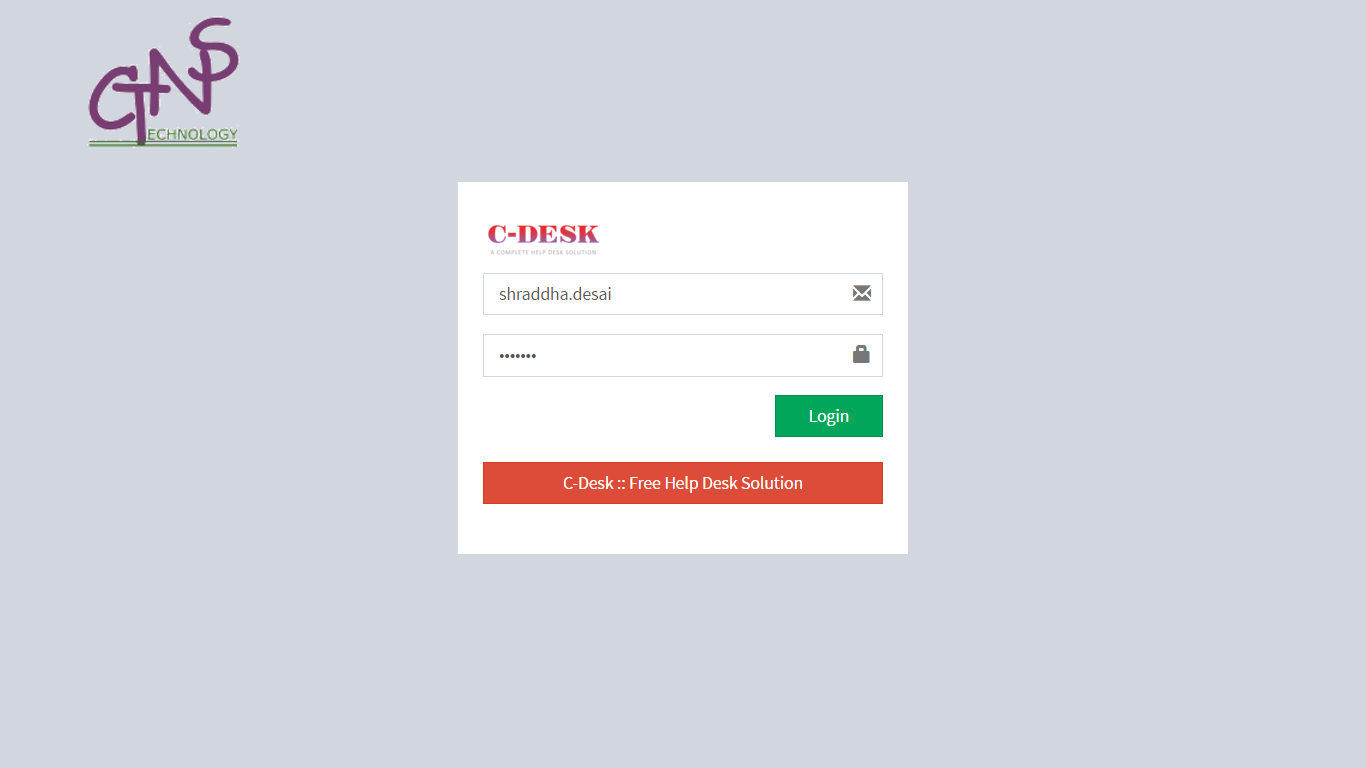
Also if the user is already registered
once. He can just put his username and password and the application will return
with his key.
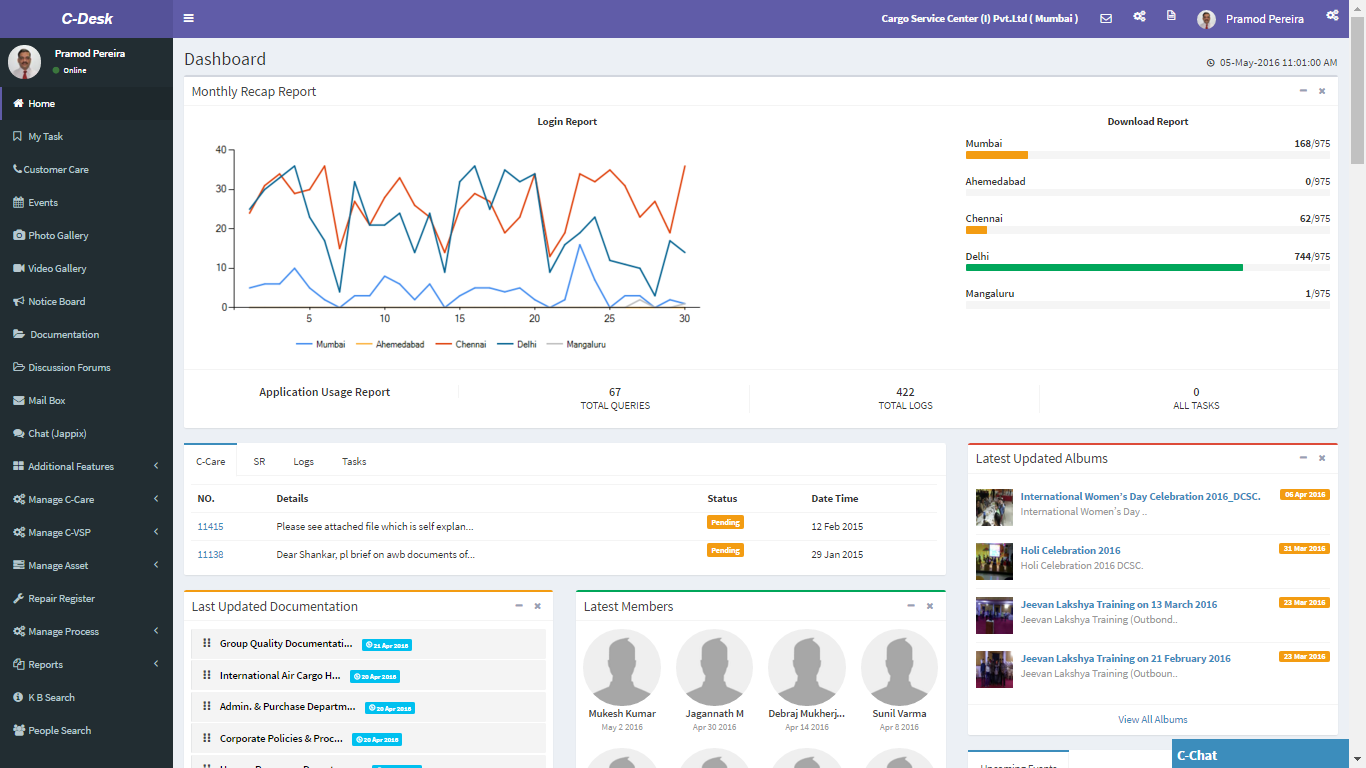
Now after registration, user can put
his username password and the Key. And user will be on his dashboard after
successful login. (If you are using only one type of authentication i.e. either
AD authentication or SQL authentication then “key” textbox will not get
displayed. If you are using both AD & SQL authentication then only “key” is
mandatory.)
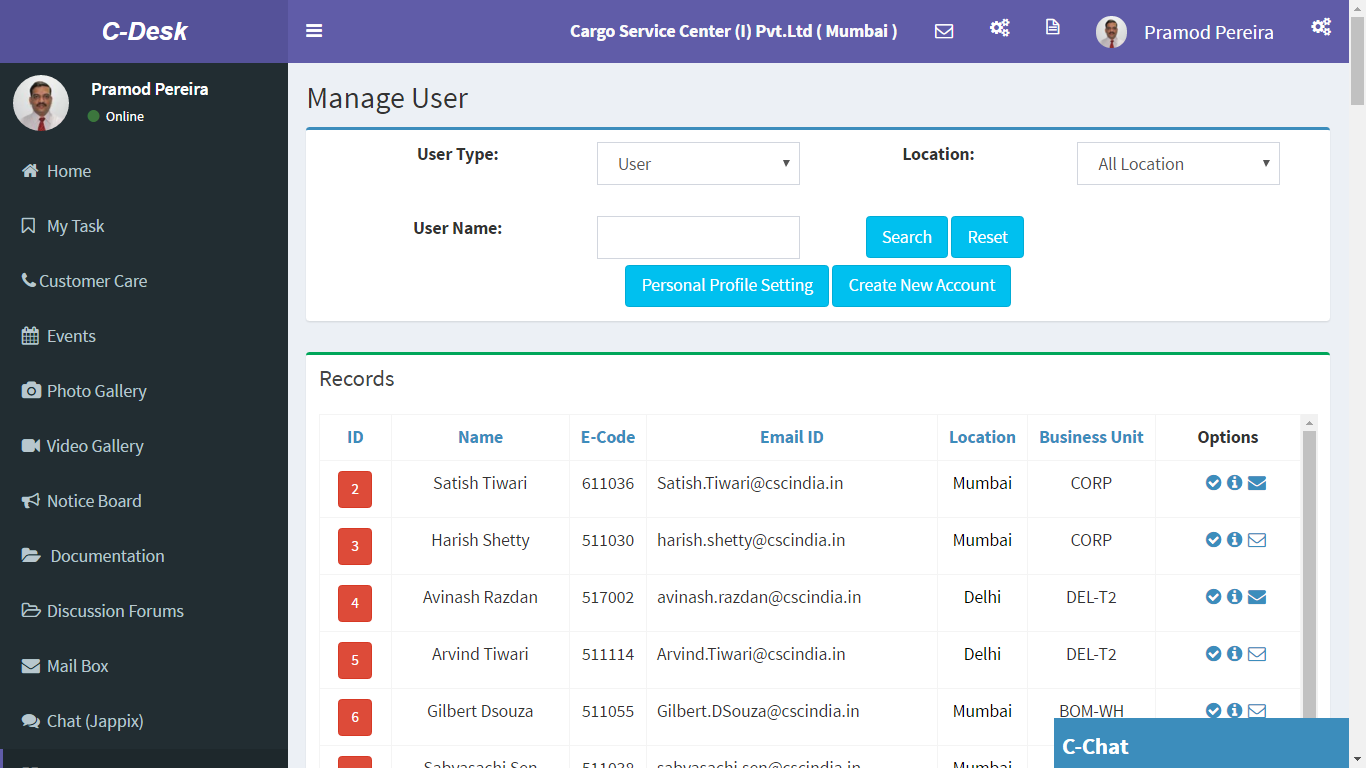
For users who do not have an AD
account or his LDAP server is not registered in the application we can create a
regular account for him from manage user. Go to manage users and click on
create account.
Later on when the users LDAP server
registered with the application a regular account can be converted to the AD
Account from manage users.
Upgrading C-Desk to next version
To update
C-desk to new version perform following steps:
Step 1:
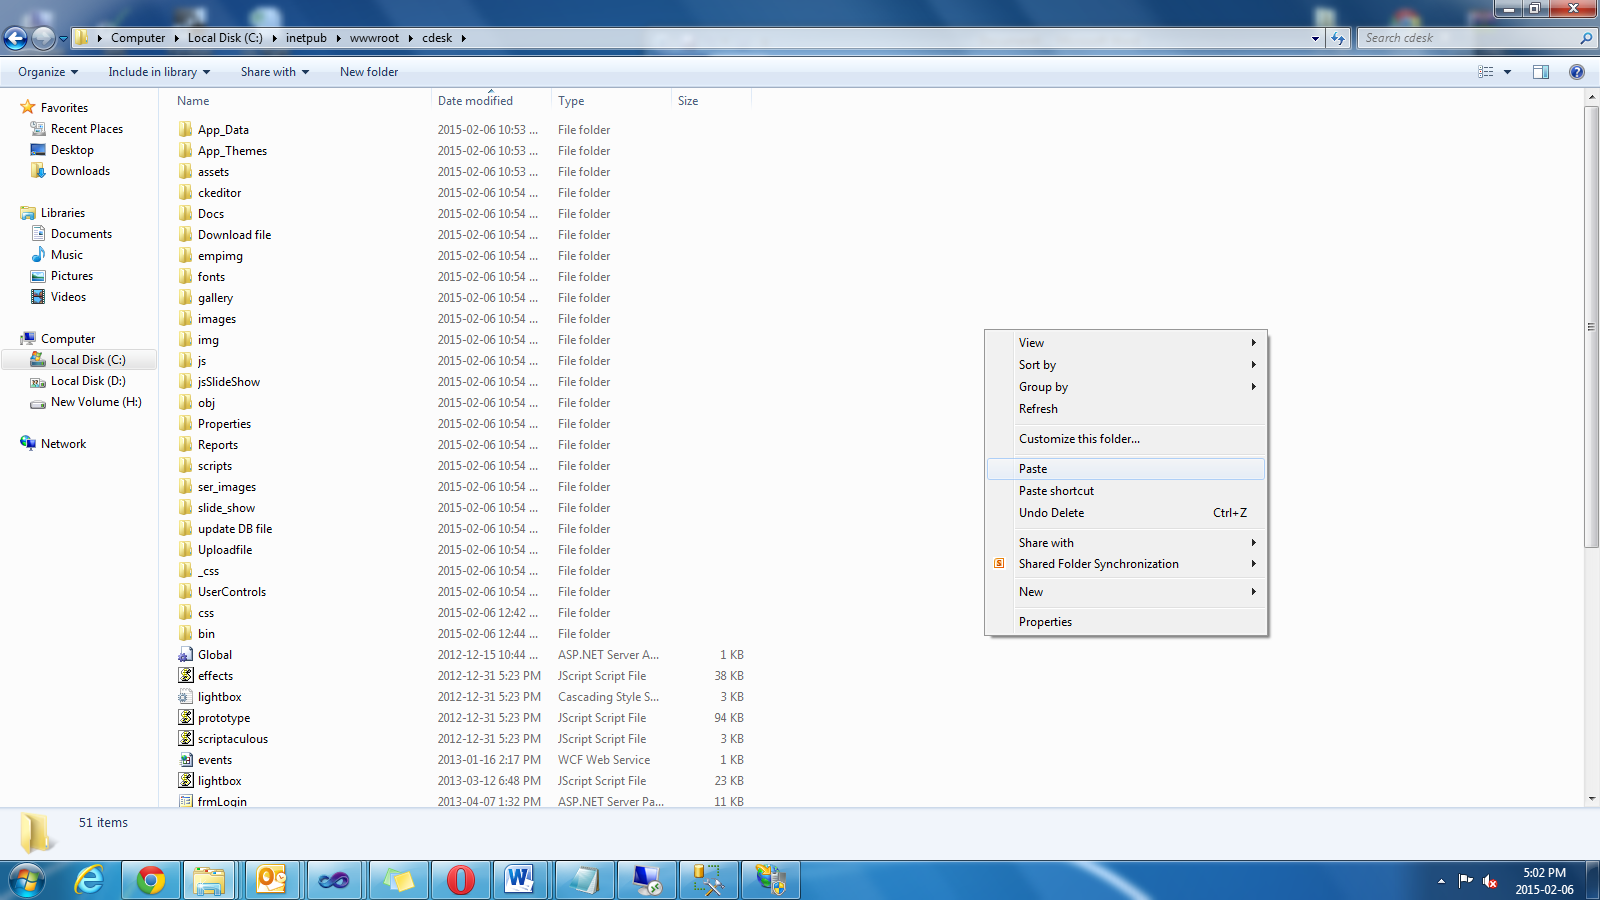
Extract downloaded .zip file. Go to cdesk folder; copy all files and folders
except folders ‘Download file’, ‘gallery’, ‘Uploadfile’ and web.config file.
Step 2: Go
to IIS explore your C-Desk website.
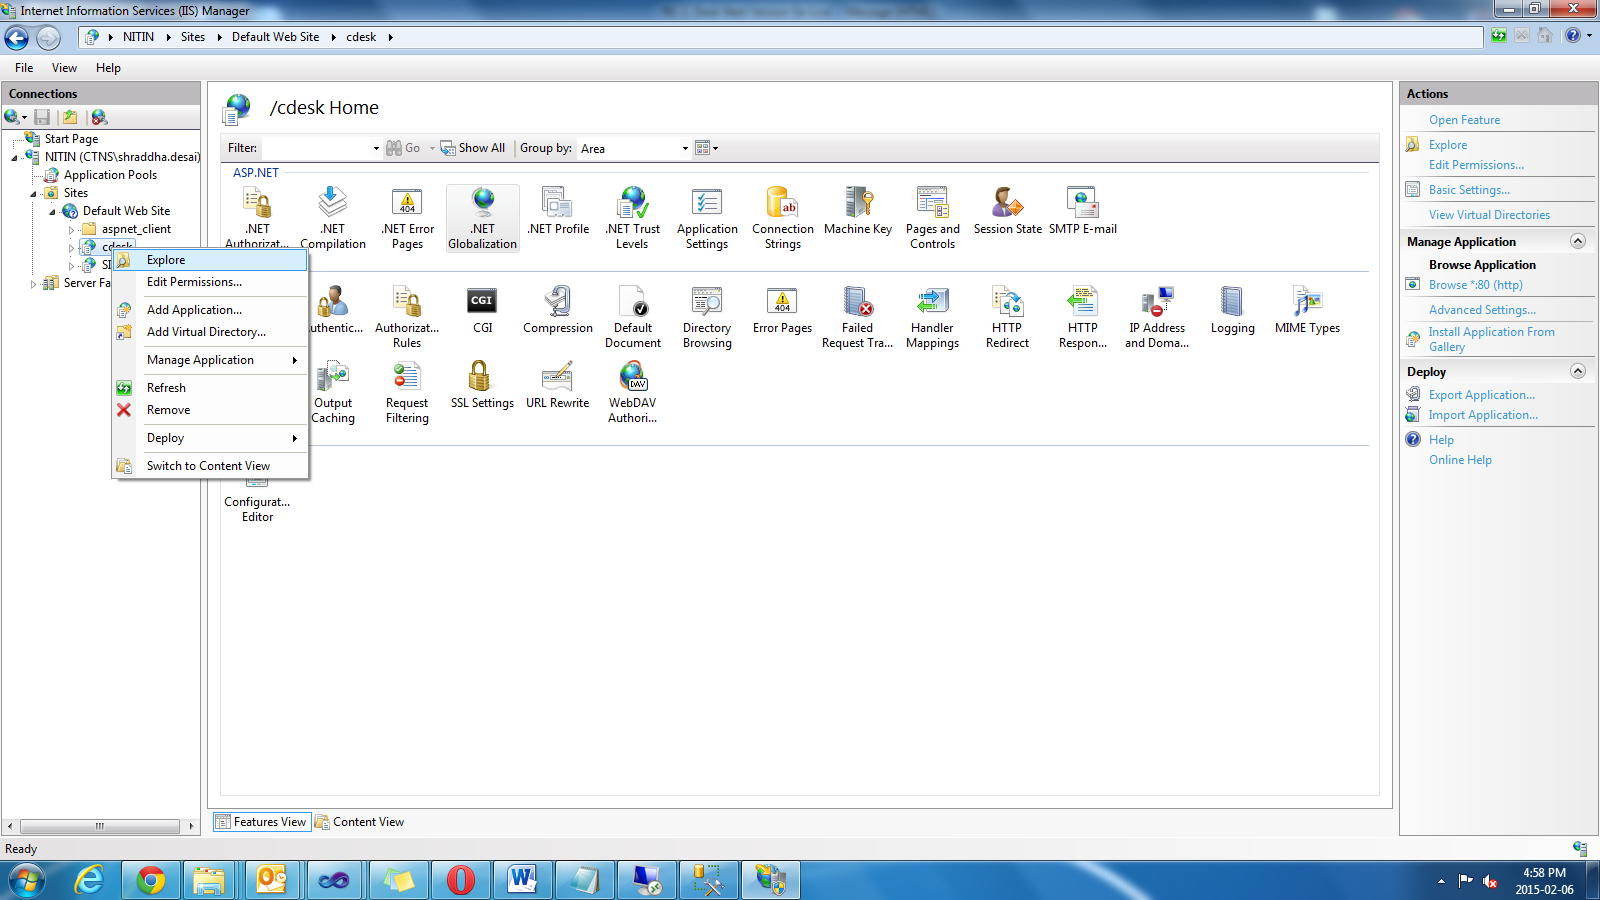
Step 3:
Replace all new files in your folder.
Step 4: Go
to IIS again and browse your C-Desk application.
Step 5: It
won’t show you login page instead ‘Version mismatch’ page will get loaded.
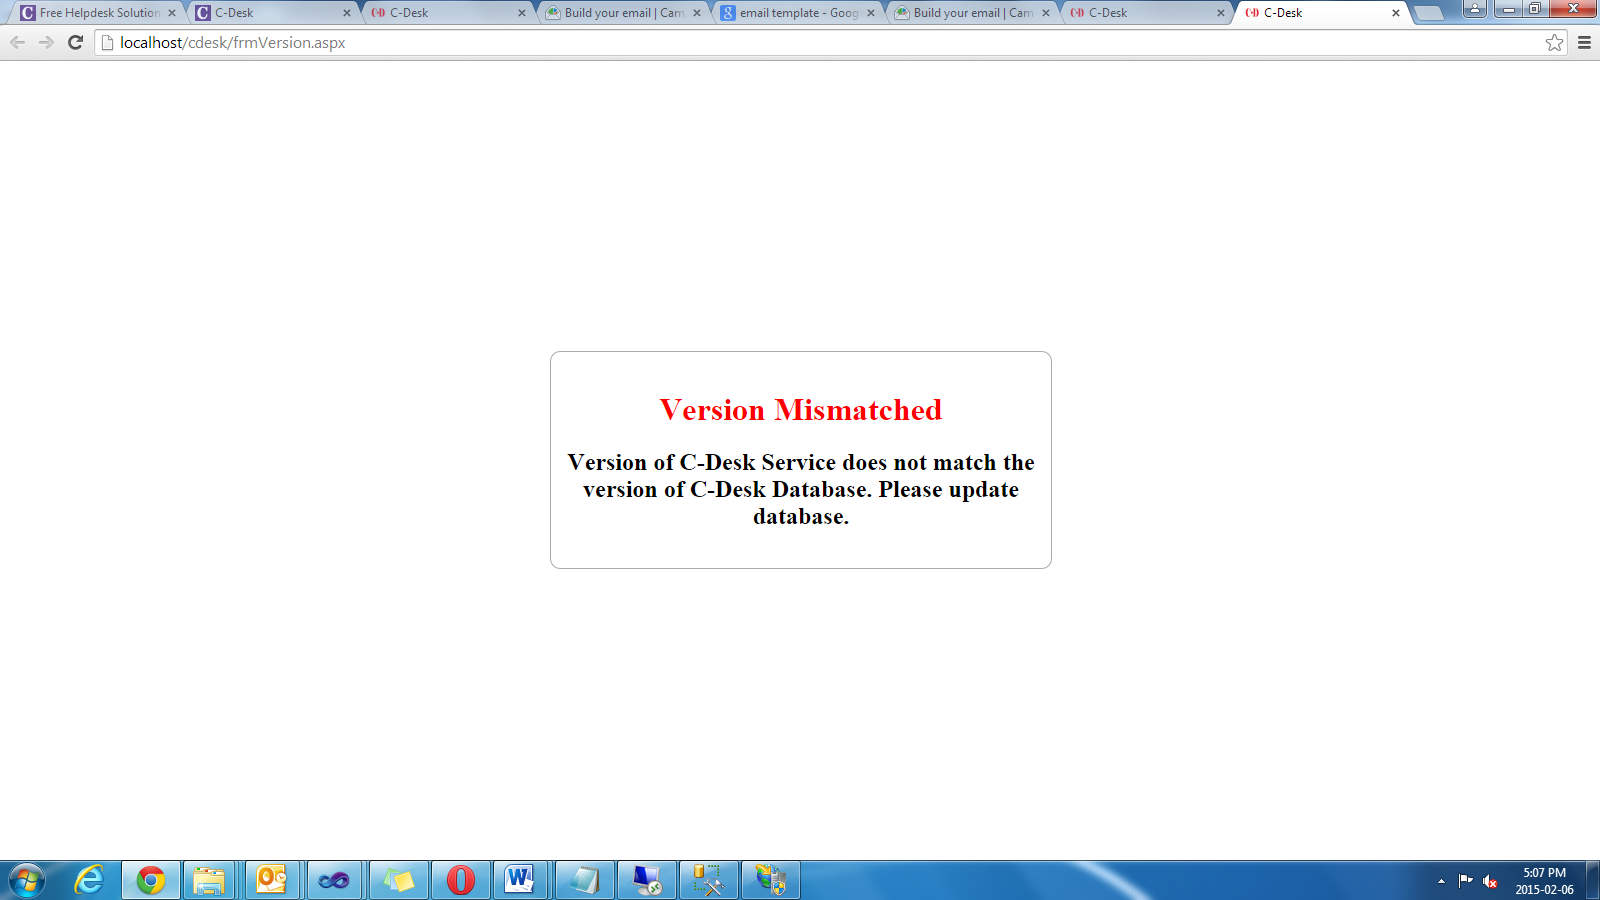
Step 6: Go
to service.aspx to update database. Click on ‘Update Database’ button. After
updating database successfully go to login.aspx
Configuration file changes for HTTPS
If you need to
configure application over HTTPS, you should do some changes in Web.config
File. Sample file is included in folder [filename Http-Web.config ]for your
reference.
There are three changes in Web.config
file..
1.Change all http addresses to https
2.In bindings [tag] you need
to add
<security mode="Transport">
<transport clientCredentialType="None"/>
3.In service behaviours
<serviceMetadata httpsGetEnabled="true" />
Please refer following link to configure multiple sites with SSL.
https://www.digicert.com/ssl-support/ssl-host-headers-iis-7.htm
Step 1:
1.Go to www.cdesk.in and login with your username
and password .. or register your organization and get a username and password..
. Go to download section and Download the C-Care ZIP..
1.Go to your IIS manager.
2.Select your website to deploy
application.
3.Select “Deploy” à“Import application”.
4.The “Import Application
Package” wizard opens and shows the “Select the Package” dialog box.
5.In the ”Package path” box, Browse
and select your.zip file from the location where you downloaded
6.The “Select the Package”
dialog box resembles the following illustration:

7.Click “Next”.
8.The “Select the Contents of
the Package” dialog box is displayed as shown in the following illustration:
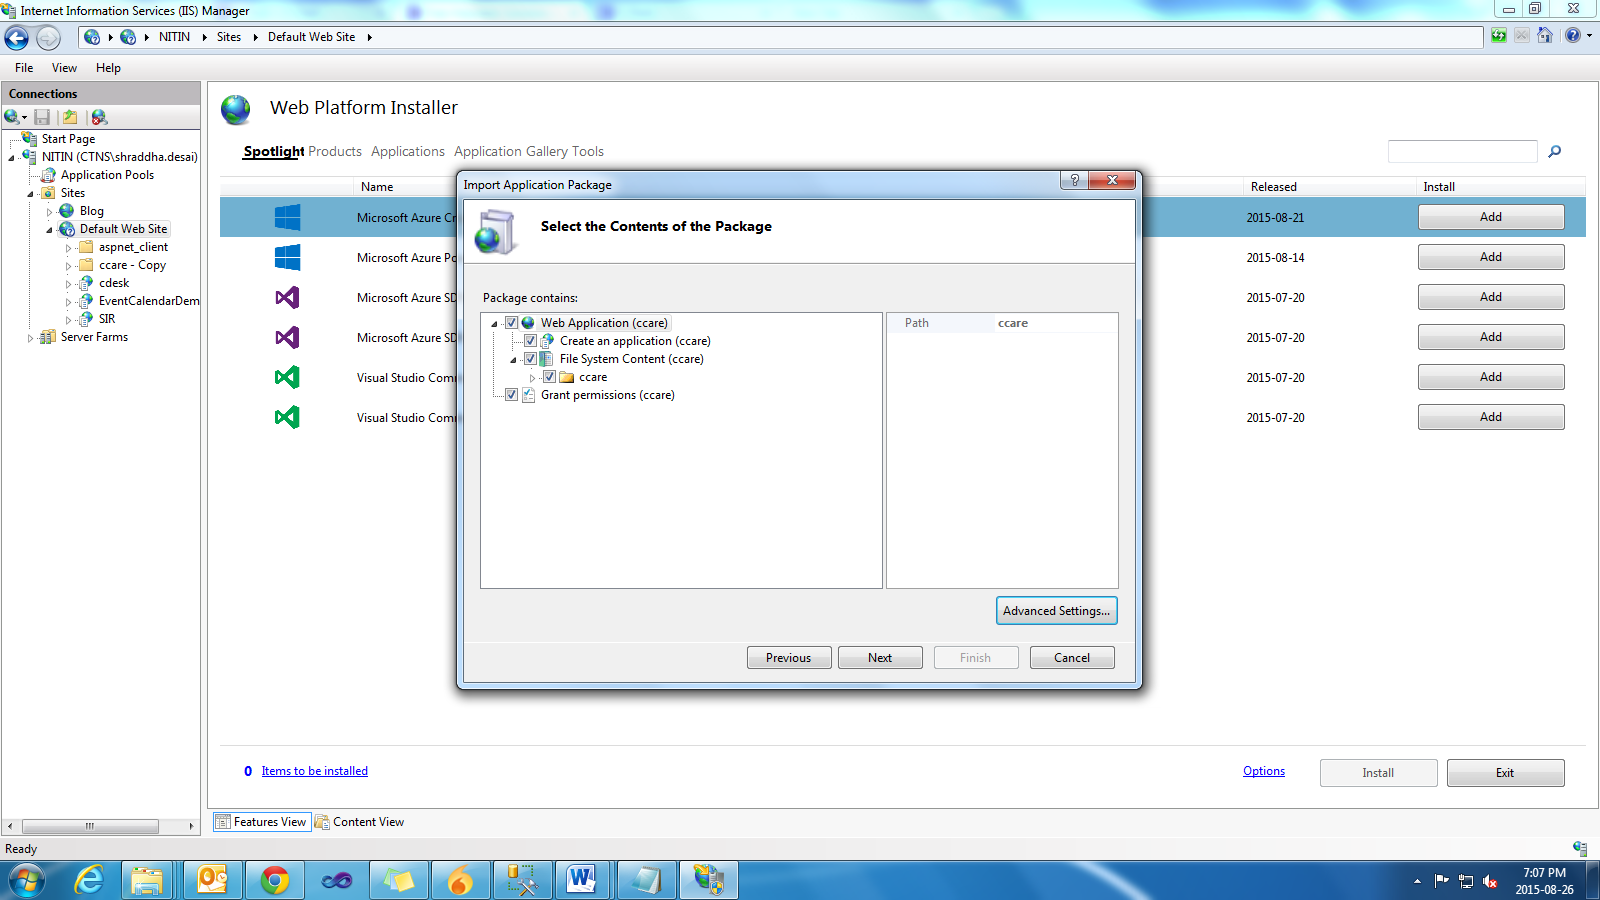
9.Click “Next”.
10.The “Enter Application
Package Information” dialog box is displayed as shown in the following
illustration:
11.While “Web Deploy” installs
the package, the Installation Progress and Summary dialog box is displayed. The
dialog box shows a progress bar during the installation process. When the
process is complete, the dialog box shows a log of what was done, as shown in
the following illustration:
12.Right click C-Care site and browse
You should get the login page.
1.Go to your “IIS manager” and
add a site
2.Go to “IIS” and add website..
Or if you have “web deploy” installed you can directly import the application
Point the physical path to the ccare
folder and define the Port. Or the host header value for your ccare app
Similarly add new site for C-Care
and point the physical path to ccare folder. Use port 80 and provide the host
name so that we can access the host from outside. Remember to open port 80 on your firewall and point it to the server.
Also remember to add required DNS entries for the host name in your DNS setting
at hosting panel.
Right Click the ccare
site created and explore
Edit Web.config
Modify the Client endpoints
Ensure the Application pools used by ccare
is running on .net framework 4.0
Step 1:
1.Go to www.cdesk.in and login with your username
and password .. or register your organization and get a username and password..
. Go to download section and Download the C-VSP ZIP..
1.Go to your IIS manager.
2.Select your website to deploy
application.
3.Select ‘Deploy’ à ‘Import application’.
4.The “Import Application
Package” wizard opens and shows the “Select the Package” dialog box.
5.In the ”Package path” box, Browse
and select your.zip file from the location where you downloaded
6.The
“Select the Package” dialog box resembles the following illustration:
7.Click “Next”.
8.The
“Select the Contents of the Package” dialog box is displayed as shown in the
following illustration:
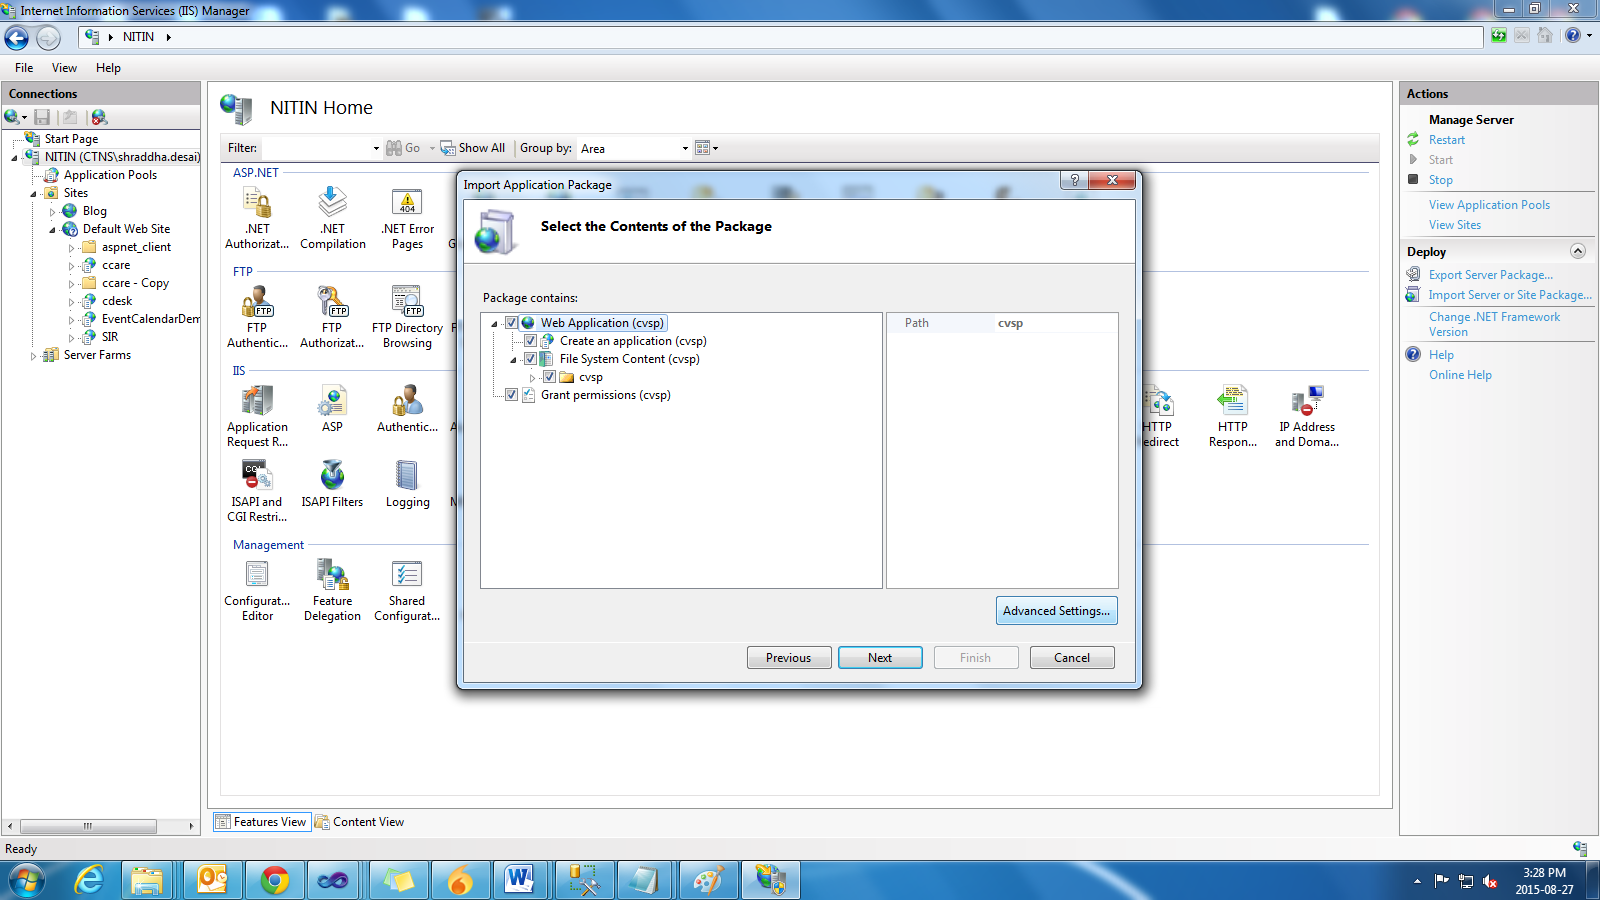
9.Click “Next”.
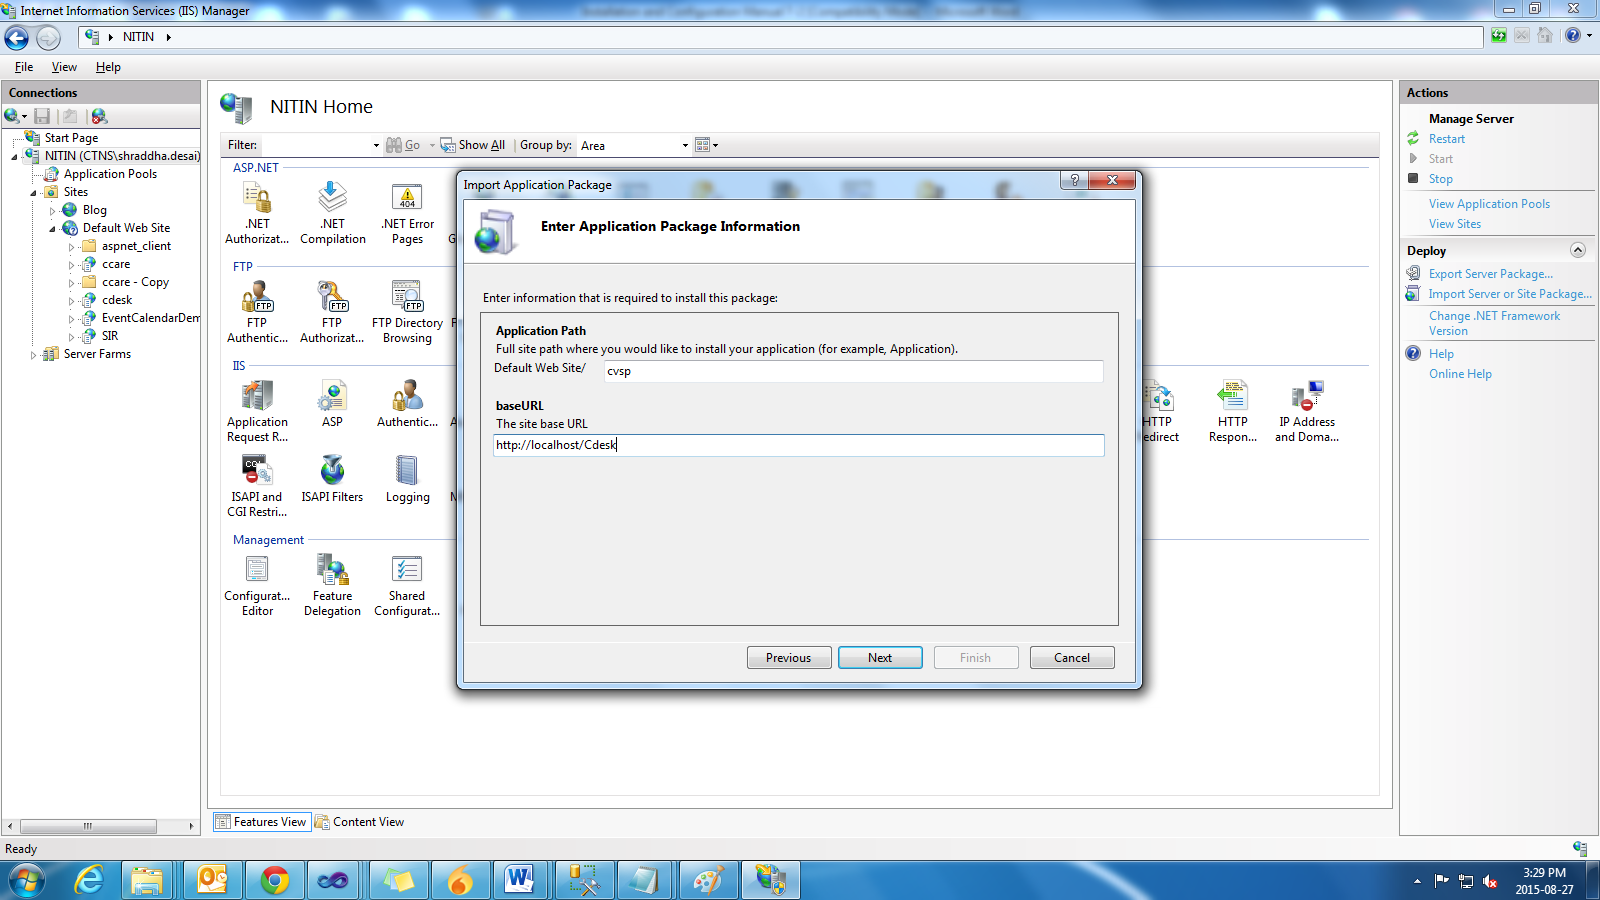
10.The
“Enter Application Package Information” dialog box is displayed as shown in the
following illustration:
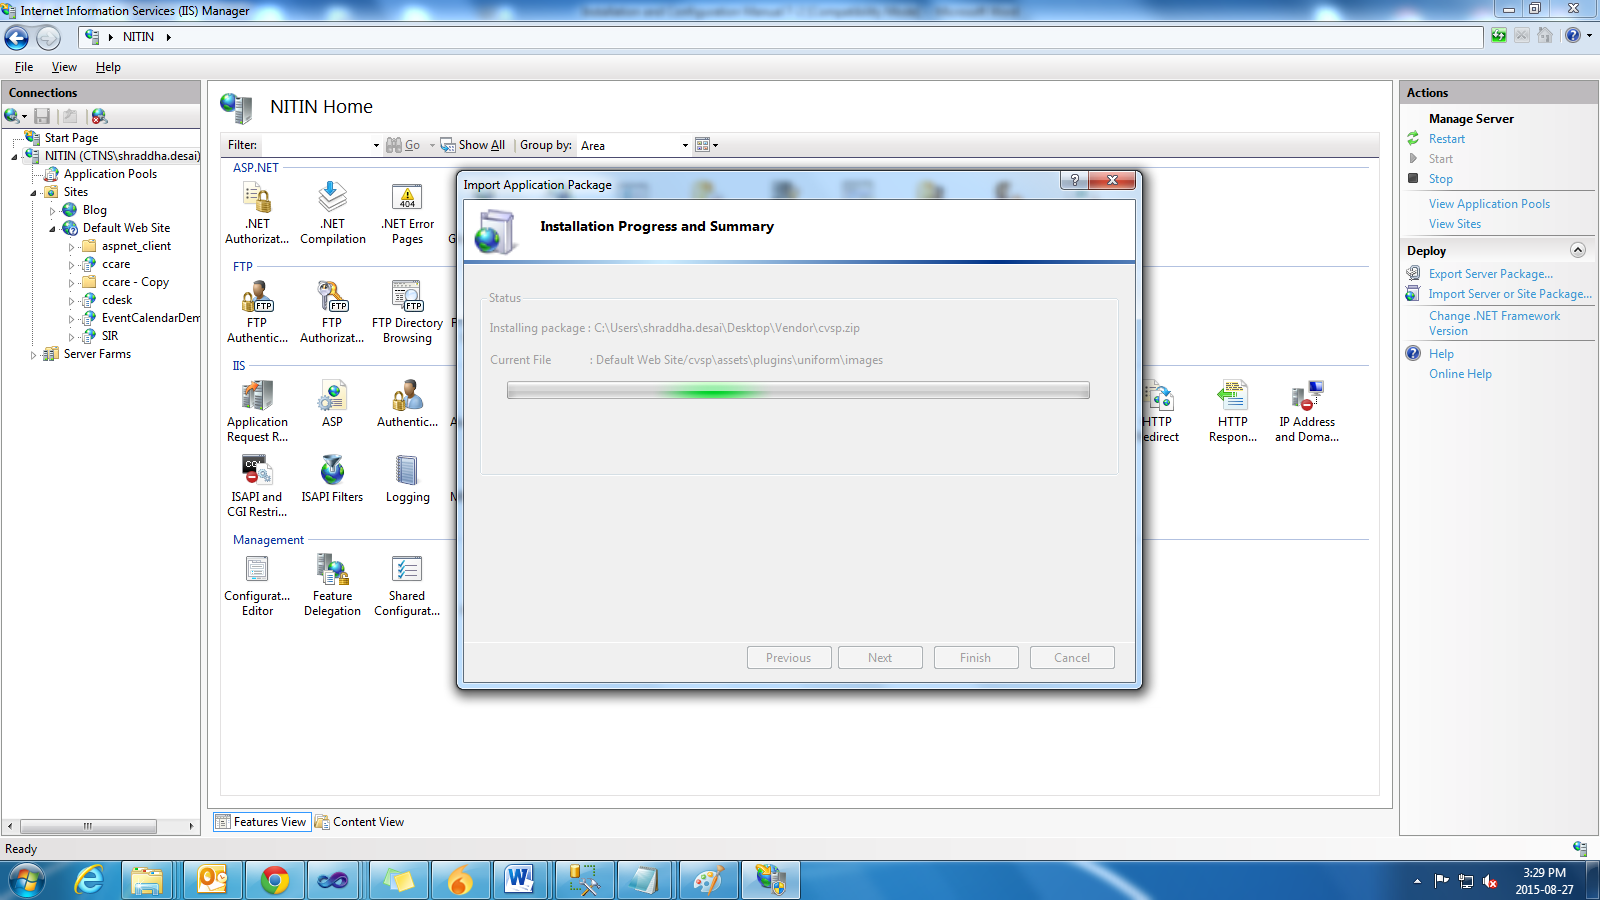
11.While
“Web Deploy” installs the package, the Installation Progress and Summary dialog
box is displayed. The dialog box shows a progress bar during the installation
process. When the process is complete, the dialog box shows a log of what was
done, as shown in the following illustration:
12.Right click C-VSP
site and browse
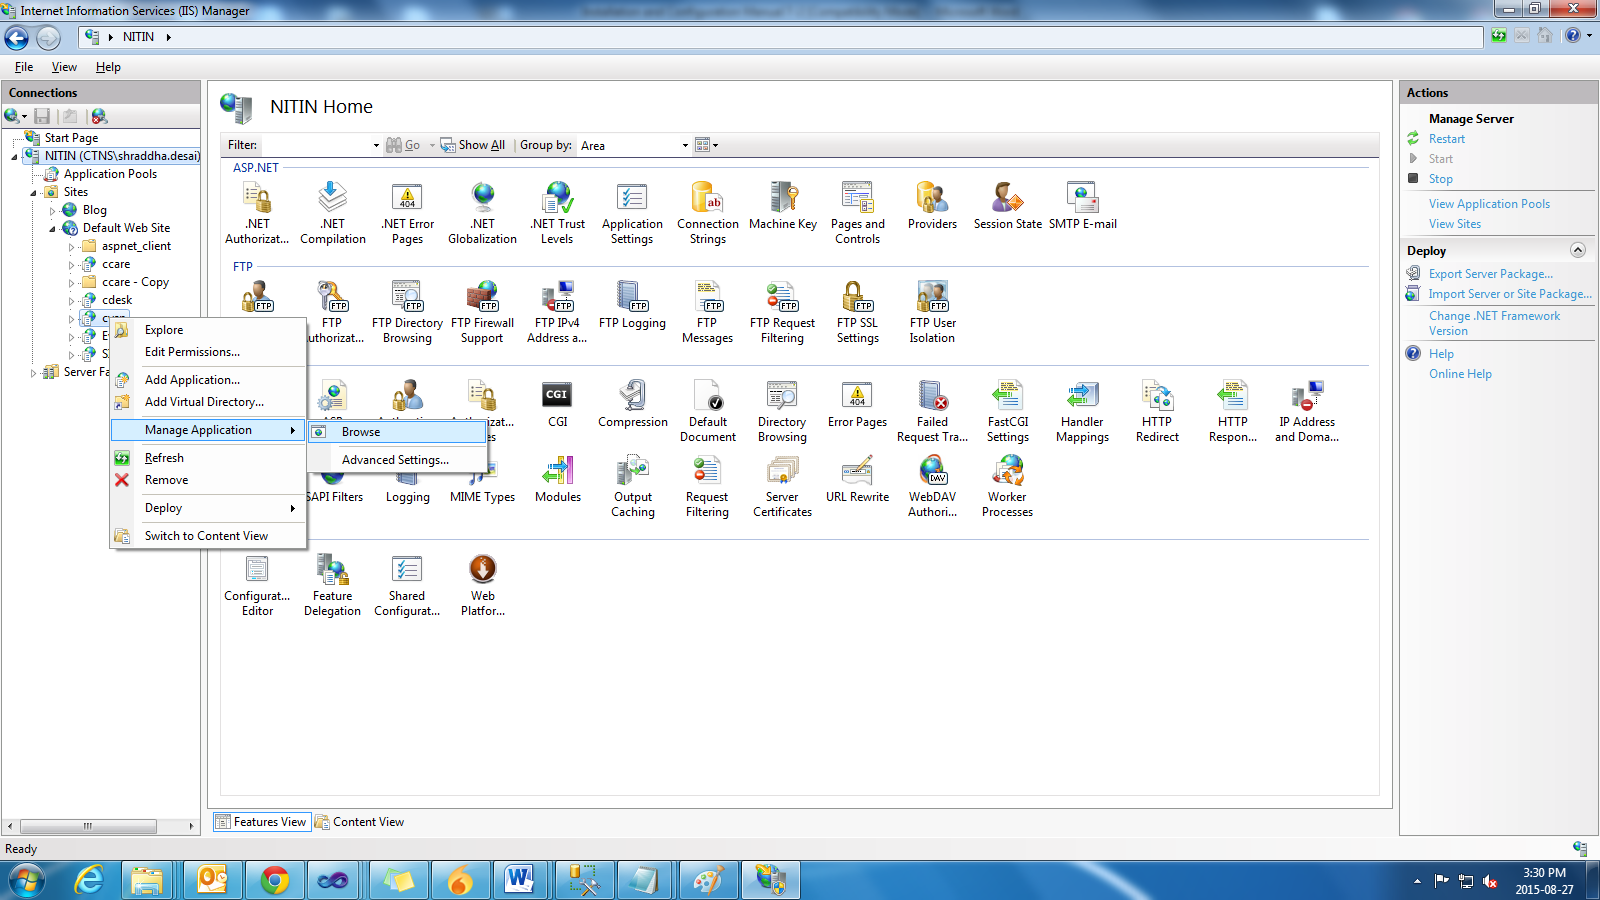
You should get the login page.
1.Go to your IIS manager and add
a site
2.Go to IIS and add website..
Or if you have web deploy installed you can directly import the application
/p>
Point the physical path to the cvsp
folder and define the Port. Or the host header value for your cvsp app
Similarly add new site for C-VSP
and point the physical path to cvsp folder. Use port 80 and provide the host
name so that we can access the host from outside. Remember to open port 80 on your firewall and point it to the server.
Also remember to add required DNS entries for the host name in your DNS setting
at hosting panel.
Edit Web.config
Modify the Client endpoints
Ensure the Application pools used by ccare
is running on .net framework 4.0